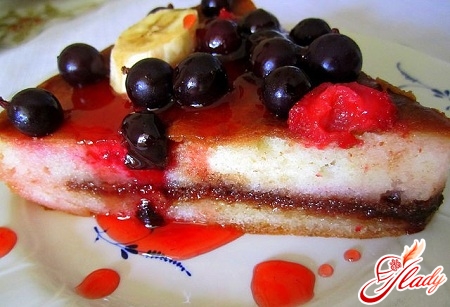
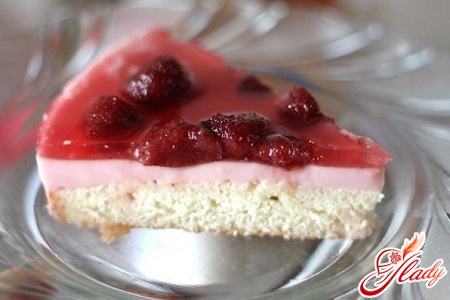
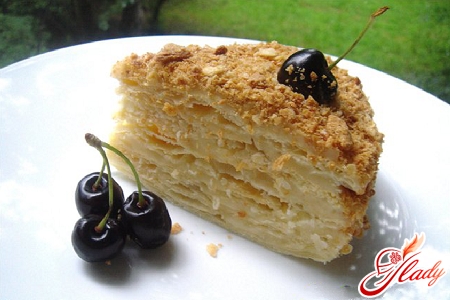
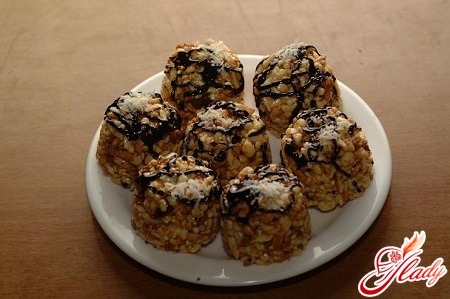
 One of the most delicious and famous dessertsis the Pancho cake - it's no secret. In this article, we want to offer you a recipe for this particular sponge cake with delicate sour cream. Its authentic recipe is kept secret, but many housewives and experienced confectioners know the technology of creating this dessert. We will not hide the fact that there are really many options for making it. The cake is prepared on the basis of a sponge cake, the cream is either whipped cream or sour cream with the addition of sugar, powder, flavorings. Perhaps even condensed milk. In addition, berries are necessarily included in the recipe: often these are cherries, but raspberries, strawberries, currants and so on can also be used. Alternatively, prepare Pancho with fruits: these can be fresh or canned peaches, pineapples, bananas. And of course, it is not forbidden to put nuts in this cake, roasted hazelnuts are best, but walnuts or almonds are also an excellent option. If you are a novice housewife, then having seen this dessert, having read its recipe carefully, it may seem to you that you will not cope with its preparation. The emphasis and the main task of this article is that this at first glance complex cake can be made without an oven, in a regular multicooker. Don't believe it? Welcome to us, you will learn.
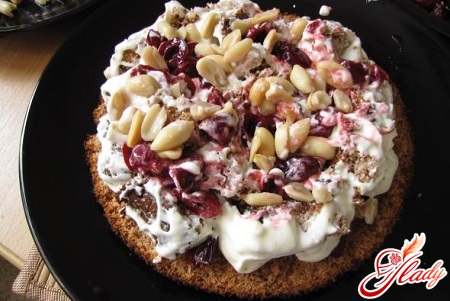
Cake "Pancho" with cherries and nuts
We present to your attention a classica recipe for a dessert called "Pancho". It is made quickly, is not too difficult to make, only the original assembly will require attention. Pieces of cut biscuits will be dipped in sour cream and laid out on the cake in the form of a slide, and the top will need to be covered with chocolate glaze. And if you are the happy owner of such a super-household appliance as a multicooker, this fact will greatly facilitate your cake preparation. Ingredients: For the biscuit:
- 3 tablespoons cocoa powder
- 6 eggs
- flour - 220 grams
- sugar - 250 grams
- baking powder - 5 grams
For the cream and filling:
- 150 milliliters of 33% cream
- 500 milliliters of sour cream 20% fat content
- 160 grams of sugar
- 300 grams of frozen cherry
- 120 grams of hazelnut
- 10 grams of powdered sugar
For the glaze:
- 70 grams of dark chocolate
- 30 grams of butter
Method of preparation: Возьмите все указанные ингредиенты. Первым шагом, входящим в рецепт торта, будет приготовление бисквита. Отметим, что этот этап является самым важным, потому что на нем создается основа для десерта. Бисквит будет печься в мультиварке, поэтому следуйте этапам приготовления, входящим в рецепт, для достижения лучшего результата. Важно, чтобы корж не осел при выпекании, был нежным и воздушным, ну и, конечно, максимально высоким. Для этого всего лишь в точности выполняйте данные указания. Итак, для начала в чистой и сухой посуде взбейте яйца. Они будут значительно увеличиваться в размерах, смесь станет пышной и побелеет. Взбивать нужно не менее 10 минут миксером. Затем понемногу добавляйте сахар, не выключая миксер. Сахар в процессе взбивания должен полностью растаять. Когда это произойдет, миксер можно выключить и отложить в сторону, все остальное нужно смешивать вручную. Отдельно или сразу в тесто просейте муку с разрыхлителем и какао. Осторожно и аккуратно добавляйте сухие компоненты, поднимая тесто снизу вверх и мешая по кругу. Если будут комочки из муки, их обязательно нужно все разминать, чтобы масса была однородной и дышащей. Кастрюлю мультиварки обмажьте сливочным маслом и выложите в нее шоколадное тесто. В меню выберите режим «Выпечка». По умолчанию время установлено 60 минут, это как раз столько, сколько нужно для того, чтобы ваш корж равномерно пропекся. Не забудьте открыть клапан для выхода пара, в противном же случае конденсат будет собираться внутри печки и капать на бисквит, чем может его намочить и помешать ему нормально приготовиться. Запомните, что крышку открывать во время выпечки категорически запрещается. По истечении указанного времени в мультиварке раздастся звуковой сигнал, говорящий о том, что пирог готов и его можно извлекать. Но даже если случится так, что вы не услышите сигнал, ничего страшного. По прошествии установленного времени мультиварка автоматически переходит в режим «Подогрев», где бисквит будет доходить на низких температурах. Готовому пирогу дайте возможность остыть, и уже прохладный порежьте на 3 части. Один получившийся таким образом бисквит будет служить основой будущего торта «Панчо». Другие 2 части порежьте кусочками, из них впоследствии будет выкладываться горка. Теперь нужно заняться начинкой и кремом. Если вишня свежая, достаточно просто вынуть из нее косточки, если замороженная — предварительно еще и довести до комнатной температуры. С вишни стечет немного сока, не выливайте его — потом им вы пропитаете бисквит. Ягоду обваляйте в сахарной пудре. Фундук можно немного побить скалкой, но будет лучше, если он останется целым. Ну и завершающий этап из раздела подготовки — сметанный крем. Его рецепт на удивление прост: сначала взбейте сливки до упругих пиков, а потом отдельно смешайте с сахаром сметану до загустения. В итоге соедините обе массы в крем. Настал завершающий момент приготовления торта «Панчо» — его сборка. Корж-основу положите на плоское блюдо. Его пропитайте соком от вишен, смажьте густым сметанным кремом, выложите в один слой часть ягод и орехов. Несколько ложек чистого соуса оставьте для оформления торта. В посуду с остальным кремом опустите кусочки бисквитов, чтобы все они утонули в нем. И теперь послойно, вперемешку с ягодами и орехами, выкладывайте пропитанные кусочки бисквитов на торт, выдерживая конусообразную форму. Верх десерта обмажьте кремом. Ну и еще небольшая деталь торта — шоколадная глазурь. Делается она за несколько минут: для этого расплавьте в микроволновой печи шоколад, смешайте его с теплым сливочным маслом. Глазурь готова; пока она еще не застыла, полейте ею бока вашего торта. Можно для этого использовать кондитерский мешок или обычный пакет с отрезанным кончиком. А можно нанести глазурь прямо с ложки — получится тоже красиво и своеобразно. После этого торту нужно минимум 3 часа побыть в холодильнике, чтобы хорошенько пропитаться. Кроме того, он должен окрепнуть и хорошо держать форму. Торт готов, в разрезе он прекрасен! Приятного чаепития!
Cake "Sancho-Pancho" with pineapple in a multivark
It is worth noting the remarkable fact thatwhen you cook the Sancho-Pancho cake in a multicooker, using this recipe, you can not worry about the result at all. The thing is that biscuits baked this way turn out much better than in the oven. They are airy, soft and fluffy. If you use the equipment correctly, do not look inside during the process, your cake will turn out high and beautiful. Take this recipe and bring to life a wonderful dessert called Sancho-Pancho. Ingredients: For the biscuit dough:
- sugar - 170 grams
- wheat flour - 200 grams
- egg - 5-6 pieces
- starch - 1/3 cup
- vanilla - 1/3 teaspoon
- citric acid - 1/3 teaspoonful
For the cream and filling:
- thickener cream - 2 sachets
- 750 milliliters of sour cream (15% fat content)
- 150 grams of sugar
- cognac - 20 milliliters
- black chocolate - 80 grams
- pineapples - 1 pot
- peaches - 1 pot
Method of preparation:A real classic sponge cake is made in two ways. In the first version, the eggs are whipped whole, while in the second, they are divided into whites and yolks. Then they are whipped separately, and only then combined into a mass. So, let's look at the second recipe, or rather, learn how to properly mix the ingredients of the sponge cake to achieve the best result when baking. As you have already noticed, the recipe does not include baking powder at all. Of course, you can put it. But if you do everything correctly, you can easily do without it. The thing is that the eggs themselves, if they are whipped correctly, do not require either soda or baking powder. Their very structure allows the cake to rise and increase in size several times. So, whip the cooled whites in a dry deep bowl with a pinch of citric acid until strong peaks form, then gradually add sugar in small doses (half the norm). It should completely melt in the whites. Grind the yolks separately with the rest of the sugar into a white mass. Finally, both of these parts need to be mixed. It is correct to lower the whipped egg whites one tablespoon at a time into the yolk mixture and stir in a circle. You need to do this until both mixtures combine. Then gradually add the sifted flour with starch and vanilla in the same way. Stir the dough with a spoon - it is ready. Since the cake will be baked in a multicooker, grease the bowl with butter, put the dough in it. Select the "Baking" item in the menu, set the timer for 60 minutes and press "Start". While the biscuit is baking, you will have time to prepare both the dressing for the dessert and the filling. Cream recipe: beat sour cream and granulated sugar in one bowl. When the mass becomes denser and the sugar is completely dissolved, add 2 packets of thickener. Open the jars of canned peaches and pineapples. Cut the fruit into pieces of the same size. You can make syrup to soak the sponge cake from the juice left in the jars. To do this, take 1 tablespoon of sugar per 100 milliliters of juice and cook until thickened over low heat. Add a little cognac at the end. By this time, the sponge cake in the multicooker will be ready, which it will notify you of with a sound signal. When the white sponge cake has cooled, cut off a layer of cake about 2 centimeters high with a knife - this will be the base of the cake. Cut or break the rest of the pie into pieces of any shape. Place the base on a plate, soak it with syrup, apply a layer of sour cream on top and place the fruit in one layer. Then dip each piece of sponge cake in the dressing and place it on the cake in a slide. Alternate the sponge cake and fruit. Maintain the cone-shaped shape of the Sancho-Pancho dessert. Decorate the surface with melted dark chocolate. Put the cake in the refrigerator for at least 3-4 hours so that it soaks and hardens. After that, you can confidently call your guests and proudly say: “The cake is ready, everyone to the table!”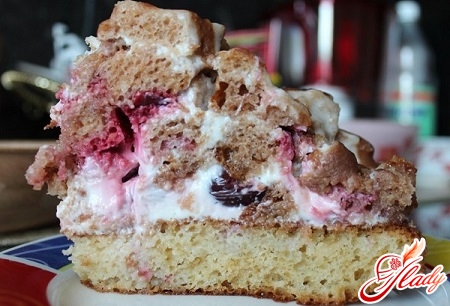
Cake "Pancho" banana
This dessert is different from its othersbiscuit "brothers" with a beautiful form: it is laid out not in two- or three-layer cakes, but in a beautiful hill. Cooking a cake using such equipment as a multicooker completely eliminates baking problems such as a burnt bottom or an underbaked middle. The multicooker uses heating technology from all sides - thus eliminating the above-described errors. Cooking cakes, pies and muffins in such a technique becomes an easy, simple and very exciting activity, because a wonderful result is always guaranteed. For the dough:
- flour - 320 grams
- sugar - 250 grams
- eggs - 6 pieces
- cocoa - 4 tablespoons
- lemon juice - 0.5 tablespoons
- soda - at the tip of the knife
For the multicooker pan:
- flour - 2 tablespoons
- vegetable oil - 1 tablespoon
For the cream:
- sour cream (20% fat content) - 600 milliliters
- sugar - 200 grams
- vanilla sugar - 1 sachet
For the filling:
- walnuts - 120 grams
- bananas - 3 pieces
For decoration:
- chocolate black - 60 grams
- milk - 4 tablespoons
Method of preparation:Carefully separate the egg yolks and whites. Beat the latter first alone, and then, when they get stronger, gradually add sugar. Remember that there should be no grains - complete dissolution is necessary. Then add yolks one at a time, continue beating. In order for the flour to fluff up and enrich it with oxygen, sift it through a fine sieve, or better yet, twice. Sift the cocoa powder with it. Add flour and cocoa to the dough, stir with a spoon. Quench the soda in half a spoon of lemon juice and add to the dough. Grease the bottom of the multicooker container with vegetable oil and sprinkle with flour. This is done so that the biscuit will come out of the mold easier later. Transfer the dough to the multicooker, smooth it out over the surface. Select the "Bake" mode in the menu, set the time - 65 minutes. When cooking is complete, check the biscuit for readiness with a wooden stick. If necessary, you can turn on the same mode again, but for 30 minutes. When the sponge cake is ready, using a steamer stand, take the cake out, cool it and divide it into pieces. For the base, you need a cake about 2 centimeters high. Cut the rest of the cake into random pieces. Grind the nuts with a blender, if you like larger pieces, crush them with a rolling pin. For the cream, combine sour cream and sugar, beat with a mixer, add vanillin. The cream mixing time is about 5-8 minutes. Place the cake base on a wide dish, top it with a layer of sour cream, then slice bananas and nuts. Then dip each piece of sponge cake into the cream and place it on the cake. Alternate with fruits and nuts. Do not forget that the cake should be conical in shape. At the end, completely cover the hill with cream. To make the glaze, melt the chocolate, add milk. Cover the cake with beautiful streaks and, of course, put it in the refrigerator. The dessert will stay there for at least 3 hours. Enjoy your tea! Each recipe for the Pancho dessert is a separate culinary fantasy, an independent story in which the hostess can embody her tastes. By preparing the cake in a multicooker, you will make your work much easier. Your sponge cake will be soft and fluffy, and in combination with sour cream, it acquires the texture of a delicate airy cloud with a creamy taste. Fruits, berries and nuts will favorably emphasize the taste and add contrast to this cake. Let us remind you that the sponge cake recipe when baking in a multicooker must be followed exactly, without changing anything in it, and then the result will not leave anyone indifferent. You can experiment without restrictions with fillings, creams, nuts. You can add jam or preserves, condensed milk to the cake. Using our recipe, create your own confectionery masterpieces with us!


