 What lengths won't we women go to in order tomake your face more perfect! We pluck our eyebrows, get tattoos, extend our eyelashes, remove the first signs of age with the help of magic beauty injections, try not to wrinkle our foreheads, and so on. That is why we try to master such a trifle as eyeliner to perfection. And for good reason, because by drawing the contour you can enlarge your eyes, make them look slightly “cat-like” or wide-open in surprise. In general, correct what we don’t like and highlight the advantages we have. That is why makeup artists pay great attention to our “mirror of the soul”, inventing more and more new makeup techniques. Did you know that eyeliner, which appeared in Ancient Egypt and was actively drawn by both women and men, originally served not at all to make the eyes more expressive? They were drawn for religious purposes, to add resemblance to sacred animals revered by the Egyptians - members of the cat family. Paint for arrows was made from lead ore and by mixing henna, mud and clay. Egyptians lined their eyes with special sticks. As you can see, people have always strived for beauty. In general, little has changed since then, except that makeup products have improved and application technologies have become more complex. It should be said that eyes lined with black paint were especially popular thanks to Hollywood movie stars of the 60s and 70s. Such famous beauties as Marilyn Monroe, Twiggy and Audrey Hepben had arrows as a distinctive feature of their image. They gave the beautiful eyes of famous actresses greater expressiveness and enchanting mystery, and also served as a little trick, hiding wrinkles. Nowadays it is impossible to imagine any famous retro-style beauty without such makeup features.
Means for drawing arrows
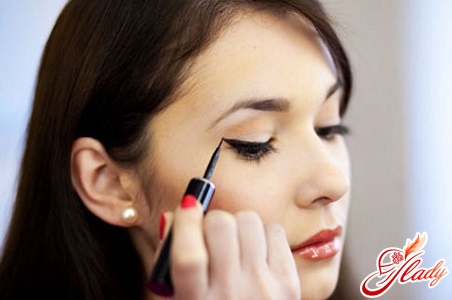
So, we hope you have come to the conclusion that you wantmake your eyes brighter and more expressive with the help of eyeliner. To do this, you go to a store with a huge assortment of cosmetics and stand there at a loss, looking from one product to another, not knowing what to give preference to. A classic situation that many beginners in mastering previously unfamiliar makeup techniques are probably familiar with, and not only on the eyes. Let's try to solve the problem and figure out what types of eyeliner exist today and what is best for a person without experience to start practicing with in order to quickly learn all the subtleties. Classic means for drawing arrows are pencils. It should be noted that they can be both matte and pearlescent, have different colors and differ in hardness. The right choice depends on what effect you want to achieve as a result. For example, a harder pencil is most convenient for drawing thin, clear arrows, which will also last longer on the eyes. But it can be difficult for beginners to handle it. Therefore, for starters, it is worth buying a soft pencil. Thanks to its creamy texture, you can draw a rich line and paint the inner side of the eyelid. As for the color, black was and remains a classic, although now some types of makeup are done using other shades. It depends on many nuances, for example, the color of the eyes, their shape, and so on. In the store, you will definitely come across liquid eyeliner. It is much more durable than a pencil, and has a more intense and bright color. But this product also has its drawbacks. They are associated with the ability of the eyeliner to dry quickly, so an incorrectly drawn line on the eyes is always difficult to correct. If you still decide to buy it, then pay attention to the brush. In one case, it can be soft and thin, and in another it will resemble the tip of a felt-tip pen. The opinions of women who tried to work on their image with each of the described types of eyeliner were divided. Someone says that a hard applicator is easier to use, and someone liked the brush more. But all women agreed on one thing: it is better to draw arrows with any type of the described means after you have mastered the basics of the technique with a pencil, that is, learn to draw the correct lines of the required thickness. There is also a creamy eyeliner. It is convenient for those cases when you are doing makeup, for example, for a friend or sister, since, according to many girls, it is very difficult to skillfully apply it yourself. Eyeshadow is also used as a means for drawing arrows on the eyes. In this case, it is better to draw the line using a flat applicator brush with a beveled edge. It is pre-moistened with water so that the shadows lie evenly and thinly on the eyelid.
Small secrets for beginners
Secret one:When drawing eyeliner, do not look at your reflection in the mirror from the side. It would seem that it is more convenient, and the line may turn out smoother. But in practice, everything looks different: most often, when looking straight ahead, you will be disappointed with the final result, although from the side the line seemed almost perfect. Therefore, it is best to learn how to draw eyeliner by looking directly at your reflection. This is the most correct angle, since your potential interlocutor will also see your face from it. Secret number two: start the eyeliner from the lash line. This is exactly what you need to do if the eyeliner technology is still new to you. This method will significantly simplify the task at first. Later, when you practice and “get the hang of it”, you will be able to draw a beautifully curved curve from the corner of the eye. In the meantime, try a simpler way to draw eyeliner and see that connecting two lines is easier than drawing the entire line in one movement and at once. Secret three: try to draw the tail of the arrow as a continuation of the mucous membrane of the eye, and not along the lash line. Yes, makeup artists do the opposite, but that's what they are professionals for - to do everything clearly and correctly. But at first, it may turn out that the arrow implausibly changes the shape of the eye, since it will create the illusion of either an overly raised corner, or, conversely, a sadly lowered one. Therefore, stick to the edge of the eyelid, and then the line will be correct. Secret four: choose shadows in the tone of the future arrow and shade them between the eyelashes. Only after such a preliminary procedure can you begin to draw the contour on the eyes. This method will help you avoid the appearance of gaps along the edge of the eyelid. After all, it often happens that the arrows seem to be even and beautiful, but the gaps between them and the eyelashes make them unfinished, and you begin to correct the situation, often worsening the result achieved with difficulty. Secret five: before drawing arrows, choose their correct thickness, taking into account the shape of your eyes. After all, the contour should highlight the advantages and hide the disadvantages. This is especially true for those with deep-set eyes with overhanging eyelids. In this case, it is important to remember that the line should be thin - its wide version will make your look sleepy and heavy.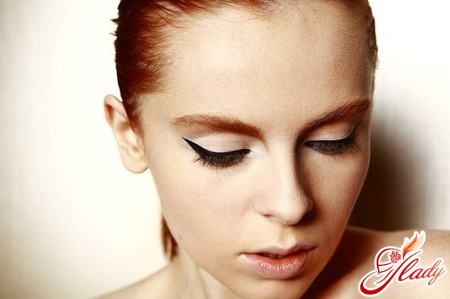
How to draw arrows with a pencil?
What do makeup professionals do beforedraw arrows on the eyes? That's right, they do a preliminary face preparation: tone, powder, draw eyebrows. Then apply shadows to the eyelids. As for their color, its choice is determined by the type of makeup. For daytime, it is better to use muted pastel shades, evening requires brighter tones, and for festive makeup, even mother-of-pearl shine is often appropriate. In any case, you will have to use shadows: it is on top of them that we draw arrows, since this is how the pencil is applied easier and lasts longer. By the way, in this version it is easier to correct mistakes by removing excess. Therefore, prepare cotton swabs and water in advance, because your hand with a pencil may suddenly jerk from tension, and the arrows will turn out crooked. And you can prevent this if you first take care of a comfortable place for applying makeup. It should be well lit from the side you need. It is good if you have a magnifying mirror, because you can comfortably sit in front of it at the table. Do not hold the hand that you will use to draw arrows on your eyes in the air — it needs a comfortable support. After all, working with makeup requires time, attention, and effort, and the slightest wrong move will instantly ruin everything. That is why a hand support is simply necessary. In order to quickly learn the art of drawing arrows on your eyes, the first few times you can make preliminary markings in the form of barely noticeable lines on the eyelids along the lash line. It is also better to immediately put dots where you think the end of each arrow should be. This will help give them symmetry. After marking, carefully connect the resulting dots into one line and evaluate the result. You can do it differently. Visually determine the middle of the eyelid and draw a line from it to the inner corner of the eye, and then another one to the outer one. Having mastered any of the described methods, try a more complex option: draw an arrow at once in one movement, in the direction from the nose to the temple. Try to make its tail slightly protrude beyond the contour of the eye, as if lifting it. If you notice that the arrows have turned out with small irregularities, try to carefully remove them with a damp cotton swab. Perhaps the lines will seem too thin to you. This can be corrected quite easily: just go over the existing contour on the eyes with a pencil once or twice.
Select the arrows under the shape and size of the eyes
If you are naturally widely arranged in your eyes,рисовать стрелки лучше с внутреннего уголка, тщательно его выделяя. При этом их стоит сразу делать толстыми и выразительными. Конец линии должен находиться над внешним углом, быть приподнятым кверху, но не выступать слишком далеко. Не расстраивайтесь, если ваши глаза располагаются слишком близко к переносице. Такую особенность легко исправить, визуально «раздвинув» их при помощи правильно прорисованных стрелок. Линии на глазах нужно проводить не от внутреннего их уголка, а с середины века. При этом сначала они должны быть тонкими, а затем постепенно утолщаться и плавно подниматься к виску. Обладательницам маленьких глаз нужно знать, что четко очерченный контур визуально сделает их еще меньше. Также не стоит рисовать толстые стрелки, которые будут диссонировать с общим видом лица. В этом случае лучше отдать предпочтение тонким линиям, начинающимся от середины века и постепенно поднимающимся вверх. Обязательно рисуем стрелки таким образом, чтобы их конец выходил за естественный контур глаз, тем самым расширяя их. Девушкам, которых природа щедро одарила большими выразительными глазами округлой формы, стрелки на глазах лучше делать вдоль всего контура века, то есть от одного уголка к другому. Линии не должны быть тонкими, а их края нужно выводить к виску. Этим вы визуально «вытянете» глаза. Возможно, со временем вы научитесь придавать им миндалевидную форму, как у восточных красавиц. Что касается узких глаз, то сделать их более округлыми получится при помощи прорисованных по всей длине стрелок средней толщины, сделав дополнительные штрихи посредине, намерено уплотнив линии именно в этих местах. Чтобы добиться взгляда «с поволокой» или, как говорят, дымчатого, стрелки рисуют так: нужно подвести контур нижнего века, но сделать это аккуратно и только по внутреннему краю. Важно помнить, что этот способ будет эффектной находкой лишь для обладательниц больших и симметричных глаз. В противном случае дополнительные стрелки только подчеркнут имеющиеся у вас недостатки или особенности. Для большей выразительности можно попробовать и такой вариант: рисуем стрелки на верхнем и нижнем веке, но не соединяем их в уголках, а оставляем параллельными друг другу. Получившийся разрыв следует подчеркнуть более светлыми тенями или карандашом. Так вы сможете достичь эффекта «распахнутых» глаз. Необходимо учитывать некоторые особенности нанесения стрелок. Помните, что очень маленькие глаза нельзя обводить черной подводкой. В этом случае выручит карандаш золотистого или серебристого оттенка, с помощью которого они визуально делаются больше. По словам стилистов, популярный сейчас ретро-образ можно создать при помощи тонких стрелок в сочетании с помадой сочных цветов, например, алого или спелой вишни. А вот широким линиям подводки на глазах должны соответствовать пастельные оттенки губ. Чтобы придать своему взгляду выразительность, обязательно научитесь рисовать стрелки. Ведь сегодня они снова на пике популярности. На показе осенне-зимней моды модели многих современных дизайнеров дефилировали в макияже со стрелками. И поэтому, если хотите быть в тренде, скорее осваивайте технику, которая призвана сделать глаза любой женщины или девушки особенно загадочными и притягательными. Следует отметить, что этой весной модными будут широкие черные и экстравагантные белые стрелки. Хотите всегда выглядеть модной? Тогда уже сегодня пора научиться рисовать такие стрелки, как у Donna Karan или как у моделей на показе Roberto Cavalli. Дерзайте, и у вас обязательно все получится. Советуем почитать:


