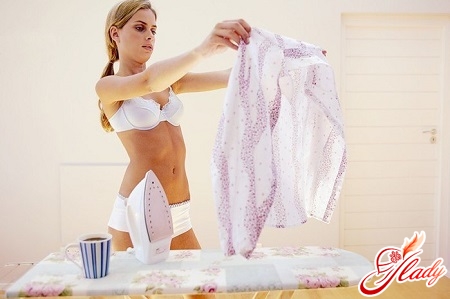
 No one is born with any onemastery - everything in this life needs to be learned. And housekeeping is no exception. Few of the newly-minted housewives are able to just like that, on the fly, take and cook borscht or perfectly iron a man's shirt. By the way, men themselves often do not know how to iron a shirt. Because some of them have never picked up an iron in their entire lives. And for most bachelors, a shirt that has hung on a chair all night is automatically considered ironed. However, such a primitive method is not for women! And in general, we are not looking for easy ways! Any experienced housewife can say with confidence: "I iron shirts properly, according to all the rules!" But how to iron a shirt correctly? By the way, it is not so easy - to iron a shirt without wrinkling the previously ironed parts in the process. However, as we have already said, everything in this life can be learned. This is what we will try to do - learn how to iron a shirt correctly.
Preparation for the process
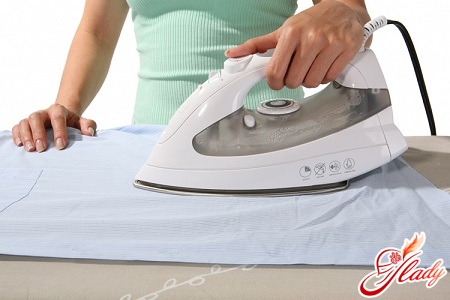
Any process (especially such a responsible one!) requires preparation. Therefore, first of all, try to dry shirts by hanging them on hangers, in a vertical position. This will make the entire subsequent ironing process much easier for you. In addition, do not overdry the item - in this case, ironing it will be much more difficult. Refuse automatic drying of shirts in the washing machine if you do not want pleasant and easy ironing to turn into torture. Iron - Of course, you can iron a shirt even with a prehistoric ruble, because our predecessors knew how to use it. But we have modern, light and reliable assistants - irons. Oh, how they make our life easier! Once - and done! And all the folds are straightened out, and the fabric acquires its original smoothness. But you need to choose the iron wisely! It is important that this modern assistant has a non-stick coating, a steam generator and several temperature settings. What do you expect? After all, we will have to iron weightless silk, ascetic cotton and capricious stubborn linen. Ironing surface. You can cover the table with an ordinary towel or sheet. You can iron a shirt on a chair or an armchair. But if you have an ironing board, then you are a super-class hostess! Everything will go without a hitch for you, because ironing on a special device is much more convenient, faster and more pleasant. But even using an ordinary (without special bells and whistles) electric iron and a spray bottle with boiled water and laying the shirt on the table, you will definitely be able to return it to an impeccable appearance if you follow the basic rules.
Process
The main rule is to iron shirts ina certain sequence. That is, ironing different parts of the shirt in turn. And it is very important not to break this sequence! You need to start with small details, and then move on to larger ones. However, let's talk about everything in order.
- Collar
It is necessary to start with the collar.This is one of the smallest details that will not wrinkle during subsequent ironing. But if you leave it for later, then everything that was ironed earlier will definitely wrinkle. Therefore, we lay the shirt on the table and begin to carefully and gently iron the collar from the inside. And if we iron the collar from the inside as it is convenient for us, then from the front side it needs to be ironed from the corners to the center. But on the fold, this part of the shirt should not be ironed at all - the collar will bend as it is convenient for it, and, accordingly, for you.
- Cuffs
After the collar, you need to iron the cuffs.- the second small detail of the shirt. Here we act according to the same algorithm: first the wrong side, then the front side. Try to avoid creases on the cuffs! This part of the sleeves is always visible, which means it should look perfect. By the way, the cuffs do not wrinkle during the use of the shirt! And if you iron them carelessly, then everyone will understand that the wrinkles on the cuffs are the result of improper ironing.
- Sleeves
Naturally, the cuffs are followed byIron the sleeves - larger parts of the shirt. If you use an ironing board, do not neglect the special shelf designed specifically for sleeves. Start ironing the sleeve from the center, smoothly moving the iron to the edges. Smooth the seams especially carefully, but do not make creases! Creases on the sleeves, by the way, are considered bad form.
- Back
Yes, yes, after the sleeves, iron the back.shirts. And not because the back is smaller than the fronts. Just imagine that in an unbuttoned shirt laid out on the table, the back and fronts are considered one piece. That's why we start ironing it from the middle (like the sleeves). This stage can rightfully be called the easiest! Iron the back from one side seam to the other. The only difficulty is the yoke seam and the tuck underneath it. If the shirt you're ironing is of this style, first iron the yoke. Then iron the fabric at the tuck. Just don't iron it into a crease! And then iron the rest of the back.
- Shelves
The final stage of work - shelvesshirts. Here everything is much more complicated: pockets, buttons, loops, plackets and the same yoke. We start ironing small details - pockets, yoke and plackets with buttons and loops. We iron them especially carefully. And then there is a fairly problem-free part of the shelves, which is very easy to deal with. By the way, many housewives try to iron the placket with buttons with special zeal. This, of course, is correct. But the main thing here is to stretch the fabric between the buttons so that this placket is not shorter than the placket with loops. But the placket with loops will be visible in a buttoned shirt. And it is this placket that should look impeccable - you need to iron it carefully, trying not to make creases and ironed wrinkles. That's all, actually! Take the shirt by the shoulders and lift it, shaking it slightly. Isn't it a joy to look at? Now the ironed shirt can be hung on a hanger and put away in the closet. The job is done!
Helpful Tips
If everything is clear with the process of ironing a shirt and preparing for it, then the question of some of the nuances of this process remains open.
These are the simple rules and secrets, knowledgewhich will help you easily cope with a difficult, at first glance, job. Do not worry if everything does not go smoothly the first time. Over time, this process will not make you nervous, and even on the contrary - it will allow you to calm down and relax. After all, you already know how to iron a shirt. So put your knowledge into practice. Good luck!


