 Nowadays, in any grocery storeand supermarkets you can see a huge range of yoghurts with various fruit and natural additives. Their production involves the use of skim and full-fat milk. The product is intended for consumption by the whole family, as well as by children separately. Many buyers of yoghurts have probably never thought about what they actually consist of, and if they paid attention to this issue, then, most likely, the desire to buy this product would disappear. What is actually in bright and very attractive jars and bottles, besides milk? Dyes, artificial flavors, stabilizers, preservatives, thickeners, various vegetable fats and so on. Agree, a diverse bouquet, isn't it? It is worth noting that many manufacturers indicate a shelf life of up to 6 months, and if you delve into the process of making yoghurt, it becomes clear that not only lactic acid bacteria will not survive at temperatures above 150-160 degrees. But it is under such conditions that most products are produced. However, there are ready-made yogurts with a short shelf life, namely up to 30 days, which contain only milk, beneficial bacteria and sugar, which has a very beneficial effect on the body. They can be used as a starter for making yogurt at home. This product is truly alive and natural. And not only you, but also your kids will like it. In fact, giving your loved ones the opportunity to eat well is very simple. You just need to know how to make yogurt at home. It is stored for no more than five days and therefore is really useful for both adults and children.
Homemade yogurt recipe from rustic milk
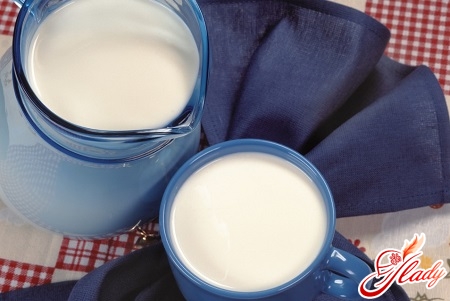
Village whole milk is one of themnecessary components, ensuring the preparation of a real home-made fermented milk product with the preservation of all the useful substances. If you are lucky enough to have access to it, then this can be called luck. But in order for such milk to be sterile and not to contain unnecessary bacteria, it must be pasteurized. This can be done both on an electric and a gas stove. So, here is a recipe for yogurt from natural village raw materials. Ingredients:
- Milk home - 1 liter
- live yogurt - 3 tablespoons
Method of preparation:First, pasteurization must be done. Pour the milk into a glass container and then place it in a water bath. Stirring, bring to a boil and keep it on the fire for 1-1.5 minutes. Thanks to pasteurization, almost 99% of bacteria will be destroyed. After the milk boils, remove it from the heat, but continue stirring for 5 minutes, and then leave it until it cools completely. After the main product has been prepared, it is necessary to sterilise the container that is intended for making yogurt. To do this, lower a ceramic or glass container into boiling water and leave it in it for 10-15 minutes. Immediately after sterilization, pour cooled pasteurised milk into this container, add live yogurt to it, cover with a lid and leave in a warm place for at least 6 hours. In no case should the container be moved or stirred. There are special yogurt makers on sale today, which will help you maintain the heat required for the product (namely, a temperature of 40° C), at which the fermentation process will take place. What should you do if you cannot buy special household appliances of this kind? Here are several options for making yogurt at home without it. Place the jar with the starter in a so-called thermos bag, and put a couple of plastic bottles with boiling water there, which will provide the necessary heat. Alternatively, you can place several containers with the starter on an electric heating pad, preheated to a medium temperature. Alternatively, preheat the oven to 40° C and turn it off. Place the container with the future yogurt in it. Then, by turning it on and off, maintain the required temperature in the oven, thanks to which the dishes with the mixture of milk and starter will be in constant heat. To make sure that the yogurt is ready, just look at the whey that appears. If it is, your homemade natural and live fermented milk product is a success. The resulting yogurt can be stored in the refrigerator for a week and used as the next starter. Be sure to try this method of preparation, and this recipe will certainly become your favorite. Of course, an electric heating pad and an oven are not always convenient for these purposes. But every home probably has dishes that will significantly simplify the process. Yogurt can be prepared in a regular thermos!
Homemade yoghurt in thermos
As is known, a child's body is much moresusceptible to all kinds of artificial fillers, dyes and additives. Serious allergic reactions to seemingly harmless ready-made fermented milk products are common. And then mothers begin to come up with ways out of the situation. Often we go to the store and buy a yogurt maker, believing that only it will allow the family to eat quality products. But before spending money on special equipment, try to master the recipe for making yogurt in a regular thermos. Ingredients:
- milk pasteurized - 1 liter
- dry leaven - 1 bottle (or live yogurt - 3 tablespoons)
Method of preparation:They say that store-bought pasteurized milk does not need to be boiled. But if you are not lazy and do it anyway, your yogurt will have an unusual and very pleasant taste. Therefore, pour the milk into a saucepan, bring to a boil and simmer for about 5 minutes on low heat. This way, this store-bought product will acquire the shade of homemade baked milk, like in grandma’s oven. Cool the milk to 40° C, be sure to remove the foam so that the yogurt prepared in a thermos has a uniform consistency. Dilute the dry starter directly in the bottle, adding a tablespoon of milk prepared as described above. This will allow it to dissolve well. Pour the resulting mixture into the container with the rest of the milk. If you still prefer to use live yogurt from the store (naturally, with a minimum shelf life), and not its dry analogue, then put the contents of the box or cup into the container with the main ingredient and mix thoroughly with a whisk. Now you need to take care of the thermos, or rather, its sterility. The easiest way is to wash it thoroughly and pour boiling water over it, preferably twice. Now pour the mixture of starter and milk into it, screw the lid tightly and leave it to prepare the yogurt for about 6 hours. Choose a place in advance so as not to disturb the processes occurring in the thermos by moving it. The cooking recipe prohibits doing this due to the creation of obstacles to achieving the desired consistency. As a rule, ready-made yogurt has a neutral taste, and a spoon stands up in it. Pour your natural live fermented milk product into another container and put it in the refrigerator for a couple of hours. This will improve the taste of homemade yogurt. If you want it to have a more pronounced sourness, then the time it stays in the thermos should be increased by another 2-3 hours. In any case, the yogurt will be tasty and will be much healthier than the one bought in the store. As you can see, the recipe is very simple and accessible to all housewives.
Classic yoghurt in a multivariate
Nowadays, technological progresshas simply settled in any modern kitchen. Everyday chores of housewives are made easier by various special household appliances and devices. One of the latest is such a miracle of technology as a multicooker. Agree, the name itself sounds very promising. And it really is. Here is yogurt - a healthy and necessary product - prepared in it easily and without any problems. And the recipe, as always, is simple and understandable to everyone. Ingredients:
- Milk ultra-pasteurized - 1 liter
- natural yogurt (without fillers) - 150 milliliters
Method of preparation: Warm the milk slightly.As mentioned above, you don’t need to boil it, since the store-bought product has undergone the appropriate processing. Add yogurt to it and mix it with a blender or whisk. The mass needs to acquire a uniform consistency. The recipe for making a fermented milk product in a multicooker involves the use of small glass containers - jars. They must first be sterilized or at least doused with boiling water. When the jars are ready, pour the mixture of milk and starter into them. Pour some water into the multicooker pan and set the device to the most gentle temperature mode. In some cases, it is designed to keep the prepared dish hot, and in the latest models it has a corresponding name - “Yogurt”. Place the jars with your future homemade fermented milk product in the multicooker. The water should reach almost to the neck. Close the device with a lid and leave for 8-9 hours. When the specified time has elapsed, take out the homemade yogurt and place it in the refrigerator. The cooking process and the result do not always live up to expectations. For example, sometimes yogurt can turn out runny. In this case, pay attention to the fat content of the milk you use. It should be at least 2.5%. But whey formation on the surface of yogurt is not uncommon. Just drain it, it will not affect the quality of the product. Do not be upset if the yogurt has curdled. Perhaps it is all about the quality of the milk and starter or the jars that were poorly sterilized. Remember the recipe for homemade pancakes and cook them with the failed yogurt. Or you can just keep it in the multicooker for a little while longer so that it curdles well, then throw it on cheesecloth and please your loved ones with the most delicate homemade cottage cheese.
Classic homemade yogurt in yogurttse
Of course, it is very convenient to make a treat ina specially designed household appliance - a yogurt maker. The recipe is not much different from the one used to prepare this fermented milk product in a thermos. But the result will almost never disappoint you. The thing is that a modern device itself maintains the desired temperature for a specified time, and always clearly and correctly. But in a thermos it gradually decreases, so the yogurt may not turn out the way you expect. If you choose a recipe for making a homemade fermented milk product and have all the latest household appliances in your kitchen, then do it in a yogurt maker. Ingredients:
- Milk with a fat content of 3.5% - 1 liter
- dry yeast for yogurt - 1 flacon
Method of preparation:First, make sure the dishes you use are sterile. The yogurt maker has special small cups. They can be made of glass or heat-resistant plastic. It is better to boil them or at least pour boiling water over them. This way, you will not allow unnecessary bacteria to get into the future yogurt, thereby ensuring its most useful and high-quality composition. In addition, this recipe requires mandatory preliminary preparation of the main ingredient. Therefore, take a saucepan of the appropriate volume, pour milk into it, bring to a boil and hold on low heat for about 15 minutes. After the specified time, remove the container from the stove and cool its contents to room temperature or slightly higher. It is very easy to check this. If it seems to you that the base has cooled down enough, dip your finger into it. If you do not burn yourself and do not feel the desire to immediately take it out, then you can move on to the next step. Open the bottle with the starter, pour boiled water at room temperature into it, filling it about 2/3 full, close the lid and shake well to dissolve everything. Now pour the resulting mixture into the container with the main ingredient and mix everything again. Pour the mixture of milk and starter into glasses and put them on a special stand provided in each yogurt maker. Plug the device into the network and select the desired program. Modern models themselves electronically select the time required to prepare yogurt. And for older devices, you need to time it. In principle, as for a fermented milk product prepared in a thermos, this requires at least 6 hours. But if you want to get yogurt of a thicker consistency, then increase the time it stays in the yogurt maker. Keep in mind that in this case it will be more sour.
Homemade yoghurt with cinnamon and cocoa
This recipe will appeal to lovers of everythingunusual. It is better to prepare a dairy product with a filler in a yogurt maker. This will provide you with the best result. The algorithm of the necessary actions is not much different from that which provides for obtaining a classic fermented milk product, but the ingredients are somewhat different. Therefore, we provide the recipe in full. Ingredients:
- milk - 1 liter
- live yogurt - 150 grams
- cocoa soluble - 5 teaspoons
- cinnamon - to taste
- sugar - to taste
Method of preparation:If you prefer to use village milk, be sure to boil it and cool it to room temperature. Ultra-pasteurized milk does not need such preparation, unless you want to give it a baked taste. However, you will still have to heat it up to 37-40° C. Do not forget to sterilize the cups, the quality of the future homemade product depends on it. Put the so-called live yogurt bought in the store in a separate container. Remember that you should choose the one with the shortest shelf life. Add the specified amount of cocoa to it and mix everything thoroughly so that the consistency becomes uniform. Now, focusing on your own taste, add sugar and a little cinnamon. Mix everything thoroughly again and combine with milk. Bring the mixture to a uniform state, pour into cups and place in a yogurt maker for 8 or 10 hours.
Homemade yogurt with fruit or berries
This recipe is usually a hit with kids.Indeed, the delicate taste of yogurt, supplemented with fruits, cannot but please. Moreover, unlike the store analogue, the homemade product is very useful, because in addition to the necessary bacteria, it also contains natural pieces of strawberries, raspberries, peaches or mango. Isn't it a great dessert for children? Ingredients:
- Milk ultra-sterilized - 1 liter
- live yogurt - 150 grams
- fruit or berries - to taste
- powdered sugar - to taste
Heat the milk to 40° C.Add live yogurt, pour the mixture into cups (don't forget to rinse them with boiling water) and place in a yogurt maker. By the way, this recipe also allows for cooking in a thermos. After 6-8 hours, make sure that the yogurt has reached the required thick consistency. If so, proceed to the next step. Peel and seed the fruit. Peel the berries, too, if necessary. Put them in a blender and grind, adding powdered sugar. Now put the finished yogurt there and mix everything. Divide the fruit mixture into cups or bowls and place in the refrigerator. Before serving, you can garnish with a handful of fresh berries or a few fruit slices. As you can see, making homemade yogurt is very simple. Every housewife can do it, and even having some special equipment is not necessary. But the resulting popular fermented milk product will really benefit your whole family. Be sure to take advantage of the opportunity and master any recipe you like. Your loved ones will be grateful to you for this, and your children will probably get sick less often. We recommend reading:


