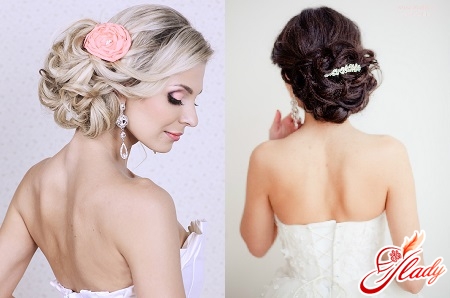
 A wedding is the day that every girlimagines herself, being still very little. She imagines herself as a beautiful princess, the most charming and happy. And he (the future prince) carries her in his arms and talks about eternal love. Years pass, that very prince is found, proposes his hand and heart, and the long-awaited moment of happiness comes. Naturally, childhood dreams do not go anywhere, because now they can come true. And we try our best, choose the best dress and cosmetics, buy the most expensive shoes, gloves and other little things that should turn Cinderella into a princess. So much needs to be done, so much to do .... Find a restaurant, think over the menu, write out contests, send out invitations. And you need to work on yourself: make an appointment with a manicurist, discuss the details of the hairstyle with a hairdresser. And you also need to find it - that hairstyle that will be ideal and will suit the most beautiful princess. By the way, many girls do not want to use the services of a stylist and try to do the styling themselves. DIY wedding hairstyle - it is not so impossible. And it has its advantages. Firstly, you will save time and money, and secondly, you will be able to fully demonstrate your creative abilities. The only thing that a girl who has decided to experiment on her own needs to remember is to start creating in advance. After all, you do not yet know how this or that hairstyle will look, whether it will suit your image. Perhaps you will have to try several options until you find one that suits you completely. And you do not need to pore over your hair yourself. Call a friend for help or involve your sister in creativity. This way, you will make your task easier and get an outside opinion, which is also very important. In this article, we have selected the most interesting wedding hairstyles, in different styles, of varying degrees of complexity. Below you will find detailed step-by-step instructions that will help you choose your image and look simply dazzling at your own wedding.
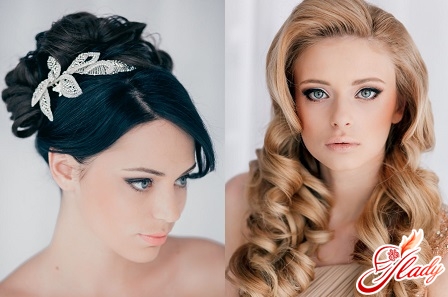
Wedding hairstyles for long hair
Queen of the Ball This hairstyle looks solemn and aristocratic. It will transform you beyond recognition and take you to the era of royal receptions. So, let's get started.
- Comb your hair thoroughly along its entire length;
- Separate part of the hair in the parietal zone, divide this part into equal strands, which we wind on the tongs;
- The remaining hair is divided into three parts, each collected in a tight tail. Tails should be placed vertically, strictly under each other;
- Now you need three hairpins. We attach them to the bases of the tails;
- Next, you need to comb each of the tails to give them a volume;
- We take a hair brush and smooth the tails, we try to keep the volume;
- Now we put them in a mesh, evenly distributing the hair;
- Then proceed to the stowage. We take the upper tail (it is already in the mesh) and wrap it in the shell. We fix with the help of hairpins;
- The other two tails are laid along the same technique, placing them under each other;
- As a result, you should get a little stretched elegant styling, consisting of large waves;
- Now we return to the parietal zone of hair, which you wind on the forceps;
- We take the first string and beat it at the very roots;
- Smooth and have waves on the finished hair. We fix;
- All subsequent strands, except the last, are stacked similarly to the first;
- The last strand, located near the face, is laid on the forehead with a light wave;
- Abundantly cover the hairdo with a varnish.
Modesty itself This wedding hairstyle is donebased on a regular bun. It turns out quite original and stylish - such a nice combination of splendor and smoothness. This styling does not include bangs.
- We comb the hair back. To give your hair a smooth and easy combing, use a hair gel;
- Take the invisible and make a "skeleton" of the future installation. For this, we pin them from ear to ear. You should have a chain of invisible, passing through the back of the head;
- We take a small prick from the occipital part of the head, right in the middle. We twist it with a tourniquet;
- Now we give the tourniquet volume, a little "breaking" it with our hands;
- We lay the tourniquet with a shell, fixing the hairpins at the very "frame" of the invisible;
- In the same way we process the other strands, until all the hair is collected in one magnificent bundle;
- We fix everything with varnish.
French Charm This French-style hairstyle reveals the full beauty of long hair. The beauty Brigitte Bardot was the first to try it on herself.
- We separate a wide parietal strand of hair;
- The rest of the hair is divided into two equal parts vertically;
- We tie the upper part with a tight tail;
- Now we weave from the resulting tail pigtail, not to the end. Somewhere in the middle we fix it with an elastic band and throw it upstairs. We fix the invisible in the area of elastic bands;
- The remaining hair in the tail is well brushed with a brush;
- Now you will need a special hair roller. We attach it around the base of our tail. We do this with the help of hairpins;
- Brushed hair is placed on top of the roller, carefully distribute them on the entire surface;
- We fix the learned structure with pins;
- Now we return to the parietal zone. Leave a pair of strands on the sides of the face, and whisk the rest of the hair at the roots and comb it on the platen, fixing the studs at the base;
- We twist the strings in the face to make light waves;
- Loose hair that remained behind, wind up vertically. Beautifully distribute them and fix them with lacquer.
Timeless classic This hairstyle will appeal to conservative girls who prefer strict and classic shapes.
- All the hair is well combed and collected in a tight tail on the vertex. We divide them into two identical parts vertically;
- We do not need the upper part yet, we pin it up. The lower part is divided into two parts;
- Well straighten each part and attach them to the invisible right and left;
- We take two hair rollers, the first one is placed around the base of the tail, the second one is placed next to the first, just below. We fasten them;
- Now go back to the top of the hair, release them from the invisible and divide into two strands;
- Comb one strand, distribute it on half of our form from the rollers. We hide the tip of the hair under the form;
- The same is done with the second string. We distribute it according to the remaining form. Make sure that the surface is smooth. We attach all the hairpins so that the hair does not get out of shape;
- We return to the bottom of the hair, as you remember, there we have two strands;
- Combing them and wrapping around the roller, throwing up. First right, then left;
- We fix everything with hairpins, so that the styling looks perfectly even and smooth;
- Spray with a large amount of varnish.
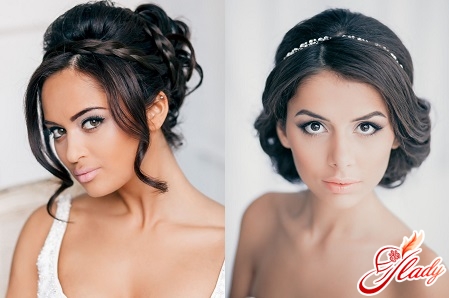
Wedding hairstyles for medium hair
Retro Perfection
- We allocate a part of hair on a parietal zone, we throw it on the face and we fix. It will not come in handy yet;
- The remaining hair is pulled into a tight tail on the vertex and also toss it forward;
- We take the roller and fix it at the base of our tail;
- Now we distribute the hair from the tail evenly over the platen, hide the remaining tip and fix it with hairpins;
- We return to the parietal part of the hair;
- We divide it into small strands, leaving a small part of the face untouched;
- Each strand is combed and neatly smoothed with a brush;
- Now we distribute all the strands, alternately laying them on the platen;
- We smooth it with your hands, take care that nowhere is anything jarring;
- We hide the ends under the roller and fix it;
- The hair that is left on the face, comb well, if necessary - straighten;
- We stack them with a light wave in the right side, fix it.
Elegance itself
- Separate the parietal hair zone, toss it forward, fix it with a hair clip, so as not to interfere;
- Remaining hair is well combed, treating each strand separately;
- We collect hair, we brush a little and throw it to the left;
- At the back of the head, we make a "skeleton" of the hairstyle, pinning invisibility vertically. From the top to the neck;
- Now we comb the hair in the opposite direction (to the right);
- We collect the magnificent shell from the hair and attach it with the hairpins to the "frame";
- We hide the ends under the hair and fasten it;
- The hair of the parietal zone is divided into strands and we comb each separately;
- The upper strands are slightly brushed and laid back, the same is done with the strands in the face;
- We fasten all the hairpins and sprinkle with a strong effect varnish.
Elegant low bun
- The dark part of the hair is separated and fastened;
- We collect the remaining hair in a low tail;
- Now take the roller and place it around the base of the tail;
- The tail is divided into two equal parts;
- The first part closes one half of the roller, distributing the hair well. The second part closes the other half;
- Smooth the hair, if necessary, fasten them with invisible objects and sprinkle with varnish;
- We take all the hair from the parietal zone and gently comb them back;
- We lay directly on the middle of the platen;
- We hide the kones and fix them;
- The center of the lock is fixed with invisibility.
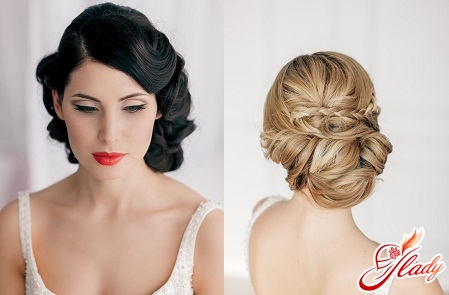
Wedding hairstyles for short hair
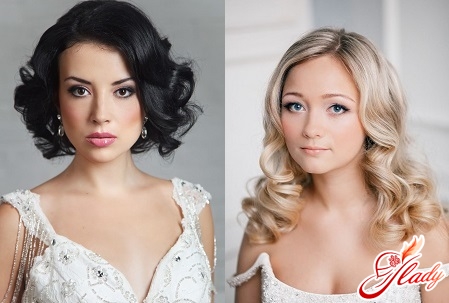
You can't really go wild here.However, don't be upset. If your hair is very short - a "boyish" haircut, accessories will save the situation. A Greek braided headband, a small stylish hair clip that gathers the bangs and is fastened to the side will look elegant. You can also use a satin bow or decorate the hairstyle with flowers. When choosing accessories, start from the overall image: dress, veil, makeup. Below are several examples that will help you decide on the choice of hairstyle and create a unique image.
- Hairstyle for a haircut bob
It is necessary to wash your hair and dry it with a hairdryer, lifting it at the roots. Then apply hair gloss and straighten each strand with an iron. This hairstyle looks very organic with a short veil;
- Forest Fairy
Straight hair needs to be curled largecurls. Now take invisible hairpins and secure each curl at the back of your head, creating a “creative mess”. The neck should be open. Also lift the bangs up and fix them with hairspray. Secure the strands at the back of your head with a beautiful hairpin or decorate them with fresh flowers;
- The girl-hooligan
A bob haircut with a length ofto the ear. Twist the ends of the hair outward, and comb the strands on the crown and behind the ears back, securing them with small stylish hairpins. The bangs are styled in a wave;
- Hairstyle "cook"
The most important thing for this styling is volume.Take a fixing gel and rub it into the roots of the hair at the temples and forehead. Now dry the strands with a hairdryer, against the hair growth, laying them back. Secure the hairstyle on the sides with invisible hairpins. A small tiara will be an adornment to such a hairstyle;
- In the style of the 40's
Take the styling mousse and apply it all over your hair.length on slightly damp hair. Make a side parting. Now divide the hair into small strands, twist each one around your finger and secure it crosswise with invisible pins. Now you need to let the hairstyle "simmer". After 7-8 hours, you can remove the invisible pins and comb all your hair in one direction. Then spray with hairspray and style the curls beautifully with your hands. This hairstyle will look great with a retro-style dress. As you can see, it's not that difficult. The main thing is not to be afraid, to be patient and diligent. You can also use your own ideas to create a wedding hairstyle. Who knows, maybe over time your version will become popular and fashionable? So experiment! All great masterpieces were originally just a figment of their creators' imagination. We recommend reading:


