Development of new technologies in the field of designnails do not stand still and almost every day there are innovations for women of all ages. One such proposal is the use of "nail photos" for nail design. This greatly simplifies the process of creating a manicure, and most importantly, that they can easily be used independently at home. After all, you will agree, it is not often possible to find an opportunity to visit a beauty salon to take advantage of the services of professionals in the field of manicure. Nevertheless, almost every woman in our time turns to the services of a manicurist at least once a month, and even more often, while leaving in the salons considerable sums of money for a beautiful and high-quality nail design. At the same time, for the manicure is used a lot of different decorative elements with which it is not always convenient to do daily business. The master can paste on your nails rhinestones, sequins, make a sculpture or art painting and even attach to your nail a small earring - piercing. Of course, this all looks beautiful and original, but there are no guarantees that the work of the master you will like. With stickers on the nails this will not happen. You immediately see a clearly traced picture, which, just like on paper, will be fixed on your nails. In addition, elegant drawings of decals are much cheaper than the services of a master in the salon. How to use nail stickers, it is not necessary to tell a lot, since it is very simple. Buy special stickers on the nails can be in any specialized store.
Photo Design of Nails
Use of stickers with images forcreating a beautiful nail design called photo design. The sticker applied to the nail can be immediately decorated with sequins, broths, colored gel, etc. Pictures can be of different types: a jacket (decorates the smile zone or is superimposed on the free tip of the nail), an application (with a transparent background), a manicure (a picture with an opaque background ), a pedicure (its difference from a manicure only in the sizes of a label). In most beauty salons you can ask for a directory where you can choose photo stickers on the nails. Photo design has a number of advantages. Stickers save time for the master and client, the drawing depends on the client's imagination and will be on the nails exactly as in the stickers catalog. The quality of the labels is much higher than that of the handmade pictures. Pictures can be used by any person, without having certain skills in the art of manicure. With the help of a photo design it is possible to put on the nails the most complicated drawings. For a photographic design, you can use absolutely any image. It can be stickers for nails fruit, flowers, images of close people (made to order), just beautiful abstractions. Sometimes it's hard to choose the right drawing even though there are a wide variety of stickers on sale. But if you find a suitable electronic picture, you can try to make stickers for the photo design yourself. Information on how to make stickers on the nails on the Internet and books abound, although the process itself will not be difficult. To do this you will need an inkjet printer and a consumable material - a special adhesive film for photographic nails. A printer for printing a photo design is simply necessary for a beginner master of manicure. It simply assembles, is very easy to use and easily pays off. It is desirable to set the highest brightness of the image, otherwise the color of the labels will be a little faded. The picture needs to be reduced and multiplied by 10 such pictures. To make labels on the nails, sparingly arrange them on the sheet, set the necessary parameters and start printing. After that, the labels will be ready for use. 
How to decorate your nails with stickers?
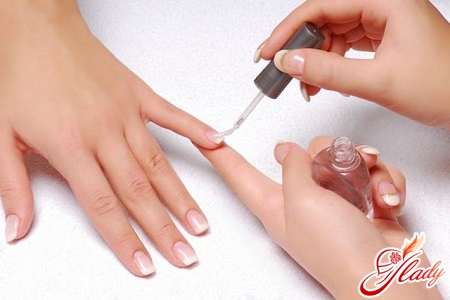
To begin with, you should purchase stickers forNails of the desired color and size. Buy stickers at any cosmetics store or order them online. The seller-consultant will be able to explain to you in detail how to glue stickers on the nails, although the process itself is not complicated. Consider the background color and possible additions to the design of your nails. Attached to the nail picture with the image is very simple. Here are some tips on how to stick stickers on your nails. Take a plate on which the pictures are fixed and cut into individual squares, for each nail. Take the sticker in the left hand, turn it face-to-face and with a thin tweezers, carefully unclip the film with the image from the soft paper substrate. During this, the film may curl, so attach it to the index finger of your left hand. Now take the film over the opposite edges, carefully, to prevent contact with your own nails, otherwise the film with the picture may deteriorate. Spread and gently attach the sticker to the middle of the nail. Try to make the center of the label coincide with the center of the nail. Gently and very lightly move the film from the center to the tip of the nail, while leaving the second edge not glued. Only if the sticker lies flat, you can gently glue its lower edge. Smooth the film with soft sliding movements. If you press too hard, the picture may be wrinkled or spoiled. If the picture on the fingernail lies unevenly or slightly wrinkled - do not be upset. If the outline of the picture is damaged, try to hide the error under the sequins or the daughter of several small lines with a thin brush and nail polish. Perhaps during sticking, the sticker will barely swing and an unpleasant crease will appear, but it can easily be cut with a nail file. Do not despair if the first attempt to paste on the nails of the picture will end in a fiasco. After several attempts, you will necessarily succeed. Under the sticker, you can pick up any background that matches the hue of the sticker. Be sure to wait for the full drying of the varnish and then stickers can be attached. When the sticker is in place, cover the nail with a coat of nail polish. So you save the picture from erasing. A beautiful and high-quality manicure is a guarantee of your elegance. Stickers for nails can be ordinary (on a sticky tape), three-dimensional and water. The first in the shop windows appeared exactly water stickers on the nails. Here are some tips on how to stick stickers on your nails. To translate the nail sticker, you must first steam it in hot water, and after 30 seconds, the soaked picture is placed on the nail plate in the middle and gently pull out the paper substrate from under the label. It is best to do this with tweezers. After that, pat the nails with a lint-free cloth and allow the sticker to dry. Only then it will be possible to cover it with a layer of clear lacquer-fixer. It turns out very nicely, because the lacquer layer on which the pattern is applied is very thin. Sometimes it is very difficult to distinguish a neatly attached water sticker for nails from a skillfully executed drawing. New labels do not require contact with water. Produce them on the principle of adhesive tape. These stickers are easy to use even for beginners. The paper substrate can easily be separated from the film and it is easy to attach a sticker to the nail. But this sticker must also be fixed with a layer of clear lacquer. Labels on the advanced nails differ from the standard only in their size. They are made in different sizes, they can cover the whole nail or only a part of it. It can also be small decorative elements that you can combine and make up the desired pattern. Thus, you will create a unique design of nails with stickers with your own hands without much effort. To create interesting combinations and you can use 3d stickers on your nails. They are voluminous and somewhat resemble sculpting, but look neater and more elegant. There are a variety of stickers on the nails of the drawings on which, depend only on your wishes. The design of nails with stickers can be supplemented with various rhinestones, sequins, sequins. Fantasize a little and create your own signature nail design, original and beautiful manicure is truly unique. Become a good addition to the nail sticker decorative beads, suitable for color. Try to apply on still wet varnish small rhinestones or a color powder. Very nice look also stickers in the form of small snakes at the tips of the nails, especially if you place light crystals in the cuticle zone. Try using different stickers on different nails. Alternatively, leave one beautiful sticker on only one nail, for example, on which you wear a ring. Small stickers on the tips of nails, perfectly complement your French manicure. If you create a nail design using stickers for the first time, it's best to use a nail sticker for a transfer. They are easier to use and do not stick to the surface of the nail as quickly as normal. To use labels for the design of nails, it is not necessary to grow long nails. The standard size of the labels is designed for a medium sized nail. But, for example, 3d stickers for nails, look better on long nails. Look, before creating a nail design with stickers of a finished manicure photo using the same stickers in the catalog of the store or beauty salon. So we told you how to use nail stickers. It remains to work for small - to acquire and use them. Strive to create not only an original, but also a stylish design that harmoniously complements your image. Choose combinations of labels, given the combination of colors and textures. The main rule that should be considered when choosing the color of the design patterns of a manicure is not to combine warm and cold shades. From the right colors, the quality of the whole manicure depends. Depending on your taste, the design can be elegant or extravagant. Opportunities for creating a unique design set - try and experiment, you will definitely get it! We advise you to read: