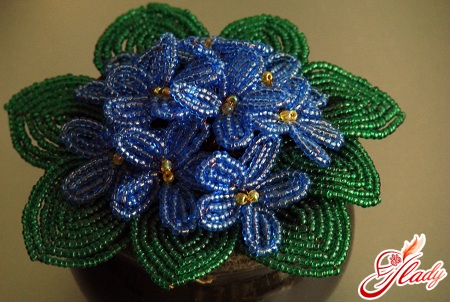
 Everyone probably knows what beads are.However, not everyone has a full idea of how diverse its application is. Beads are used to weave baubles, make necklaces and beads, clips and rings. Pictures are embroidered with beads, clothes, purses and bags are decorated. And amazingly beautiful flowers are made from beads! Of course, only experienced craftswomen can create real masterpieces of beading, but almost anyone who sets such a goal can make flowers from beads with their own hands. Naturally, you need to start with something simple, and only then move on to mastering complex techniques. But you need to start! Let's try?
We prepare materials
A very easy to make beaded flower. Not only beginners, but even children can handle it. So, for a simple beaded flower we will need the following materials.
- Multicolored beads for flower petals and green beads for its leaves. By the way, the beads will approach both chopped, and round.
- Beads are smaller than for petals and leaves. We use it to make flower stamens.
- Green threads floss or iris for decoration (wrapping of the stem). It's better if they match the tone to the green beads.
- A wire of this diameter to be threaded with beads.
- Cork from bottles, which will become "pots" for flowers.
- Alabaster for fixing a flower in a pot.
However, the latter material can be easily replaced.ordinary plasticine. It is better to take copper wire. It is flexible and durable, and is also quite suitable for stringing beads. You can also replace bottle caps with any suitable containers.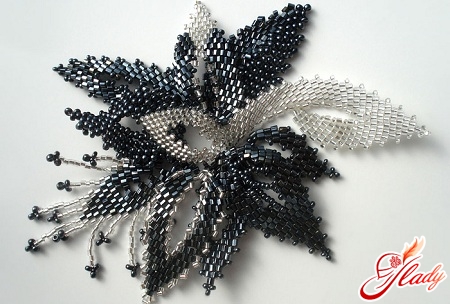
We collect petals
So, for the first petal we needcut a piece of wire about thirty centimeters long. Now string thirteen or fifteen chopped beads on it (closer to the left end of the wire) and twist the wire, forming a loop from the chopped beads. To do this, make two or three turns, connecting the wire under the outermost beads. String the same number of beads to the right of the petal and make another loop. And make the same loop to the left of the first. We decorate the edge of the petal. String eight or ten beads (round ones - more) on the right end of the wire, move them to the outer loop and pass the wire under the middle of the top of this loop. String two or three more beads, close the gap between the right and middle loops with them and pass the wire under the middle of the top of the middle loop. Two or three more beads - and the wire under the top of the left loop. Now we close the edge by putting on eight or ten beads, lowering the wire to the base of the petal twist and securing it with several turns. We twist both ends of the wire at the base of the petal. We make seven or eight petals in this way. Now it is the turn of the middle of the flower - stamens and pistil. To make them, we put one large yellow bead on a new piece of wire, fold the wire in half and twist it. This is the pistil of the flower. Next, we put a small yellow bead on a piece of wire slightly longer than the previous one, fold the wire in half and twist it, forming the stem of the stamen about a centimeter high. We step back a couple of centimeters to the right or left and make another stamen in the same way. Thus, along the entire length of the wire, we make eight stamens. Next, take the pestle wire, place it on the middle of the wire with stamens and wrap the left edge of the wire with the stamens around the pestle first, then the right one. Twist the free ends of the wire in turns along the entire length.
Collecting leaves
We will make the leaves using the French technique.weaving. To do this, make a knot on a piece of wire, stepping back three centimeters from one edge. Now put five long beads on the long edge, move them toward the knot, grab about four centimeters of free wire and make a loop by folding in half and twisting the wire. Our beads will be between the loop and the knot - this is the middle of the leaf. Next, put ten round beads on the free end of the wire and make two turns with the wire over the knot - this is one edge of the leaf. Put eleven round beads on the free end of the wire and screw it to the base of the loop - this is the second edge of the leaf. Do not forget to straighten the wire before screwing when making the edges, so that the leaf does not turn out crooked. To frame the edges of the leaf, continue to work with the free end of the wire. Put nine long beads on it and screw it over one edge of the round beads. We make the second arc of eleven long beads in exactly the same way, securing the wire between the arcs. The leaf is ready. We make five more leaves in the same way. We assemble the branch. In addition to the prepared leaves, you will also need a green thread. So, we take a leaf in one hand and a thread in the other. We secure the thread at the base of the leaf and wrap it around the wire leg, placing the turns from top to bottom. Having wrapped the leg to a length of two centimeters, we attach the second leaf to it, screw it and also wrap it with thread. Next, we apply the turns, connecting the legs of the two leaves into one. Having placed the turns of thread to a length of about a centimeter, we screw the third leaf, connect its leg to the common one and wrap it with thread. The branch is ready. We make the second branch in exactly the same way.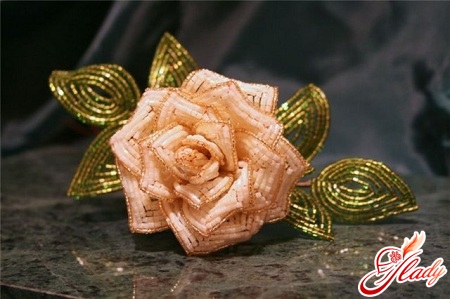
Collect the flower
When all parts of the flower are ready, it remainsassemble and secure in a pot. To do this, take one petal, apply it to the stamens and screw it on. The wire of the stamens should be the base of the flower, so all the parts need to be screwed to it. Next, screw the second petal opposite the first. Then screw the second pair of petals, placing all four petals crosswise. And screw the remaining four petals one by one between them - in the spaces between the petals. Take the green thread again and begin to wrap the stem of the flower. Having wrapped it with thread for a length of five centimeters, screw the first branch with leaves, connect the leg of the branch with the stem and continue to wrap. After another centimeter of stem height, screw the second branch, connect both wires and wrap the stem to the end, leaving a small end of the stem bare. Next, fix the flower in the pot. To do this, pour some alabaster into the lid and dilute it with water until it has the consistency of sour cream. Stir the alabaster and insert a flower into the center of the cork. The mixture will harden for about ten minutes. To avoid waiting, holding the flower with your hand all this time, you need to support it by placing it under a branch, for example, a spool of thread. If you do not want to mess with alabaster, then simply fill the cork with plasticine and insert the flower into it. When the flower is firmly fixed in the cork, you can decorate the pot by filling the "soil" with any glue and sprinkling it with decorative sand or small beads. Wrap the edges of the cork with any ribbon or braid of suitable width. Straighten the flower petals and leaves on the branches, straighten or bend the stem and admire your creation. The flower can be made from multi-colored beads, and then you will get a real seven-color flower. If you make it from white and yellow beads, it will be a chamomile, if from red ones - a poppy. In a word, fantasize! Such a cute trinket will liven up your office desk and will take a worthy place on your bookshelf at home. Try to start small, and then any complex technique will definitely be conquered by you! Good luck! We recommend reading:


