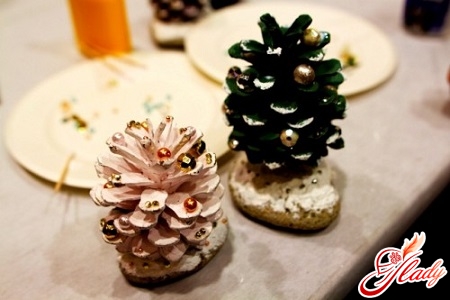
 What do you think children like most?Of course, making something with your own hands! And no candy, not even the most delicious, will replace this process. And if mom joins in the creativity, the child will be simply happy! After all, in all the everyday hustle and bustle, we somehow forget that in addition to communication in kindergarten, the baby also needs our attention. And it is joint creativity that gives us the opportunity to show this attention, to let the child understand that he is the best, the most skillful and the most beloved. Today we will talk about what crafts can be made on the eve of the winter holidays. And it does not matter whether they are needed to decorate the kindergarten or to decorate your own home. The only important thing is that your child will be able to show his imagination to the fullest. You will be surprised how smart and clever kids can be, doing something that brings them pleasure.
How to make an original snowflake yourself
These are the winter crafts that were and remainthe main element of children's creativity. Of course, you can resort to a proven method and cut snowflakes out of paper napkins. However, there are much more interesting ways. Volumetric snowflake For children aged 5-7, who already have developed fine motor skills and have the skill of working with scissors, the option of a snowflake made of twisted paper will be interesting. For this you will need:
- The base is a sheet of white or colored cardboard;
- Stencil to apply the drawing on the cardboard;
- Twisted from dense colored paper serpentine;
- Scissors;
- PVA glue;
- To decorate the beads, rhinestones, sequins.
We transfer or apply the drawing onto a sheet of cardboardsnowflakes. It would be nice to make it multi-pointed and fluffy. Using scissors, cut thin and long stripes from thick paper. Since snowflakes usually have pastel shades, choose paper of the corresponding color. For a standard A4 sheet, stripes 5-7 millimeters wide are suitable. Next, tightly twist the stripes into tight skeins. If desired, they can be given an irregular shape: lightly press the corners to get a rhombus, oval, polygon. Glue each skein onto cardboard using PVA glue. Fill the entire field of the future snowflake with such skeins and let the product dry. This will take at least two hours. In order to give the snowflake a more elegant look, you can glue rhinestones or beads around the perimeter and the middle of each bundle. This technique allows you to make not only snowflakes with your own hands, but also a snowman, a Christmas tree, a star. Lace applique Very young children can be offered to make an applique. To do this you will need:
- Sheet of cardboard (not white).
- White thin lace.
- Pieces of foam plastic.
- PVA glue.
You will have to make blanks for the craftindependently. To do this, cut out several identical parts from the lace, and also make a sketch on cardboard. Then involve the child - he will be able to do the rest of the work with his own hands. Glue the blanks onto the cardboard: apply glue with a brush and press the lace tightly. To make an original edging, you can dip the brush in glue, then in small foam chips and go along the perimeter of the snowflake.
What are the Christmas trees
A Christmas tree made with your own hands will bringa child is as happy as a real forest beauty. So, what can you make an artificial Christmas tree from? From any available material! Let's look at several options. Option 1 - classic For such a craft, you will need large cedar cones, a sheet of cardboard, threads and glue.
- From the cardboard we make a cone, which is well bonded with adhesive tape, stapler or glue;
- We tie the thread to the base of each pin;
- Thread the grease with glue and attach all bumps to the blank of cardboard so that it is completely closed;
- We put the Christmas tree in a flower pot, and the base is decorated with tinsel.
All children love to decorate the New Year's beautywith your own hands, then give them this opportunity! For this you will need a thin brush and white or bronze paint. Dip the brush in the color you like and lightly draw it over each cone. That's it - the tree sparkles with a festive shine. And with the help of beads, buttons, plasticine and foil we make other decorations. Option 2 - soft For the craft you will need: cardboard, padding polyester, green felt or velvet, scissors, glue, decorations.
- We cut out a thin sintepon according to the dimensions of the cardboard sheet and paste it. You can use a stapler, in this case you have to close the staples with edge;
- From the green fabric we cut out the triangles. For each triangle, we slightly bend the edges inwards to impart volume along the contour, and glue them in the appropriate order to the soft cardboard;
- Actually the Christmas tree itself is ready. It is necessary to allow it to dry thoroughly, after which you can start decorating. As it used sequins and rhinestones.
Option 3 - a sparkling fir tree Perhaps the easiest option. A child can make such crafts practically without outside help. For the tree you will need: cardboard, a stapler, tinsel.
- From the cardboard it is necessary to build a cone with a strong base, which will not allow the tree to overturn;
- Then you need a long and fluffy tinsel. It looks interesting green with a white touch, but any other will do;
- We wind the tinsel on the cone so that there are no gaps, we fasten it in several places with a stapler. The Christmas tree for the kindergarten is ready.
Bear in the north
Winter crafts are not only snowflakes, fir trees andsnowmen. Let's look at a master class that will tell you how to make a cute polar bear with your own hands. You will need "soft cardboard" made according to the previous version (blue padding polyester plus cardboard), white padding polyester, a marker or beads.
- To the cardboard is attached a blue or blue sintepon, imitating snow;
- A figure from a white sintepon cuts out a bear figure and is pasted onto a cardboard blank;
- Using a comb with small denticles, we comb out the little animal so that its "fur" is slightly rasstohmatalsya;
- With the help of a marker, we draw eyes, ears, and nose. Beads can also be used for these purposes.
Variety of garlands
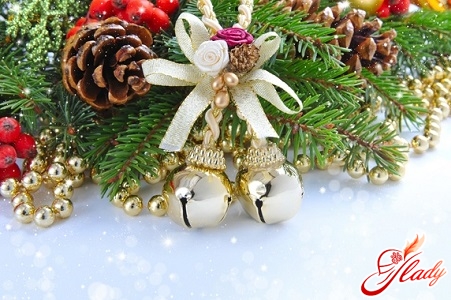
From candy wrappers Candy wrappers are trash,which flies into the basket? And in vain! You can make quite original winter crafts from them, for example, Christmas tree garlands. Start collecting candy wrappers as early as possible and be sure to involve your child in the process. He will really like this idea, and he will be looking forward to the day when you can bring it to life. If you did not manage to collect enough wrappers, you can replace them with multi-colored foil. So, let's get started. Prepare candy wrappers, foil, thick thread and a gypsy needle. Fold the paper blanks into an "accordion". Now take a needle and thread and string the candy wrappers, trying to push them towards each other as tightly as possible. At the same time, unfold one wrapper lengthwise, the other - across. As a result, you will get a "fluffy" tinsel garland - a very original craft for kindergarten, made with your own hands. From cones First, cut off the tops of the cones with nippers to give them a rounded shape. Treat each piece with white gouache (or another paint you like). Take a strong thick thread, soak it in PVA and glue it to the bases of the cones. Once the garland is completely dry, decorate the Christmas tree with it.
Christmas decorations
The most famous New Year's decoration isChristmas tree ball. And you can also make it yourself. To create the craft you will need: a balloon, floss of different colors, PVA glue. So, what should you do?
- Inflate the balloon to the required size;
- Soak the threads in a lot of glue, let them soak;
- Slightly wring out, wrap the thread on the ball. And the density of the winding depends solely on your assiduity;
- You can sprinkle the entire product with a shiny hair spray;
- Let the craft work dry. This will take at least eight hours;
- Using a thin needle, gently pierce the ball and release the air;
- If there is an opportunity to untie it - it will be wonderful. The main thing is that the ball does not burst before the time;
- Remove the rest of the ball through loosely threaded threads.
A Christmas tree decorated with such balls will look unusual, and children will have a lot of fun dressing up the forest beauty with toys made with their own hands.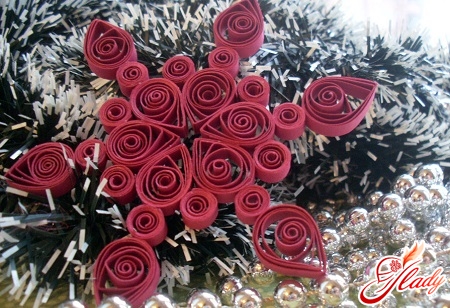
New Year card
Что может быть прекрасней, чем подарок, made by the child himself? Both the mother and the kindergarten teacher will love the New Year's card, in which the child put all his love. You will need: cardboard, PVA glue, scraps of fabric and a lot of children's (and yours, of course) imagination. What to depict on such a card? Anything! The kid himself will suggest an idea. Usually, children choose any options related to winter: snowmen, forest animals, Christmas trees and Santa Claus. When the image is chosen, prepare pieces of fabric of the desired shapes and sizes, as well as cardboard. To decorate nondescript cardboard, you can glue it with foil, colored paper or fabric. "Tarpani" looks interesting and unusual. Now it's up to the kid. Let him assemble a mosaic from scraps himself. A sea of positive emotions are guaranteed! In addition, such creativity develops logic and finger motor skills. As you have already seen, there are quite a lot of ideas for making winter crafts yourself. And here it is necessary to start from the age of the child, from his perseverance and desire. Be sure to engage in creativity with children! This process will bring pleasure to you, and the children's joy will know no bounds. And this is real happiness!


