 If your child goes to kindergarten, or if youIf you go there yourself as a member of the teaching staff, then sooner or later you will definitely be puzzled by the problem of creating stands for a kindergarten. And the whole point is that ready-made stands are simply not affordable for most kindergartens. So parents and educators, headed by the head of the preschool educational institution, have to somehow solve this problem on their own or with their own means. And, let's note, many are quite successful in this matter! And they find a completely predictable solution, namely, they make stands for the kindergarten with their own hands. How? Well, that's what we'll find out now.
Where to begin?
Actually deal with this problemwith the joint efforts of parents, children and teachers is quite simple. The main thing is to generate ideas. However, our teachers, who work almost on pure enthusiasm, have no problems with this. What kind of stands might a kindergarten need? These are information or thematic stands. Information stands are intended primarily for parents, and thematic stands for children. The stands for parents contain information about the daily routine, menu, announcements and news. Stands for children are used as visual didactic materials. They help in the training and development of kindergarten pupils, and also play an important role in interior design. Therefore, depending on the purpose, stands can be made from different materials. And, naturally, you need to start with finding materials and further implementing the generated ideas.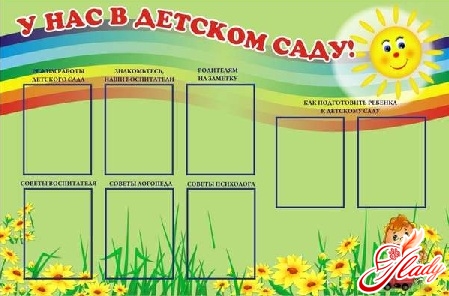
Information stands
It turns out that it is necessary to make information standsmuch simpler than thematic ones. The choice is limited here. What stands can be offered to parents for review? "For you, parents", "Menu", "Our birthday boys and girls", "Class schedule", "Daily routine", "Announcements" and some other standard information stands for kindergartens. If the kindergarten is unable to purchase ready-made stands, they can be made by hand. For this, any flat surface can be used, from a wall to boards made of chipboard or plywood. In addition, you will also need wallpaper or self-adhesive film, overhead letters cut out of cardboard or colored paper, and patch pockets made of transparent hard or soft materials. These can be purchased pockets of industrial production, homemade pockets made of the same plexiglass, or pockets made from a frame-skeleton with transparent film stretched over it. In the end, you can use ordinary colored holders on pins (for wooden stands) or on magnets (for metal boards). In this case, you can do without pockets, attaching sheets of information directly to the stand. You can do without pockets, also making frames from polymer construction molding or ceiling plinths. Such frames (like letters or pockets) are attached to the stands using double-sided tape and can always be easily replaced or moved to another place. And as a decor, you can use pictures cut out of wallpaper (with a children's print), and decoretto film (decorative wall stickers) with thematic images, and printouts of pictures downloaded from the Internet or made in Photoshop. You can decorate the stands with improvised materials: tape or ribbons, appliques, collages. However, this already depends on the individual abilities of parents and educators.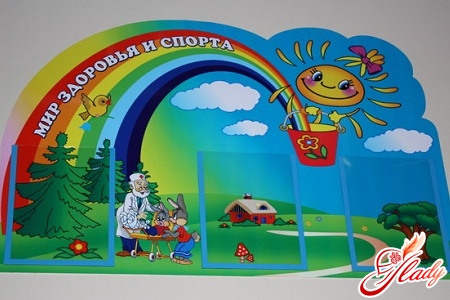
Thematic stands
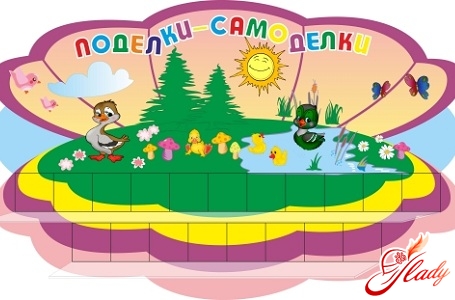
Thematic stands on manufacturing technologyare almost no different from informational ones. But there are many more possibilities for their design! The basis of a thematic stand is a shield, which should be durable, but lightweight, since it will probably have to be moved when used for classes. Such a basis can be a sheet of plywood or chipboard, plexiglass or ordinary ceiling tiles. The last option is not the easiest, but the cheapest. The tiles are firmly glued together, forming a shield of the desired size, and then this shield is pasted over with wallpaper or self-adhesive film. In the design of the stands, you can use almost any materials that are safe for children. These can be drawings, printouts, appliques, fabrics, and natural materials (shells, cones, straws, etc.). For example, for an astronomical stand, you can use black glossy self-adhesive tape and dark blue or silver relief wallpaper. The sun and planets can also be cut out of paper, textured wallpaper or the same ceiling tiles, covered with acrylic paints or gouache or covered with multi-colored self-adhesive film. The orbits of the planets on such a stand can be laid out using colored cords or yarn, and for the "Seasons" stand, the same mittens or sunglasses will come in handy. But the "My Homeland" stand will not require special efforts from educators and parents in design. For example, in the center of the stand, you can place a map of the country, which can be easily bought in a bookstore or printed on a color printer. An image of the coat of arms can also be printed. The words of the national anthem can also be printed out, or typed from overhead letters. And the highlight of such a stand will be the flag - a real flag canvas, made of real fabric. The "Time of Day" stand can be made interactive with a real clock face and moving hands. For the “Learning to Count” stand, you can use a metal shield, decoretto film, and regular refrigerator magnets in the form of animals, which will be used instead of numbers when learning to count. And such magnets can also be made from salt dough or plastic. In short, so many dreamers, so many fantasies! By the way, children turn out to be very useful assistants not only in the manufacturing process, but also at the stage of generating ideas. So do not neglect their help. After all, all this is done, first of all, for them, and these stands will be looked at by children's eyes, who see the world completely differently than adults. We recommend reading:


