Blinds were once fashionable, and many peopleinstalled them in homes, offices and summer cottages. The cost of purchasing blinds is not very high, and they are quite convenient to use. Today, blinds are already becoming a thing of the past, they have been replaced by roller blinds. If your budget does not include the purchase of new blinds, they are quite easy to make yourself, using your own hands and the materials at hand. Roller blinds, made with your own hands, are perfect for decorating your home interior. A room with roller blinds becomes more comfortable. They are convenient to use and have many types of design, which makes it easy to choose them for any interior. The advantages of using roller blinds:
- the possibility of using together with existing curtains as an addition or as an individual decoration of windows;
- curtains of this type are great for plastic and wooden windows;
- Roller blinds, which are installed on the window frame, usually strongly adhere to the glass. This completely excludes the possibility that someone will come to your house from the street;
- roller-type curtains do not require special care;
- roller blinds perfectly protect against too bright sunlight. In cases where there is a need, there is the possibility of completely dimming the room;
- Curtains have different design options, and they are easy to manage.
Roller blinds can be bought in a store, but if you can't find anything suitable, don't despair. You can make roller blinds yourself.
Differences between rolls and Roman blinds
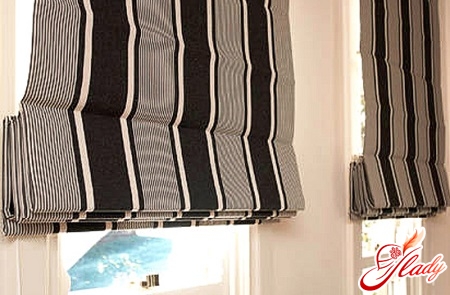
Remember that roller blinds are different fromRoman. They have only some external similarities, but the lifting mechanism is completely different. Roman blinds are assembled into horizontal folds using cords that are located on the sides or on the back. Roller blinds bought in a store are wound onto a specially designed shaft, which is attached to the top of the window or doorway. The fabric wound onto the rod can be hidden in a cassette or be visible. Roller blinds made by yourself are twisted at the bottom, and are fixed using garter tapes. The tapes are located at a distance from each other along the width of the entire canvas. First of all, it is necessary to measure the opening (when attaching to the opening) or the glass panel (when attaching to the frame). This is done in order to cut the fabric of the required length and width. The curtains should be wider than the opening in which they will be installed by 20-40 mm (for allowances). The length of the curtains should be 50-150 mm longer than the height of the opening, excluding allowances.
The scheme of manufacturing curtains with their own hands
These curtains are perfect for rooms,designed in a minimalist style. In addition, they can serve as a decorative partition in the premises. They do not have gathers and folds, so it is very easy to calculate the consumption of the required amount of material. The main thing is to carefully process the edges. For them, you need to select only dense fabric that does not let in sunlight. It is very good if the fabric is double-sided. A metal or wooden rod with a diameter of 10-15 mm is sewn into the bottom. The rod is needed so that the curtain can be rolled up. Its upper part is firmly fixed to a wooden beam, so it is recommended to seal it with twill tape. Necessary materials:
- a rod made of wood or metal with a diameter of 10-15 mm. The length of the rod should be less by 20-30 mm than the width of the curtain;
- a beam made of wood having a thickness of 25 mm and a width of 30 mm. The beam should have a length equal to the width of the blade;
- tape length of approximately 1 m;
- rings having a diameter of about 50 mm, in an amount of 2 pieces;
- nylon cord. Its length is calculated as follows: width plus the length of the curtain multiplied by 5;
- fastening element for nylon cord.
The opening is measured.The width of the fabric should be 50 mm larger than the window opening (25 mm for each side seam). The length of the canvas should be 140 mm longer than the height of the window (60 mm for the drawstring at the bottom and 80 mm for the allowance at the top). Just in case, you can add a few more centimeters to the length. If the curtain is slightly longer than the height of the window, it will not be noticeable. It is much worse if it is short and does not touch the windowsill, which will lead to the not always desired penetration of light into the room. In cases where, due to the width of the window, it is not possible to make a curtain consisting of a single piece of fabric, sew the edges so that the seams coincide with the bindings in the center of the window frame. The canvases are folded with the right side inward and sewn with an allowance of 15 mm. The seam is well ironed. To prevent the edges from pulling the curtain together, it is better to trim them immediately. Curtains should be cut in the direction of the threads of the fabric. Having placed the fabric on a flat surface so that the front side is at the bottom, all wrinkles are smoothed out. Then, using chalk, the fold lines and points where the ribbons with rings will be sewn on are marked.
Sewing Features
The top edge and cuts are processedvertical. Before starting work on the sewing machine, it is necessary to go over all the folds with a hot iron. The lower edge is folded inside out by 15 mm and then ironed. After this, the folded edge is folded again so that a wooden or metal rod fits freely inside. The fold is ironed along the entire length. Having stitched the drawstring, place the rod in it. Check the length of the curtain again. To do this, from its lower edge (where the rod is inserted into the drawstring) at a distance equal to the height of the window, mark a line with chalk. Having prepared the tapes (two parts of 0.5 m each), fold each in half and put a ring in it. The tapes are sewn and attached to the curtain so that the rings are at a distance of approximately 5-6 cm from the top of the canvas, and from the edges - by 20 cm. To prevent the ends of the tape from fraying, they need to be processed. After attaching the upper part (edge) to a wooden block, it needs to be secured. This work can be done with a furniture stapler or with a hammer and nails. Hooks are screwed into the surface of the wooden block opposite the rings. A more convenient side for bringing out the cord is selected (in our case, the left). After cutting the cord to the required length (1 width + 5 curtain lengths), one end is tied to the left hook. Then the curtain needs to be placed face up and rolled up halfway. The folded part is wrapped with cord. Then the cord is threaded through the left ring. After that, it is wrapped with cord again, and its free end is tied to the right hook. Folded in half, the cord is threaded through the second ring (right) so that a loop is formed in the ring. By pulling the loop, you can roll up the curtain. The resulting loop is threaded through the cord fastening element and secured near the window. To fix the height of the curtain, the cord must be wrapped around the loop. The curtain is attached to the window opening. Then it is unfolded and the cord is adjusted. If it turns out that the cord is too long, you need to untie it from the hook and cut off the excess part. In order for the curtains to be held rolled up, as an alternative to the nylon cord, you can use fabric garters. They will not only serve as a support, but will also additionally decorate the curtains. To make such garters, you will need two ribbons equal in length to two curtain lengths plus 30 cm each. The optimal width of the garters is 8 cm. Fold the strips in half lengthwise and sew the long and one short side of the tape. The tapes are sewn from the wrong side, then turned inside out, and the second short side is sewn. After this, the tapes are carefully ironed. To connect the garters to the curtain, they need to be thrown over the bar. The distance from the edge does not matter. The tapes are attached to the cornice using a stapler or nails. This is a fairly simple way to make roller blinds with your own hands. And this fashionable accessory of the home interior will add coziness and good mood to all residents and guests of the house.


