 To decorate your house, probably, like anywoman. And if it comes to the kitchen, then the fantasy is just inexhaustible. And you can always apply your own hand-made skills to decorate the kitchen. Here, for example, sewing kitchen sticks. Such cute little things can become an excellent decorative decoration, a touching and useful gift or even serve in practice. Very interesting and "cozy" look potholders, made in patchwork style. Products are small in size, and use for their manufacture can even the smallest scraps. So patchwork in any way is applicable for sewing kitchen sticks. They can be quilted (made in the quilting technique), they can be round and rectangular (traditional patchwork) or even made in the form of a mitten or in the style of a cakey patchwork. Let's see how all this is done in practice.
A simple square patchwork patchwork
It is easiest to use patchwork formaking square potholders. You can choose some famous pattern, and you can create your own ornament, focusing on the number and color of the flaps. Let's try to make the most simple tack of patchwork made from two kinds of fabrics. For this we need eight square flaps with a side of ten centimeters and a bake for the edging. Beechku can be taken ready, use for this purpose a thin satin ribbon or cut out a slanting bake from any suitable fabric. And for relief, make a pad of plain or thermal batting between the pads. Naturally, first the material must be soaked or washed, dried and ironed. Then cut out the flaps and stack them in pairs (two different pieces) with faces. Now every pair of flaps we grind and iron the seams. After that, we sew together two pairs, making sure that the squares are in staggered order, and again we press the seams. We got two small square cloths, consisting of four scraps (each). We take these cloths and fold them with the wrong sides, and between the canvases we put the gasket to the size of the tack. After that, we break all the layers with pins and make a stitch along the lines of joining the flaps (stitch the seam in the seam). Now it remains only to trim the edges of the bake, the length of which should be equal to the length of all sides of the tack, plus seven to ten centimeters per loop. We begin to sheathe from one of the corners of the potholders, evenly laying the bake around the entire perimeter of the square. The remaining "tail" we spend on the edge of the bake and wrap it with a loop, the end of which is sewn by hand. 
Quilted square pothook
Patchwork sewing does not have to be donefrom the flaps. There is a very interesting technique called quilting. This is a stitch or an American patchwork. Try to make and such stitches for the kitchen, sewed from the whole pieces of fabric and decorated with a volume stitch. For one pothard, we need two square flaps of the same size, batting for laying and bake for edging. We begin sewing from the fact that we cut out squares of the same size from cloth and batting. The first flap we put on the table with the wrong side up, we put batting on it, and on top we have the second flap face up. We break our "sandwich" with pins and proceed to the stitch. If you are not confident in your abilities, you can, firstly, apply stitch lines to the fabric with a pencil (or soap), and secondly, you can make an easy outline on these lines. Just remember that the threads from the basting can get stuck in the machine line. So, make a stitch. This can be a simple lattice (straight or oblique). It can be smooth curved lines, located as we like (or as it will), but you can quilt and some specific pattern (flowers, butterflies, hearts, sun, maple leaves). If you use a checkered fabric, then make a stitch along the cage. If a fabric with a large print pattern, then stitch the stitch along its contour. Any straight or curly stitch will look good on a monochrome fabric. Now we process the edges of the tack-on by bake and make a loop. And for a more effective look of the product, you can round the corners of our stitch in the style of patchwork, simply cutting off excess fabric with scissors, and then sew the edges of the side. In this case, it is better to take ready-made slanting bake or cut it out of contrasting fabric.
Heart-shaped potholder
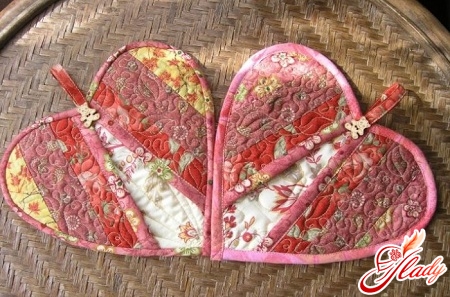
A great way to use patchwork is notonly to decorate your own kitchen, but also to make a gift for the Day of all lovers. You say that such patchwork valentines do not fit as a gift to your beloved? But, firstly, it is possible to give a heart-catcher not only to a man, but secondly, many of them cook with pleasure, spending a lot of time in the kitchen. So we sew potholders in the form of a heart, using the popular patchwork sewing. We choose fabrics of two colors. We will need a monophonic calico or satin and a cloth with a pattern (cage, flowers, peas or something else). Fabric of red, pink, orange, lilac tones is preferable for such hearts. Still need thread in the tone of the fabric, cardboard for the template, pins, batting for laying and bake for edging. From the cardboard we cut out a pattern in the form of a heart, put it on a cloth and cut out two parts of different colors. Now we begin the sewing: we fold the fabrics with the wrong sides, we cut the pins and cut them into three parts along the inclined straight lines, which cut off the side parts of the heart. As a result, the middle part of the patchwork heart should turn out to be a trapezoid with figured ends (one end is the bottom corner of the heart, the second is the upper notch). After that, we change the middle of the hearts in places and get two canvases in which the middle part will be from one fabric, and the side from the other. Now we sew the flaps. First, fold the middle flap with one of the sides, facing the sides, aligning the edges of the cut, and make a connecting line, and then also tie in the third part of the heart. Due to the allowances for seams, the edges will turn out to be slightly uneven, but it's not scary: just trim the outline of the heart with scissors. Now cut out the heart for the padding pattern and fold all the layers of the future patchwork patchwork, attaching them with pins. After that, it is necessary to stretch the layers along the contour of the heart, having retreated from the edge of five millimeters, and process the tack with the help of the beekeeping. The loop can be made from the same bake or lace, hiding its tips between the layers of the gasket, but this must be done before the layers are sewn and the sewing of the bake. 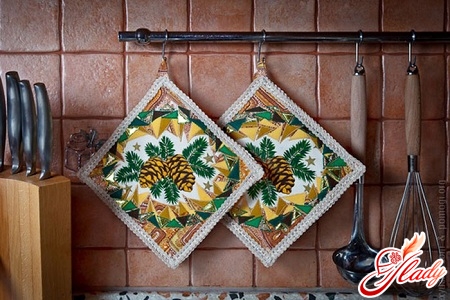
Pothook - turntable
No, no, they will not turn around. Just here patchwork is used as a technique for creating a pattern from pre-sewn strips of fabric. We will make the flaps triangular, and the tack will turn out to be hexagonal with the pattern-turntable. So, for making such pothooks in patchwork style, we need a fabric of two colors: monophonic and printed. Of these tissues, we cut bands about eight centimeters wide (and smaller ones, counting their width from the height of the triangular flap). Now we add the strips with faces, we sew them along one edge, making an allowance of five millimeters, and iron the seam. Then, using a ruler-corner (angle of sixty degrees), we cut triangles. First, we put a corner, aligning the vertex with the upper edge of the strip, then flip it and combine the vertex with the bottom edge of the strip. As a result, we get two-color flaps-triangles with a mottled and monochromatic upper part. Such flaps we need twelve pieces: six for each side of the patchwork potholders. Sort the flaps of six identical triangles. Next, we need to fold the flaps (with a monotonous vertex), forming hexagonal blocks. We do this as follows. We put the flap vertically up. To the right of it, we place a triangle with a monotonous vertex to the right and up. We apply a flap with a monotonous vertex to the right and down to it. To the first patch from the bottom, put the triangle (aligning the bases) with the vertex to the left and up, next to it we place the flap vertically to the left and down, and the last triangle has a vertex down. As a result, on our block a pattern appeared in the form of a motley turntable. Now we sew the flaps: first the triangles of the upper part of the block, then the triangles the lower parts, and then we grind both halves along the long sides. Sutures are stretched. Similarly, we do the same with the second lot of flaps, sewing together a block with a monophonic pattern-turntable. Now we cut out the bobbin from the batting in the form of potholders and add all the layers in this order: first put the batting, and on it one piece face up and the second piece face down on it. We break the layers with pins (so that they are shifted) and we spread them around the perimeter of the tack, leaving a non-stitched area to turn the product out. Now we remove the pins, trim the allowances almost to the seam, cut them in the corners and turn out the tack. Smooth, insert the loop between the layers in the uncoated area and sew it by hand. Starting from the center of the tack, make the stitch a seam in the seam, and if desired, put a decorative stitch along the edge of our patchwork potholders.
Potholders - gloves
You can use patchwork and how to techniqueto perform traditional gloves in the form of mittens. First we collect the patchwork cloth in the traditional technique. We begin sewing with the cut out of small square shreds, which we collect into strips, and then we sew the stripes into a whole cloth and iron the seams. Now we cut out the cardboard template in the form of a mitten and we cut out one piece from the patchwork, two details from the batting and three parts from the whole piece of fabric for the back sides of the tack. We begin sewing halves of mittens. For the back side we put layers of a monophonic detail face down, batting, and on it a patchwork face up. We break the layers and spend on the contour of the mitten with a small allowance. Now, exactly the same way we sew the part for the inner side of the mitt made from plain patterns and batting. After that, in the places of the rounded contour, we make cheeks-notches on the allowances, and in the place of transition to the big finger, in general, cut out the allowance carefully. Then we add the two blanks with their faces and sew them along the mitten's contour, leaving the wrist open. After that, we turn out the mitt and process the open edge with a lap or tape, making a loop out of its tail. That's all patchwork for mittens in the patchwork style. Actually, patchwork and stitching are the best suited for making tack. The tack should be thick and thick to protect the hand from hot pans and pans. A multi-layer patchwork cloth perfectly with this task will cope. So sewing stitches can become not only a pleasant pastime, but a profitable occupation. On the one hand, you find the use of unnecessary scraps of fabric, and on the other you get the right and practical thing for the kitchen. And if sewing is your hobby, then try to apply your skills in making useful and cute kitchen sticks. By the way, beginners can successfully master patchwork sewing on such small products. Good luck and creative success! We advise you to read:


