Paint or glue?
As a rule, people choose between two options- wallpaper and paint. Tension ceilings and other "twists" of modern civilization will be left for another case. It is painting and wallpapering traditionally the most simple and budgetary ways to improve the appearance of the upper tier of the apartment. But we still have a choice, and we want to help you in this. The choice of paints on the market now is simply huge: all colors, textures and even compositions are accessible to the ordinary consumer. They look great on any surface, including the ceiling. The procedure of dyeing is very simple - the child would have coped with it, had it not been for harmful vapors during the staining process. And the result will still please the eye for a long time. But, on the other hand, among the wallpapers there are even more opportunities to realize their creative fantasies. You can choose a product made of natural materials, and it will be eco-friendly and hypoallergenic. Or there is an opportunity to give preference to modern options that can be washed, repainted and manipulated with them. And yet what is better to choose for the ceiling: paint or wallpaper? Everyone decides for himself, prioritizing and selecting important parameters. We should not forget about the possibility of combining materials, thanks to which you can create a unique and bright interior. 
Types of wallpapers
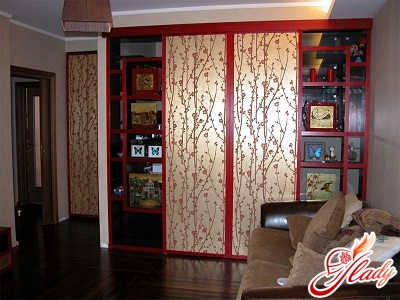
If you decide in favor of pasted onthe ceiling of the wallpaper, then do not rush to run to the store for the first product caught. First, figure out what wallpaper does exist. Comparing them among themselves, you can definitely choose what is right for you. The main thing, for gluing the ceiling, use not ordinary, but ceiling wallpaper. They are characterized by a specific manufacturing technique - two interconnected dense layers, on which a pattern is applied from above. What are they like?
- Paper. The oldest, simple and well-known option. The wallpaper with which the rooms in your childhood were pasted consist of paper. Like any other thing, they have their pros and cons. The main advantage is the ecological compatibility of these wallpapers, because they are made of natural material - paper. From the shortcomings can be allocated a short service life - they will last on your ceiling no more than five years.
- Non-woven. Unlike the previous ones, the base is non-woven, consisting of cellulose and synthetic fibers. Many people choose them due to the fact that non-woven wallpaper is very easy to glue to the surface due to its specific structure.
- Vinyl. They are made of a paper substrate, which is subsequently covered with PVC glue. Due to its embossed surface, vinyl wallpaper very easily conceals cracks and any other flaws in the ceiling, which is a significant plus when carrying out repairs in domestic apartments. In most cases, they can be washed, so the housewives prefer to cover them with a kitchen or a bathroom. At the same time, low water permeability can be attributed to shortcomings, which negatively affects the climate of the apartment (although you can try to find the same vinyl wallpaper, only with micropores, and get rid of this minus).
- Fiberglass. Another type of modern, but environmentally friendly wallpaper. They are made by pressing from quartz sand, limestone and dolomite. They repel moisture and prevent the appearance of mold and fungus, do not accumulate dust on their surfaces and have excellent sound insulation characteristics. All this allows the hostess to save nervous resources and cleaning time. The main drawback - their high cost, because of which this choice can not afford everyone.
- Liquid. Quite unusual, but popular because of its properties option. With liquid wallpaper you can decorate the room in the most incredible way. Quality products are made of natural and hypoallergenic materials. But their application requires a certain skill and knowledge of technology.
- Tissue. Quite expensive, but elegant option. Look unusually and bright, so if you want to bring a highlight to your interior, the fabric wallpaper gives you the opportunity to do it. At the same time, it's worth to be careful with their gluing.
It would seem that I chose wallpaper - and it's over, it's timeproceed to pasting. However, take your time, because it is very important that you will be between the wall and the sheet. Simply put, you need to choose the right glue. Do not buy the first thing that comes to hand - you risk instead of a beautiful ceiling to get something with bloated bubbles and peeling edges. Adhesive must necessarily match the type of wallpaper you choose. Ideal option is when you buy both products from the same manufacturer, who already took care of you so that you do not worry about anything. But even if it is not provided, you can always check with the marking on a pack of glue, which will tell you what material corresponds to this product. When choosing it is also necessary to take into account other parameters: the surface structure of the ceiling, the humidity level and the temperature in the room, the weight of the wallpaper, finally. Do not be tempted to buy a universal adhesive - in this case, the quality of repair will be significantly lower than if you picked up an option that suits your circumstances. So do not hesitate to consult with competent sales consultants who will help you choose exactly what you need. 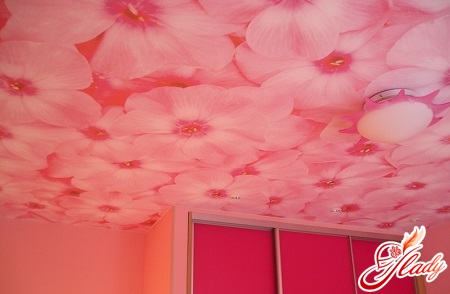
How to glue wallpaper on the ceiling?
So, you decided on what wallpaper and gluemost suitable for your ceiling. It's up to the little thing to cover it with them. To begin with, put on your work clothes, since there will be a lot of dust and dirt. You will need to prepare the surface for the process. It should be flat, clean and dry before proceeding to gluing. If the ceiling contains traces of an old paint or wallpaper, then they must be removed before repair. In the case where the correct glue was used, it will be enough for you to wet the remaining layers of paper on the surface, and they will go away by themselves. But if this does not happen, then you should cut them with a spatula in several places or process with a needle roller. After that, wet the wallpaper with warm water with soda, detergent or a special solvent. The problem should be solved. In the case where the ceiling is covered with enamel paint, additional complications may arise. The thing is, it's pretty tight and it's very labor-intensive. Experienced repairers advise in this case not to remove the paint, but only to wash the ceiling with soap, dry it and walk on it with a "skin". And to test the stability of the paint layer, use a simple method: glue a strip of adhesive tape on the surface and abruptly tear it. If it remains clean, then you can proceed to pasting, if not, then the old paint will have to be removed. On the ceiling there may be serious unevenness. In this case, the question arises: what is better to resort to, shpaklevke or primer? The first option is better to use when the ceiling has a strong slope or large defects. If the level difference is excessive, you will have to level the surface with gypsum boards. Primer is preferable in most cases, especially acrylic: wallpaper on it is glued much better, it dries faster, is not toxic and lets in air. Before you proceed to the immediate process, make a markup on the ceiling - so it will be easier and faster to deal with the case. Cloths of wallpaper should be glued to the ceiling in parallel to the sun's rays, that is, along the line, mentally drawn from the window to the wall opposite, - the seams will be less noticeable. On the surface (from the longitudinal wall) mark with a pencil the distance corresponding to the width of the roll minus two to three centimeters. Do the same symmetrically on the opposite side. Use a marking cord for this: hammer two cloves on both sides of the room and stretch it along them, parallel to the walls. From the dry mixture, somewhere around half an hour before the process begins, prepare the glue. Of course, keeping the proportions that you can see in the instructions. To avoid clots, "untwist" the water in the bucket in a bucket to form a small funnel, into which it is recommended to pour the basis for the glue. Do not forget to stir the mixture continuously until it is completely dissolved. Leave the glue for thirty minutes to swell. Spend this time on the wallpaper. Remember that every corner wall will need to be lapped on it in a half to two centimeters. Provide a reserve of half a centimeter in those places where there is contact with the final wall. It should not be forgotten that after shrinkage, a slight shrinkage occurs, about half a percent of the total width of the roll. Now you can start. If you are dealing with imported or non-woven wallpaper, then they do not need to be impregnated with glue - in this case it is simply applied to the ceiling. But the paper requires it without fail. Spread the cloth on the floor with the side with the pattern down and apply the glue evenly with a brush or roller from the middle to the edge. After that, fold the cut of the wallpaper in half, placing the wrong side inward. Impregnate the wallpaper for eight to ten minutes, and on each sheet must go the same amount of time. For the very pasting of the wallpaper you will need an assistant: one person should stand on the ladder, and the second - give him the wallpaper, being downstairs. It is necessary to combine the end of the blade with the marking line and press it firmly against the ceiling. Make a small overlap on the adjacent wall. Press the center of the cloth and roll it towards the edges with a clean rubber roller. Firmly press the longitudinal edge against the corner. If there are superfluous areas, they can be cut with a sharp knife and a metal ruler. The next cloths are glued next to the first exactly to the butt. Do not forget to level the wallpaper with a roller and follow the sizing. It is necessary to exclude temperature drops and drafts in the room somewhere for a day. See that the glue does not squeeze out of the seams. If it is of good quality, then the traces should not remain, but just in case, it is better to get wet over surplus with a clean rag. Glued wallpapers should not "bubble" and "wrinkle." Small folds are smoothed out after drying, but with large ones it is necessary to work - carefully unglaze them and apply glue again. In the corners, determine the exact position of the canvas, press a clean brush on the wallpaper and mark this place with a pencil. After that, separate this section from the ceiling and cut off the "extra" part directly on the given label. Just do it quickly, otherwise the glue will have time to "grab". In this article, we tried to tell you about overcoming all possible difficulties that you may encounter when pasting wallpaper on the ceiling. We hope that the result will make you rejoice in the beauty that has opened. And a photo of your "ceiling" wallpaper will be worthy of looking at any forum dedicated to "independent" repair!