 Even after the discovery of electricity, the inventionIlyich bulbs, fluorescent lamps, LEDs and neon lights, people have not lost their craving for the light of a living flame. We remember candles in sorrow and joy, we decorate birthday cakes with candles and light memorial candles. We celebrate the New Year with burning candles and always use them to decorate a romantic dinner. Of course, any candles for any occasion can be simply bought today. But it is much more interesting to make a candle yourself. Have you tried? But it is not as difficult as it may seem. You will need very little time and materials for this. And making candles does not require any special skills either. And if it is so simple, then let's find out how to make a candle at home and try to apply this knowledge in practice.
Materials
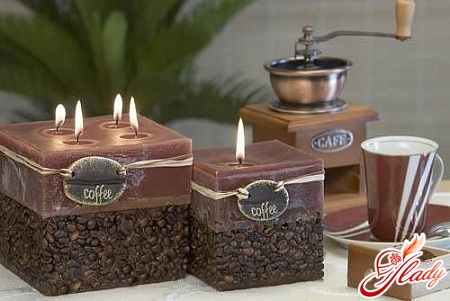
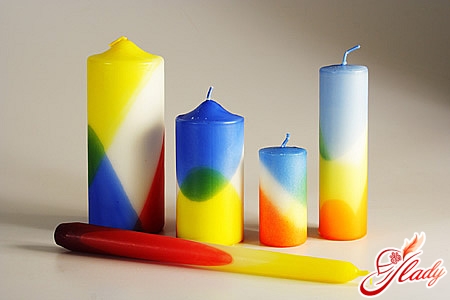
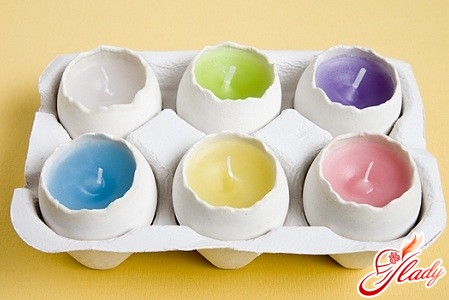
The material for a handmade candle can bewax, paraffin and gel. The easiest to make are paraffin candles, since even simple white household candles will do for their production. If you want to make a gel candle, you will have to stock up on special materials, which you can buy at a craft store. But paraffin candles... Even the stubs of any decorative candles can become a new candle. If plain white candles do not suit you, then paraffin can be easily painted with regular wax crayons or food coloring. In addition, modest white candles can then be decorated with decoupage napkins, ribbons, lace or beads. You can use the peel of orange or grapefruit halves as decoration and a kind of case. Scented candles are also quite easy to make yourself. All you need is any essential oils with your favorite aroma:
- the aroma of sandalwood, coconut, cinnamon and coriander relieves fatigue;
- orange, mandarin, lemon, rosemary and mint raise tone;
- bergamot, lavender, jasmine, mimosa, geranium and sandalwood act as antidepressants;
- the smell of vanilla, bergamot and rose is suitable for a romantic dinner;
- chamomile, patchouli, lemon balm, ylang-ylang will help to relax.
In addition to paraffin, dyes, decorativematerials and essential oils, you will definitely need a wick. If you use ready-made household candles as a base for your candles, then use the wick that they have. If you are casting candles from candle stubs, then make a wick from regular cotton thread or floss. To do this, thin threads just need to be braided very tightly, for example, in a regular braid, or even crocheted. Then the wick is soaked in liquid wax (paraffin) and allowed to harden. And, of course, candle molds. A case mold is, for example, a regular orange peel in the shape of a bowl. For floating candles, you can use metal bottle caps as a case. However, any candle whose width (diameter) is greater than its height will float. Well, for casting candles, any metal, silicone or plastic molds (baking molds, yogurt cups, glasses, juice or milk boxes, soap molds) are suitable. In short, anything where you can pour hot paraffin and then take out the hardened candle. That is, the bottom of the mold should be either the same size as the top opening of the container, or smaller. In addition to all these materials and tools, prepare a grater, a knife and a saucepan for a water bath for making candles. And after that, you can safely begin the process itself.
Manufacturing process
Making a candle at home is really easyIt's very simple. First, you need to grind the paraffin. To do this, carefully break the candles or stubs into pieces and remove these parts from the wick. Then grate these pieces of paraffin on a regular grater. For colored candles, shave wax crayons and mix these shavings with the chopped paraffin. If you use food coloring, then dilute the dry ones in advance in a very small amount of water. This solution or liquid dyes then simply need to be dripped into the melted paraffin. Also prepare the wick and the mold for pouring the candle in advance. If your molds are disposable and you can make a small puncture in their bottom, then pierce the bottom in the middle and insert the wick into it, securing it with a knot on the back side. Grease the mold with liquid dishwashing detergent, and secure the wick to a toothpick (barbecue stick, knitting needle), pulling it through the mold and placing the toothpick on its edges. That is, the wick should be exactly in the middle of the mold, stretching from the bottom up. And do not forget that at least a couple of centimeters of free wick (currently wound on a toothpick) should remain above the edge of the mold. Now put the paraffin in a ladle, jar or small saucepan and place this container in a water bath. Melt the paraffin over medium heat and let the dyes dissolve in it. For a scented candle, drop a few drops of essential oil into the paraffin. Then carefully pour the liquid and still hot paraffin into the prepared mold and leave the candle to harden. If you are using a mold in which it is impossible to make a hole for the wick, then do the following. Melt the paraffin, dip the wick in it and hang it vertically so that the thread becomes stiff and straight. Pour the paraffin into the mold and let the candle harden. During this time, the wick will also harden. Now heat a metal knitting needle and make a hole in the center of the candle. Then insert the wick into it and carefully fill the hole with liquid paraffin. Remove the hardened candle from the mold. To do this, simply place the mold with the candle in hot water for a few seconds and pull the wick - the candle will easily slide out of the mold. And do not forget to cut off the knot on the back of the bottom of the mold, if this is how you attached the wick to the candle. All that remains is to decorate your candle. You can simply decorate it with beads or seed beads, slightly heating the candle with a hair dryer so that the beads are easily pressed into the paraffin. Simply wrap ribbons, braid and lace around the candle, attaching them with glue. And if you are using decoupage napkins, then cut out a motif of the desired size, attach it to the candle and smooth out the napkin with a hot spoon. Under the influence of heat, the wax will melt, soak the napkin, and the pattern will be imprinted on the surface of the candle.
Gel candle
If everything is clear and very simple with a paraffin candle, then what about gel candles? Is it possible to make such a candle at home? Yes, you can! For this you will need:
- gelatin;
- glycerol;
- tannin;
- reinforced wick;
- transparent shape.
Glycerin and tannin can be bought at any pharmacy, andUse regular gelatin - food grade. You can buy a reinforced wick in craft stores or reinforce (make hard) a regular wick with paraffin. Fat-soluble dyes are suitable for gel candles. The main thing in the process of making a gel candle is not to let the candle mass boil, otherwise the gel will become cloudy. And one more thing. If you use flammable materials to decorate such a candle (dry rose petals, for example), then the wick should not be inserted into the candle to the very bottom, that is, it should end above the level at which the flammable decor is located. So, let's prepare the candle mass. For twenty-four parts of water, take five parts of gelatin, thirty-five parts of glycerin and two parts of tannin. Pour warm water over the gelatin and add twenty-five parts of glycerin. Heat this mixture (do not boil!) in a water bath until smooth. In another bowl, mix ten parts of glycerin with tannin, stir both mixtures and heat. Pour the resulting candle mass into the mold, where we attach the wick in advance (as in the case of paraffin candles). To decorate the gel candle, use any suitable materials: beads, pebbles, shells, twigs. Just first wet these items with wax or paraffin, then put them on the bottom of the mold, pour the candle mass, and then gently shake the mold. Beads and pebbles will be randomly located throughout the candle. This is how you can make a decorative candle with your own hands and even without special skills. Do it! Fantasize, try, experiment - and you will succeed! We recommend reading:


