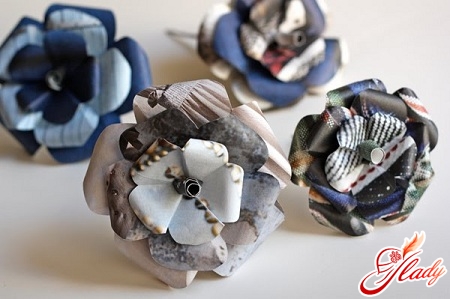
 We women are creative people.And we are also creators by nature. We are always itching to create, improve, decorate and perfect something. And we also love to involve our children (and other people's children, too) in this process. Well, we also have pedagogical inclinations. And for many, many mothers (grandmothers, aunts and sisters), crafts with children are one of their favorite activities. And what we do together, what we do not teach our offspring: sew, knit, embroider, sculpt, draw, craft. So, in order to satisfy your creative itch, realize your pedagogical potential and introduce children to beauty, we suggest you make paper flowers with your own hands. You do not need special skills for this, the most accessible materials will be needed, and the process, believe me, will bring pleasure to both you and the children. What is good about such crafts? First of all, the availability of materials and the variety of techniques. Paper flowers are made using quilling, origami, kusudama, and paper plastic techniques. They are made from regular colored paper, tissue paper, and corrugated paper. Children also happily make such crafts as gifts for their mothers and grandmothers.
Paper Rosettes
All kinds of paper crafts are very popularfor children: they like to mess around with paper. And if you share your child's hobby, then together you should get something. Try, for example, making paper roses. Incredibly simple, but very impressive. And most importantly - accessible and easy for children. For such flowers you will need only colored paper (double-sided), scissors and a pencil. We work step by step.
- From the colored paper, we cut out a square with a side of ten centimeters.
- With a solid line draw a spiral on it, starting from the center and bringing the line to the edge of the square. From the point of intersection of the line with the outer edge of the paper, we draw a line perpendicular to the line of the previous coil.
- On the drawn line we cut out the scroll with scissors.
- Now, from the outer end of the spiral (that very section), we begin to twist the strip of paper into a roll: the spiral curls into a rose.
That's it. The flower is ready.These paper roses are perfect for a decorative panel, for a voluminous greeting card or even for a bouquet. By the way, if you attach these paper flowers to dry branches, you can create an excellent composition in Japanese style.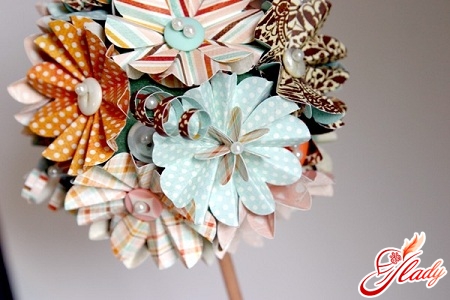
Flowers made of tissue paper
This is also a fairly simple technique for children.The flowers are delicate, translucent and “airy”, just like in a fairy tale! And don’t children like fairy-tale crafts? For such magical flowers, prepare tissue paper, a ping-pong ball, thin soft wire, cotton wool, glue, millet groats, and floral tape. First, make the stamens. Cut pieces of wire five to seven centimeters long. Twist a little cotton wool on one side of each piece, wrap it around the wire and roll it between your fingers. Wrap the rest of the wire in white tissue paper. Now dip the thick (with cotton wool) end of the wire in glue and millet. Also make stems for the flowers from wire, wrapping it with floral tape. Attach about eight stamens to each stem, gathering them into a bunch and wrapping them with floral tape. Now start making the petals. Cut out five rectangles from tissue paper with sides of ten and five and a half centimeters. Place a ball on the paper and wrap it halfway with paper. Twist the ends of the rectangle and take the ball out. You should get a "cup" with two sharp ends made of twisted paper. Attach the paper petals to the wire, alternately applying and wrapping each petal with floral tape. Then trim the outer sharp edges and straighten the petals. These are the fabulous flowers you can make from paper with your own hands!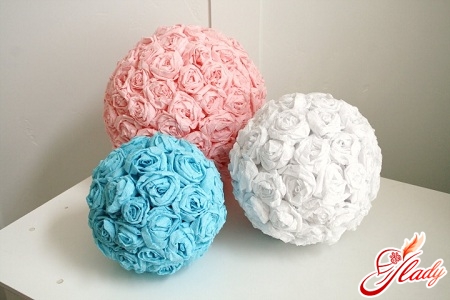
Peony from corrugated paper
I like crafts made from corrugated papercrafts not only for children. Even experienced needlewomen enjoy working with this material. And flowers made of corrugated paper are especially beautiful. I make roses, crocuses, lilies, irises, peonies from them. And believe me, the flowers look very natural, and sometimes even better than real ones. Try making a peony from corrugated paper and see for yourself. We will need:
- corrugated paper sheets of green, yellow and pink;
- soft wire for stems;
- teip-tape (floral tape);
- glue stick.
Cut out oblong shapes from pink paperpetals with a narrow straight edge and a wide wavy edge. For one flower - fourteen petals about twenty centimeters high. From green corrugated paper, cut out two double leaves for each flower. From yellow paper, cut strips ten centimeters wide and fifty centimeters long. Please note: for petals and leaves, cut out blanks according to the grain pattern of the corrugated paper. For the yellow strip, unfold the paper so that the crumpled "grain" is parallel to the long side of the strip. Now wrap the wire with floral tape, slightly pulling it and smoothing it with your hands. Cut strips of yellow corrugated paper with a fringe on one side about a third of the width of the strip. Then wrap these strips around the stems, winding the strips onto one end of the wire and leaving the fringed edge free. Secure with tape. We form the petals, slightly stretching their wide edges and making the petals a little “curly”. Using glue, we attach the petals to the stem, collecting them in several tiers. We straighten the petals, making the flower fluffy and similar to a real peony. We put a wire wrapped with floral tape on the leaves of green corrugated paper and glue it to the paper. We lightly press the paper around the wire, giving the leaves volume and imitating veins. If desired, we stretch the paper, making the edges of the leaves wavy. We attach the leaves to the stems with flowers and admire our creation. Do-it-yourself paper flowers are a great way to spend time with children, teach them to work with this material, make crafts as a gift or just for fun. Children's crafts have a special energy. Adults, unlike children, can no longer devote themselves to the process so selflessly. Use the opportunity to "feed" on creative energy from children. Good luck and success in your creativity! We recommend reading:


