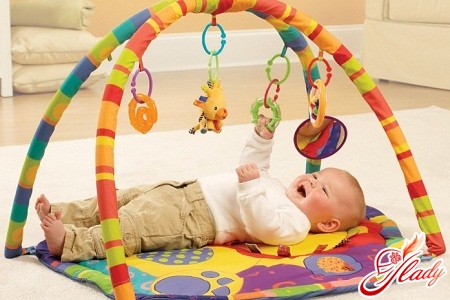
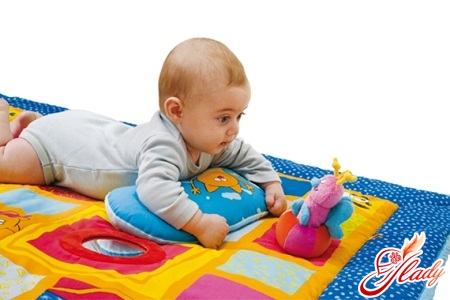
 Developmental mat for children plays an important rolein the process of development and formation of the baby's personality. When playing, the child develops and learns faster. In addition, the presence of parents is necessary to use the mat. Thus, you will have more opportunities to communicate with your baby. Read our article today to learn how to make a development mat or how to knit a mat from soft, warm, multi-colored yarn. All mothers want their children to develop correctly, grow up inquisitive and capable. For this, there are now many toys and various developmental devices. One of such devices is the tiny love development mat for children - this is a play complex with many interesting small details. But the best solution can be do-it-yourself development mats, which you will make for your beloved baby yourself, putting all your love and tenderness into it. Loving mothers and grandmothers create development mats for children with their own hands, which look simply excellent. And it is not so important what materials you used - the main thing is the love put into making.
What is a rug for?
Does everyone know what results can be achieved?with a rug? Do-it-yourself development rugs for children will help develop your child's memory, logic, composure, and attentiveness. A development rug for children gives each child the opportunity to develop independently, in the process of creative, interesting, and free play. Patchwork rugs designed for the development of your child should be used in joint activities turned into an exciting game. Do-it-yourself play rugs should be bright and attractive to the child. But do not be upset if the baby has not shown much interest in your creation. Perhaps he is not yet old enough and needs to grow up a little. Try playing with him in a couple of months. Development rugs for babies help develop a child's thinking, fine motor skills, and tactile perception. You can even make a development rug with your own hands. It is not at all difficult and very interesting, and, in addition, a development rug for babies will allow you to save your money, because children's products are not cheap at all. How to make such a rug so that it lasts a long time? A developmental mat for children should be made taking into account that some parts will become unusable and will need to be replaced, in addition, it should be made “for growth”, so that children can play with it for many years. By replacing individual parts, you make developmental mats for babies more interesting, because each new detail is a discovery for the child. We want to tell you how to make developmental mats for children correctly. And now we will dwell in more detail on the question of how to make a developmental mat. Do-it-yourself developmental mats for children are preferable to those sold in the store. Firstly, the quality of ready-made mats is quite high, and secondly, you can make exactly the kind of developmental mat for children that your baby will like.
How is it done?
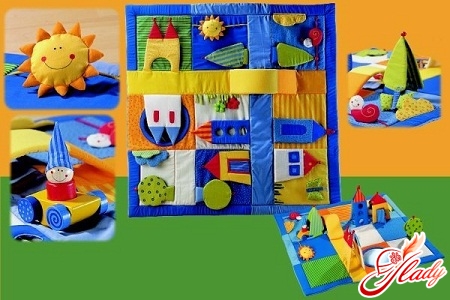
The developmental mat is made by handочень просто, а сам процесс не займет у вас много времени. Два куска плотного материала с красивым ярким рисунком подойдут для основы. Материал может быть любой. Надо взять полтора квадратных метра. Кроме того, развивающие коврики для малышей нуждаются в наполнителе. Для этого лучше всего подойдет синтепон. Необходимо будет также приготовить нитки, пуговицы, веревки, лоскуты, обрезки различных тканей, все, что найдется у вас дома. Вы также можете связать коврик для своего ребенка. Как связать коврик, чтобы он был интересен малышу? Свяжите обе стороны и соедините их вместе. После этого пришейте аксессуары и пуговицы. Возьмем нашу ткань, в центре будет композиция из плотной темной ткани. Развивающий коврик для детей своими руками будет оборудован домиком, который надо пришить к основанию и сделать отгибающиеся отверстия. Прорезать ткань, это и будут открывающиеся окошки. Развивающие коврики своими руками необходимо декорировать. Надо изготовить цветы, птичек, насекомых, зверьков и поселить их в этих окошках. Чтобы развивающий коврик для малышей хорошо держались, необходимо сделать на них сзади «липучки». Иногда надо переставлять их, менять местами, пусть они «ходят друг к другу в гости». Такая игра будет ребенку очень интересна. Развивающий коврик своими руками может быть каким угодно: добавьте цвета и декораций. Яркие и красивые коврики из лоскутков украшаем сверху над домиком солнцем и тучами. Как сделать развивающий коврик, чтобы он максимально отражал все задуманные вами идеи? Используйте разную ткань и аксессуары. Для солнца берем желтую ткань, наполняем ее целлофаном, а лучи делаем из желтой тесьмы. Для туч берем синие кармашки, к которым приделываем голубую бахрому. Это будет дождь. Бахрома, украшающая развивающие коврики для детей своими руками, должна отсоединяться. Невдалеке от дома обязательно должен быть красивый сад. Возьмите материалы различных зеленых оттенков. Таким образом, развивающийся коврик своими руками можно украсить роскошными кронами деревьев. Для цветов возьмем зеленую тесьму – это будут стебли, а кусочки цветных тканей – лепестки. В саду будут жить пчелки и разные птички. Их надо связать, а можно нарисовать и вырезать, а потом прикрепить к веткам деревьев на резинке. Коврики развивающие для детей можно декорировать аппликациями, сделанными по схемам печворка. Если вы не знаете, как сделать развивающий коврик, так, чтобы он понравился вашему ребенку, то положитесь на свою интуицию и фантазию. Они не подведут и подскажут, какой коврик будет лучшим! Развивающиеся коврики для детей своими руками можно украшать на ваш вкус. Только помните о том, что все детали не должны быть слишком маленького размера и не должны составлять угрозу для здоровья малыша. Думая о том, как сделать развивающийся коврик, не забудьте о том, что его форма и вид будут зависеть от возраста вашего малыша. Некоторые применимы уже с первых дней, а некоторые можно использовать только через несколько месяцев. Развивающие коврики своими руками следует изготавливать только из безопасных для ребенка материалов. Возьмите тесьму, леску или веревку, наденьте на нее разные бусинки, погремушки и пуговицы. Пришейте леску по краям, так, чтобы ребенок мог передвигать игрушки. Таким образом, коврики, развивающие для детей, становятся весьма полезны для развития моторных функций и усиления памяти. 
Surprises for the baby
Developmental mats for children can beimprove and supplement with all sorts of interesting devices and means of entertainment. To make it even more interesting for the baby to play with the rug, you need to make "surprises" that improve the developmental rugs for children with your own hands. They are made of thick fabric, closed with snaps, zippers or buttons and attached to the rug. An inquisitive baby will have to try very hard to open them and find out what's inside. In this way, do-it-yourself play rugs turn from a play item into a development tool. The rug for kids you create can be even more diverse. You can divide it into several squares. In one there will be a house, and in another, for example, the seasons. For the winter period, we make snow from white fringe, a Christmas tree from green velvet, and on it toys from beads and appliques. From thick cellophane, we make a snowman and a slide. Educational rugs for children, symbolizing summer - this is a lot of multi-colored rags, cellophane, beads, buttons, from which flowers and fruits are made. We make a lake from blue fabric, and fish figures on elastic bands or "Velcro". The educational rug made by hand primarily has a cognitive and instructive function. Autumn will be with mushrooms, yellow and red leaves, autumn rain. In the spring - a lot of puddles, birds fly in and flowers bloom. Here you can show all your imagination. Knitted educational rugs look great. How to knit a rug for your baby? You will need yarn and a pair of knitting needles. In addition, no one has canceled your imagination, with the help of which you will make interesting decorations and tasks for your baby. The educational rug for children made by hand should be decorated differently for boys and girls. If you are making a rug for your son, it is better to fill it with cars, trains, balls and boats of different colors and sizes. A DIY children's development mat for your daughter can be made in the form of a large flower, and the multi-colored petals can be filled with different toys. It is better to keep development mats made of scraps separately from the rest of your child's favorite toys. It is better to use them only during classes - when you are trying to explain something to your child. It is better to hide the DIY children's development mat away from your child. This way, your baby will always be interested in this "special" toy. Don't be afraid to fantasize and experiment.
In conclusion…
Developing rugs for children will help indevelopment of the baby not only in physical, but also mental and moral terms. A do-it-yourself development mat will create a special atmosphere for your child, created by your own hands. The more creatively you approach the manufacture of such a mat, the more interesting it will be for your baby to play with it. A do-it-yourself children's development mat specially takes into account all the needs of a small child. It is soft and comfortable for the baby. He will be happy to sit on it for a long time. Do-it-yourself play mats will diversify your child's leisure time. When going out into nature, do not forget to take it with you, as with its help you will protect the baby from sitting directly on the ground. A well-made do-it-yourself development mat for children will arouse the child's interest, and it will become his favorite toy, with which he can play for hours, and you will get a lot of free time. A do-it-yourself children's development mat is not only useful for the baby, but also simply improves his mood and pleases him every day. Do not forget that you should think about how to make a development mat based on the age, capabilities, talents and needs of your child. And you did all this for your beloved baby with your own hands! We recommend reading:


