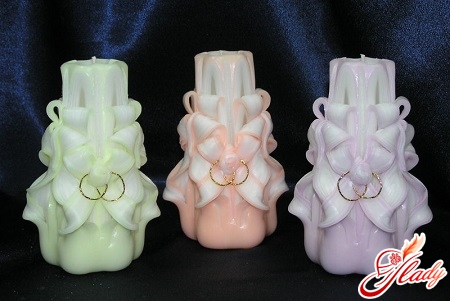
 Carved candles come in different types:Easter, wedding, New Year. And if you have difficulty choosing a gift, buy this unique product - you will definitely not go wrong! A creation of extraordinary beauty - this is the thought that comes to mind when you look at such a candle. And naturally the question arises - how? How to make a carved candle? How can you create such a masterpiece with your own hands? This article is dedicated to the answers to all questions. It is worth saying right away that the process of creating a carved candle is quite labor-intensive, moreover - costly. But let's take everything in order ....
Stages of creating a carved candle
Making carved candles with your own hands can be divided into several main stages:
- Reflux of paraffin billet for a candle;
- The equipment of tanks with heating;
- Dipping the billet in hot colored paraffin until the desired number of layers is obtained;
- Directly cutting candles;
- Coating the finished product with a fixing varnish.
The process itself is not particularly difficult.The main task is to prepare the equipment and materials for creativity. To buy all this, you need to find people who professionally make decorative candles and order the necessary materials from them. Or try to search for them online yourself. Just don't make a mistake with your choice! After all, the quality of the future candle will depend on the quality of the paraffin and dyes.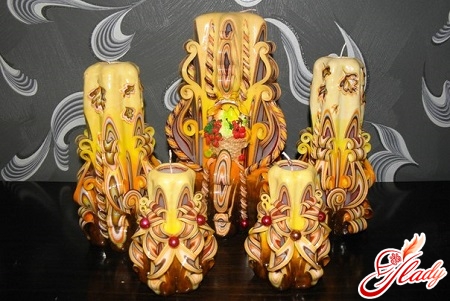
What is needed to create carved candles?
So, let's figure out what materials we need for the work.
- Paraffin or wax
Buy only highly purified material, without any chemical additives. Pay attention to the fat content of the paraffin. The outcome of the entire process will depend on these two parameters;
- Basis for a candle
It is made from paraffin or wax, but with the addition of special additives that prevent the candle from "flowing". In addition, such a mixture does not smoke, and the candle flame burns evenly and stably;
- Forms for candles in the form of a five-pointed star
It is very difficult to get really high-quality formsdifficult. And they cost a lot of money. Molds are made of various materials: plastic, silicone or metal. Plastic blanks are not durable at all. After 2-3 uses, they begin to break: hot paraffin sticks to the walls and is almost impossible to remove without damaging the mold itself. Metal products are rare, they are almost impossible to get. The best option in this case is silicone. This material is elastic, withstands high temperatures well. About two hundred paraffin bases can be removed from one such mold;
- Candle for candles
Each product is made speciallywick. Its texture and thickness depend on the shape of the candle, as well as its height. The wick is made of special threads intertwined with each other. The main thing here is to guess with its thickness: too thin will often go out, and too thick will provoke excessive soot;
- Varnish for candles
This material gives the finished candles shine andprotects them from external influences. According to the manufacturers, the varnish is completely non-toxic, that is, it does not emit any harmful substances when burning. Regular acrylic varnish is not suitable here - it does not lay evenly on the surface of the candle. Special varnishes for paintings are also not worth buying, since they have an unpleasant smell and do not give the desired shine to the product. So there is only one way out - to buy varnishes designed specifically for carved candles. They can only be found on thematic resources on the Internet;
- Dyes for paraffin
In the production of carved candles are usedfat-soluble dyes. You can buy traditional dyes intended for painting candles. Only in this case your work will be several times more complicated. Such material poorly covers the previous color, this becomes especially visible after the candle dries. As a result, the finished product will acquire a "speckled" color. To achieve effective painting results, it is necessary to order dyes from companies that supply materials intended specifically for carved candles.
- Baths for melting paraffin
Here you have two options:either make such a bath yourself (involve your husband), or order it together with other materials. In principle, for a man who knows how to hold a welding machine in his hands, this problem should not seem too difficult. It is necessary to make a rectangular container from stainless steel, which in turn must be divided into several sections (one section - one color). You also need to take care of heating the melted paraffin. For this, a wooden stand is made under the bath, into which an electric heating element is mounted. The paraffin must be constantly maintained at one temperature - 80-90 degrees Celsius.
Step-by-step instruction on making carved candles
So, let's assume that you already have all the necessary materials. Now you can start creating. Ready? Well, let's begin!
- Attach the wire to the paraffin billet, so that it is convenient for you to dip it in a container with colored wax;
- Place a bucket of cold water near the bathroom;
- We immerse the workpiece in the first color for a couple of seconds,pull it out and immediately lower it into the water (also for a couple of seconds). This is necessary in order for the colored wax layer to cool slightly, and the next layer evenly distributed over the surface;
- We wipe the workpiece with a clean piece of cloth and immerse it in a second color. We repeat the trick with water;
- Thus, you need to make 15-20 multi-colored layers;
- After you finish painting, gently and evenly cut the bottom of the future candle;
- Now at the top, make a small round hole, into which we fix the wick;
- And then the most important process is read - cutting the candles;
- It takes you no more than 10-15 minutes. Otherwise the wax will solidify and it will be impossible to cut it;
- For cutting, special knives are used;
- Carefully cut off the upper layer of narrow strips, but not to the end;
- These strips can simply be folded inward or outward, you can weave braids from them. In general, let your imagination work;
- And in the end, we dip the finished candle in a container with varnish.
We all admire the creation that youcreated with your own hands! Of course, be prepared for the fact that you are unlikely to be able to create a truly beautiful candle the first time (or the second time, too). This requires constant training, persistence, and desire. Over time, you will learn to cut real masterpieces from paraffin. And who knows, maybe this innocent hobby will grow into a small home business that brings in quite a tangible income. We recommend reading:


