 Women's hands are always in sight.That is why taking care of them is an important point. As important as maintaining a perfect figure and fighting wrinkles. A modern woman can do absolutely everything. Cook an exquisite dinner, do cosmetic repairs, and even find a breakdown in a car. But at the same time, she will never allow her hands to look sloppy, because a neat manicure is a sign of elegance. And who among us does not want to feel like a real lady? Probably, there is no girl who has not tried to do a manicure on her own. After all, not everyone has enough time, and sometimes money, for beauty salons. And why pay if it is easy as pie to do a beautiful manicure at home. The main thing is to think carefully about how you want to look today, set a goal and achieve it, no matter what!
Do you know the history of manicure?
It turns out that manicure gained popularity back inAncient Egypt. Even lower-class Egyptian women painted their nails with henna and other herbal dyes. But wealthy ladies had special sets that allowed them to tidy up their hands. European women learned about manicure only in the 19th century, at the same time it became popular in Russia. And then a real manicure boom began. Not only girls but also young men began to take care of their hands. Everyone discovered the benefits of herbal baths and polishing tools. For a long time, such thorough care was available only to wealthy people, and well-groomed hands and smooth, shiny nails became a kind of calling card of high society. Today, of course, everything has changed. On store shelves you can find everything from nail polishes and manicure sets to special devices for exclusive nail design. And in this article we will talk about home manicure, learn how to properly care for nails and learn how to draw interesting and stylish designs.
Pre-treatment of nails
Classic manicure can be done in two waysmethods: edged and dry. The latter has become popular quite recently and came to us from Europe, so it is popularly called "European". It does not involve steaming the hands. Special products containing fruit and lactic acids are used to soften the skin. Due to their softening properties, the cuticle becomes pliable and is simply pushed back to the base of the nail with an orange stick. To give the nails the desired shape, files with different grain sizes are used: diamond, ceramic, cardboard. You need to choose a tool based on the density of your nails. And it is best to buy a combination file that has several surfaces: for cleaning, for polishing, for shaping. Experts categorically do not recommend using a metal file, since it injures the nail, which can lead to delamination and brittleness. Edged manicure is performed in a well-known way - by steaming the skin of the hands. Manicure baths can be made with sea salt, medicinal herbs, and essential oils. After steaming, the cuticle is trimmed with special scissors. This is done very carefully so as not to damage the skin around the nail. Then each nail is lubricated with restorative oil, and after 10-15 minutes (when the oil is absorbed), a thick cream is applied to the hands. Nails are filed in the classic way. As you can see, you can put your nails in order in literally 15-20 minutes. This is how much time you will need to carry out the above procedures. Which one to choose is up to you. But then the most interesting process begins - nail design. This will require all your skill, imagination, patience and accuracy. You can draw whatever your heart desires on your nails. Start from the general image, mood and go ahead - create masterpieces!
Poppy Field
So, you will need: base coat, light green matte varnish, acrylic paints, thin brush, varnish fixer.
- We are laying the foundation - it is necessary for the varnish to lie flat. We are waiting for complete drying;
- We paint each nib with green lacquer, we also wait for drying;
- Now you need a dark green paint. We immerse the brush in water, then we collect a small amount of paint and draw oblong leaves. You can draw at random;
- We rinse the brush, apply a red paint on its entire surface, and on the tip it is yellow. So when you paint a bud, the colors will mix and you will get multi-colored petals;
- It is not necessary to choose the poppies, you can draw any flower that you like;
- Next, we need black paint. She draws the core of the flowers;
- Having finished work on all the nails, we wait for complete drying and apply the fixer.
This is such a bright and colorful design! The best option for a beach party or a romantic walk. Especially in combination with an airy sundress.
Snake for happiness
The current year is the year of the water snake.So let's create a suitable design to appease the snake. Who knows, maybe such a manicure will bring good luck and happiness? For work you will need white varnish for French manicure, matte colorless varnish (it is best to take "smart enamel"), a set of shiny varnishes on a transparent base, which can be purchased in a professional store.
- First we draw the edging, as for the jacket. We make it broad;
- Now we cover all the nails with "smart enamel", preferably in two layers. We are waiting for complete drying;
- Take the blue sequins and with a thin brush draw three transverse strips on the white edging. Try to keep the distance between them the same;
- Next you need silver sequins. With their help we draw a snake. It should be located in the middle of the nail, vertically, without capturing the blue strips;
- Lilac sequins set the points between the snake's bends;
- Continue to act on your own. If you want to add more bright colors, draw a red "smile" at the bottom of each nail. And between the blue stripes, carefully draw a line of green;
- Cover the finished manicure with a fixer.
This design will definitely give you a goodmood and will give you self-confidence. An evening dress, a high hairstyle that reveals a delicate neck, high-heeled shoes – you will undoubtedly conquer the man of your dreams.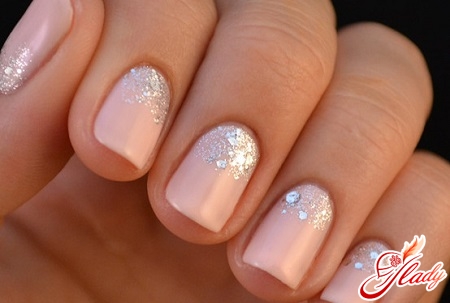
Love does not love…
You will need: white matte polish, pink glossy polish, silver glitter polish, and a few rhinestones.
- We apply a white varnish on the entire surface of the nail;
- As soon as the base dries, take a pink lacquer andDraw the petals in the upper right corner of the nail. Imagine that the corner is the core. From it, and start to remove the petals. As a result, you should get half of the flower;
- With the help of silvery varnish we circle the flower along the contour;
- Now with the same color draw a couple of curls, right and left. One should turn out under the petals, the second - parallel to them;
- The rhinestones adorn the very tip of the nail and, if desired, add them to the curls. Do not overdo it, one for each will be enough;
- We fix the drawing with two layers of the finish coat.
This design goes with almost any outfit. It will be equally appropriate for office days and weekends in nature.
From the smile will be all lighter
Are you feeling the spring blues?Are there gloomy clouds and rain outside instead of the expected sun? Don't be sad! Draw a smile on your nails, and the day will sparkle with new colors. Stock up on multi-colored varnishes, yellow and black should definitely be in their arsenal. The rest are up to you.
- The first step is applying a pastel-pink shade to all marigold nails;
- After it dries, take any color, for example, blue and draw a pea of different sizes;
- So we process each nail. Colors choose any, you can make all the peas of the same color, you can alternate the color through one nail, or you can choose a multi-colored design. Here, as the fantasy tells;
- When the peas are dry, take a yellow lacquer and draw a smiley face, it should look bigger than the rest of the patterns. Eyes and mouth smiley draw in black lacquer using a very thin brush;
- Cover everything with a fixer.
Smileys can be placed anywhere on the nail.Place them randomly, so the design will look more cheerful. Green, blue, red or raspberry colors are appropriate for such a manicure. All of them go well with a sunny smile.
The sun in the hands
You will need: base coat, nude and bright yellow polish, white and black polish, rhinestones, gold and silver nail polish, brush.
- We put the base, wait for the drying;
- Now we take the bodily varnish and cover the entire nail;
- We make diagonal strokes in yellow, leaving small gaps;
- The same method is applied on top of white lacquer;
- Gold and silver paint draw a few small leaves, directed to the base of the nail;
- In black, carefully draw the leaves. You can step back a little from the outline and create some interesting pattern at your discretion;
- We paste the rhinestones, as fantasy tells us;
- Cover with protective varnish for shine.
The design turned out to be especially festive and bright, like the summer sun.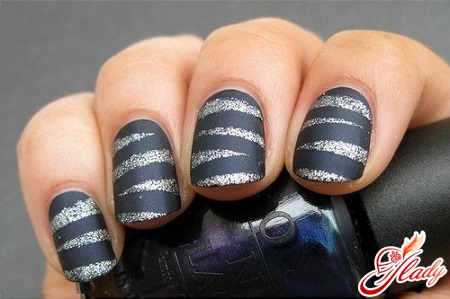
Once a strip, two strips
Striped patterns have been in fashion for several seasons in a row. And this applies not only to clothes, but also to manicure. For the following design, you will need only two colors: white and black.
- We begin with the usual application of base lacquer;
- After drying it, we paint the marigold in white. The varnish must be chosen exactly matt, so that no gaps remain;
- Now, on the index finger of each hand, draw a black, wide crescent. Straight in the middle. The "crooks" of the crescent should look up;
- Next, in the same black color, we paint the place at the base of the nail, as if repeating the natural contour;
- On the other fingers, a crescent is not needed, we process only the base;
- Now draw the black bars on the index fingers, starting from the inside of the crescent and pointing them upwards. Three thin lines in the middle and two on each side - a little thicker;
- Other fingers are also decorated with three strips in the middle, beginning from the base and ending with the tip of the nail;
- We fix the result.
This manicure looks very strict and at the same timetime exquisite. It will go well with a classic trouser suit. Suitable for a business meeting or interview. As you have already seen, you can make a beautiful manicure at home. The main thing is to approach the work with desire and have a little patience. Maybe you will not be able to apply a picture on your nail perfectly right away, but after a few practices you will see that there is nothing difficult or scary about it. Try, fantasize and experiment, create your own unique pictures and always be irresistible! We recommend reading:


