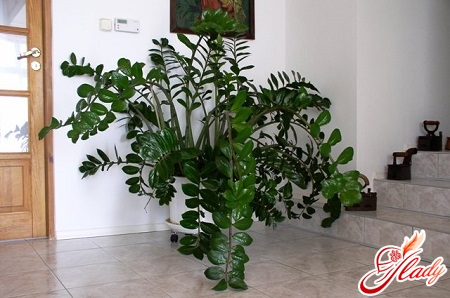
 Zamioculcas is a fairly new phenomenon indomestic indoor floriculture. This overseas guest quickly became very popular, but not all newly-minted owners of this flower manage to save the purchased plant. Although it is believed that zamioculcas is quite unpretentious in maintenance and care, it happens that it dies immediately after moving from the store to the house. And the fact is that this plant needs a proper transplant. Perhaps, it is precisely how to transplant or plant zamioculcas correctly that beginners fail to do. Therefore, we suggest that you learn the rules of this procedure, following which you will be able to transplant it without negative consequences for the plant, and, if necessary, plant it. In short, we study the rules for transplanting zamioculcas for its successful cultivation in indoor conditions.
Conditions for successful transplantation
If you follow a short set of recommendations,then the transplantation of zamioculcas will always be successful. Let's first understand these simple rules, and then consider the transplantation procedure itself. For successful transplantation of the plant it is necessary:
Choice of dishes
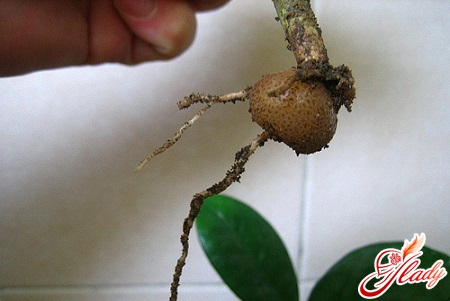
Regarding the transplant itself and the dishes in whichzamioculcas should grow, this indoor flower is quite capricious. Often, an incorrectly selected container can lead to the death of the plant and complicate the transplant procedure. It is very important to choose the right container for the plant. One of the main mistakes in choosing is too large or very narrow containers for the flower. The optimal size of the pot is a low container, slightly wider than the zamioculcas tuber. Why? If the pot is narrow and high, it will be difficult to remove the flower from it during transshipment. And flower growers also note that as soon as the roots of the zamioculcas grow to the sides of the container, the flower begins to develop more intensively. As for the material from which the flower pot is made, zamioculcas is not recommended for growing in ceramic containers. Firstly, the flower can die in such a pot due to lack of space, and secondly, during transshipment it is almost impossible to remove the flower from such containers without harming the plant. The ceramic pot can only be broken, but this will inevitably damage the roots. So, to grow and then safely transplant zamioculcas, you need a plastic pot, not very high and with a diameter slightly larger than the flower tuber.
Transplant procedure
After the zamioculcas moved fromstore into your home, it needs its first transplant. But this should be done no earlier than after two or three weeks of the adaptation period. Then the young plant is transplanted annually, and after four or five years - less often. The biggest mistake when transplanting zamioculcas is freeing the roots from the soil. Usually, after such barbaric treatment, the plant gets sick for a long time, and often dies. To properly transplant zamioculcas, you just need to transfer it to a new pot along with a lump of earth. To do this, the soil must be slightly moistened, and the walls of the pot must be pressed down. After this, the flower pot is slightly tilted and, tapping on the bottom, the flower is pulled out along with the earthen lump. The new prepared pot should be slightly larger in diameter than the previous one. Drainage must be poured onto its bottom and the flower with the earth must be carefully placed inside the pot. After this, the space between the earthen lump and the walls of the pot is filled with new soil mixture, tamping it with your fingers or a stick. The transplanted zamioculcas must be watered so that the newly poured soil in the pot settles and add soil to the level of the old earth lump.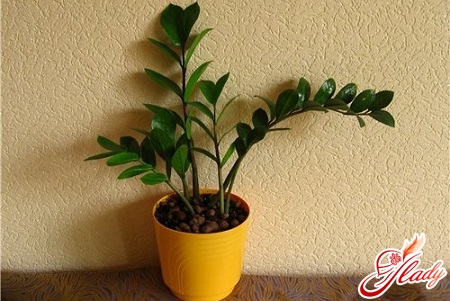
How to arrange a zamiokulkas
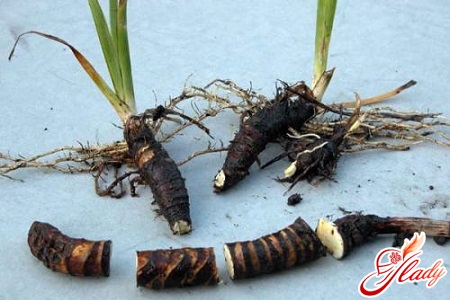
This indoor flower only needs to be plantedfor propagation purposes. If you feel that the plant is cramped in the old pot, then you just need to transfer it to a more spacious container. As you remember, the plant experiences pain when releasing the zamioculcas tubers from the ground during transplantation. That is why you should not replant the flower without the need for propagation. However, if you decide to propagate your zamioculcas by dividing the bush, then try to carry out the procedure in the most gentle way. Remove the bush from the old pot, as in the case of transplantation, and free the roots from the soil. Now just try to divide the bush into two or three parts with the same number of stems with your hands, carefully separating the roots. If the roots are very intertwined, then cut them with a sharp knife, rubbed with alcohol or hydrogen peroxide. You can also divide the tubers (potatoes) themselves. To do this, simply cut the tubers in half with a sharp knife, and let the cuts dry. Then sprinkle the cuts with crushed charcoal and plant the divided bush in new pots. Do not forget about the rule, according to which the diameter of the pot should only slightly exceed the size of the tuber. Otherwise, your planted bush will be “stuck” for a long time in the state and size in which it was transplanted. And one more important point. Do not water the planted zamioculcas for at least three days. And fertilize with fertilizers only a month after dividing the bush. These are the simple rules for transplanting (or rather, transshipment) zamioculcas and planting the bush. Be prepared for the fact that this flower reacts very painfully to being moved to a new pot, even if the owner transplanted it according to all the rules. But if you did everything correctly, then such a temporary ailment will quickly pass, and your zamioculcas will quickly return to its previous shape and will delight you with lush greenery and elegant beauty for a long time. Good luck! We recommend reading:


