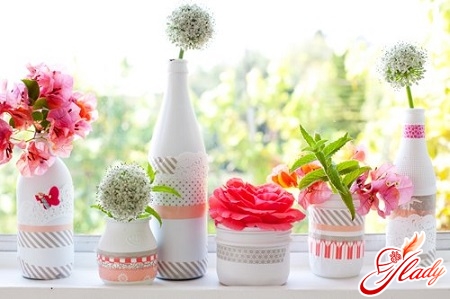
Of course, there are all sorts of vases and bowls todaythere are simply too many of them in stores. But sometimes you want something exclusive! Something unusual and stylish! Something that only you have, something like "oh, how lovely!", something like "where did you buy that?" And you, modestly looking down or casually waving your hand: "Oh, I made it myself." And for such hand-made creativity you don't have to be a virtuoso potter or glassblower. You can make a nice exclusive vase with your own hands from ordinary bottles (glass or plastic) or even from jars. And it won't require any special skill from you, and it won't take that much time. Let's try?
Vase from a plastic bottle
Soon after they appeared in our everyday lifeplastic bottles, folk craftsmen quickly found a not quite traditional use for them. What they don’t make with their own hands from this waste material! So they came up with the idea of making vases. Of course, there are a great many options for such plastic vases, but one of them is especially interesting. To make such a vase with your own hands, we only need a large plastic bottle with a figured bottom and preferably with a narrowed “ring” above the bottom. Then the vase will look especially elegant. So, remove the label from the bottle and wash the plastic thoroughly, trying not to scratch it. Therefore, do not use hard sponges and abrasive detergents. Now cut the bottle approximately to the middle of the height. However, the vase can be made higher. The only thing to consider: in its finished form, our vase will still be about twenty centimeters lower than the cut bottle. And it's all about the fringe, which will become the original decor of our vase. Next, we need to mark the desired height of the vase from its bottom and draw a straight line around the circumference - the border of the top of the vase. We will cut the remaining upper part with fringe and make decorative trim from this fringe. So, from the cut line to the marked line, we make vertical cuts - strips 1-2 cm wide. It is important that these strips are the same length and width and, of course, with very even edges at the cut. Now we bend these strips outward. To make the bend even, you can turn the bottle upside down and gently but firmly press it to the table at the bend of the strips. The circumference - the top of the vase - should be as even as possible. Then we proceed to decorating the edge of the vase. We bend one strip so that its top is bent at an oblique angle of about 90 degrees. In this case, the top of the strip should touch and slightly extend (with one small corner) beyond the edge of the fold line. The folded strip should pass over the closest strip to it and under the next two. If you want to get a neat decorative edge of the vase, make sure that the corner of the folded strip touches the outer lower edge of the third strip. We bend the second strip in the same way. Only we pass it over the next two and tuck it under the third. But we bend the next strip exactly like the very first one. Thus, alternating the method of wrapping and fixing the strips, we bend all the fringe, intertwining the cut strips. As a result, we will get a braided serrated edge of our vase, made from a plastic bottle with your own hands.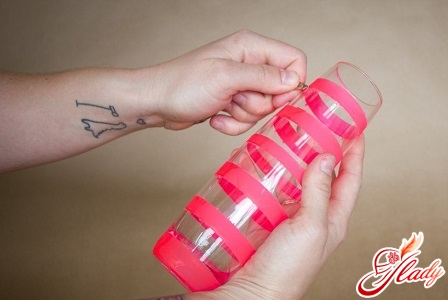
Vase for a French bouquet
An original way to use it right awayseveral bottles to make a vase. Such a vase, made with your own hands, is used for a French bouquet, when flowers are placed in different containers. That is, we will make a prefabricated vase. To make it, you will need nine not very large bottles with a wide neck, for example, left over from baby food. In addition, you need to prepare a beautiful silk ribbon or a strip of fabric (silk, organza, nylon) for decoration. You can also decorate our vase with a decorative cord or braid, which is desirable to choose in the tone of the ribbon. To fasten the bottles, you will need silicone glue and transparent wide tape. That's all we need to make a vase for a French bouquet with our own hands. Now we start making the vase. We need to glue the clean and dry wiped bottles together, connecting them into a single composition. To do this, first take two bottles and glue them to each other with their sides. Now we attach the third bottle to them (in one row) and glue it too. We also glue two more rows of the remaining six bottles. And now we glue all three rows of bottles together to make a semblance of a cube (three by three bottles). To make the composition durable, we wrap it with tape, laying a transparent tape along the central (middle) part of the bottles. We mask the tape and at the same time decorate the vase with a colored tape, which can also be attached with glue. On top of the tape, we wrap the vase with a colored cord. That's it! All that remains is to make a French bouquet. To do this, fill the bottles with any flowers and decorative greenery. By the way, the same vase can be made from tall jars with a wide neck.
Vase from a can
With your own skillful hands from ordinary jarsCraftswomen make amazingly beautiful vases! And here it is not so much a matter of skillful hands, but of the taste and imagination of the craftswomen. After all, we already have a container! It is only a matter of how to decorate it. Depending on what method of decoration you prefer and what materials you will use, you can get a vase in a different style. For example, in an eco style. For this we will need any colored rope made of natural materials. It is good if it is a decorative rope made of jute, raffia or hemp. And even better if it is a two-color rope. However, you can make such a finishing material yourself by twisting two ropes of different colors. In addition to the jar and the rope, prepare scissors, glue and double-sided adhesive tape. So, let's start making. From a roll of adhesive tape, cut off a strip equal to the height of the jar. Now glue it along the jar, from the bottom to the neck. Next, take the rope and secure its edge near the bottom of the jar, bending back the adhesive tape. Now start wrapping the jar, applying tight turns of rope, trying to ensure that there are no gaps between them. As you wrap, gradually remove the protective strip of adhesive tape, thereby fixing the rope. To ensure that the turns fit tightly to the jar, apply them by pulling the rope, and press it tightly with your finger at the point where the rope touches the adhesive tape. When the winding reaches the neck, simply cut the rope. Such a vase can be used not only for bouquets, but also as a decorative interior accessory.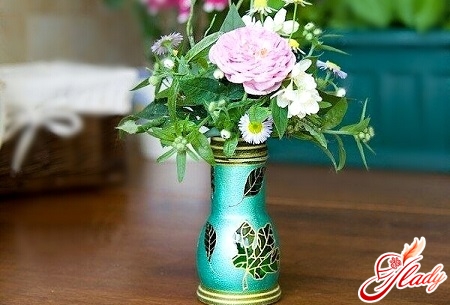
Variants of decor of a vase from a bottle
As you already understood, make a vase with your own handsfrom a bottle or a jar is quite simple. The principle of decorating a vase with a rope can be used when working with any similar material: twine, cords, braid, knitting yarn, ribbons. In addition, any vase made of glass bottles or jars can be painted with stained glass paints, decorated using decoupage technique, even decorated with ordinary multi-colored electrical tape. And they can also be dressed in hand-knitted covers, decorated with lace, beads, buttons, beads. And craftswomen also manage to decorate such vases with ordinary stockings (tights). Yes, yes! Don't be surprised! Ladies' tights soaked in PVA glue become a very flexible and obedient sculptural material! And then all that remains is to cover such a vase with acrylic or spray paints. An original solution is to decorate a vase with natural materials: pumpkin seeds, cereals, tree branches, shells. In short, almost any material can be an excellent decoration for a vase made with your own hands from a bottle or a jar. As they say, where there is a will, there is a way. Therefore, look for opportunities, use any suitable materials and do not hesitate to give free rein to your imagination. After all, hand-made is always exclusive, unique and original. Naturally, your vase, made with your own hands, will definitely turn out just like that. By the way, vases made from bottles are very convenient to use as hanging elements of interior decor. And in any room of your home, they will be quite appropriate and organic. So go for it, and you will succeed! Good luck!


