 We girls are such throwers!Such romantic natures that it takes your breath away. There are restless chatterboxes and concentrated silent ones among us, but we all want to be heard. By the way, many of us are so timid that we are simply afraid to speak out, fearing to be ridiculed or misunderstood. And for others, this fear adds bravado to their behavior. However, each of us can have a silent and all-understanding interlocutor - our personal diary. Diaries became fashionable among educated aristocrats of the nineteenth century. And from that very time to the present day, they are popular with young and not so young ladies. By the way, the tradition of making diaries with your own hands is also quite old. And although printers offer us all sorts of options for such ready-made diaries, a personal diary made with your own hands is always better. So, without further ado, let's get down to making it.
Diary-folder
A diary that we will be putting together, as they say, from scratch. To make it, you need to prepare:
- Thick paper on the cover is a rectangle with sides of 28 and 15 centimeters;
- Paper for diary pages is rectangular sheets with sides of 20 and 11 centimeters;
- Thread or braid for strings - about 30 centimeters;
- Two eyes (metal rivets) with a diameter of 3 millimeters;
- A scrap of skin;
- Marker;
- Scissors;
- Ruler;
- Stapler.
First, we'll make the cover.Take one sheet and turn it over with the long sides up and down. Measure 3 centimeters 8 millimeters from the right short edge and draw a straight line parallel to this edge. Step back 12 centimeters from the left edge and also draw a vertical straight line. Now cut out two circles-buttons from leather with a diameter of about four centimeters. Turn the cover face up and on the right side, about a centimeter from the edge and in its middle, attach a leather button. For this, use a rivet and a hammer. Make folds along the drawn lines, folding the paper inward. On the opposite side near the left edge of the cover, attach the second button in the same way as the first, stepping back two and a half centimeters from the edge. Insert the tape into the eyes and attach it, tying knots on the inside of the cover. Fold the inner pages in half, put them into the cover, aligning the fold line with the left fold of the cover. Fasten the pages to the cover with a stapler at the junction of the folds of the cover and the pages. That's it. Our diary-folder, made with your own hands, is ready!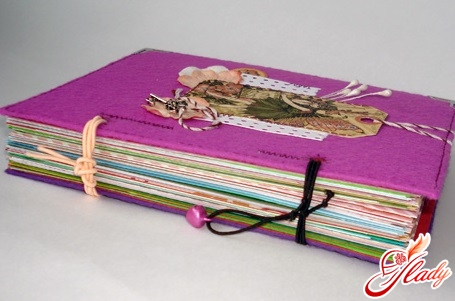
Personal diary-notebook
Make a notebook like this for your personal diaryvery simple. And although we use a ready-made notebook for it, the diary will turn out very impressive, and most importantly - it will emphasize your individuality. For a young lady, it is best to make a diary with a beautiful applique in the form of a flower. Moreover, the brighter and more exotic the applique is, the more impressive and unique the diary itself will be. For it we will need:
- A ready notepad on a metal spiral;
- Cloth for cover;
- Cloth for application;
- Glue;
- Decorative braid;
- Pencil;
- Awl;
- Scissors.
First, you need to make a fabric cover.To do this, pull the spiral out of the notebook and remove both parts of the cover. Now cut out two pieces of fabric from the fabric you prepared for the cover, the size of which should be two centimeters longer and wider than the size of the cover. Glue the fabric from the back of the cover to both of its parts. Carefully fold the excess fabric over the front and glue it too. Cut out two more pieces of such a size that the pieces lie on the front side of the cover, covering the folded and glued fabric. Glue these pieces as well. Glue the braid to the joints of the back and front pieces. Cut out an applique in the form of a flower from another fabric, process its edges and also glue it to the front cover of the cover. Using an awl, poke holes in the fabric in the places where the holes from the spiral were. Insert the spiral, assembling the notebook from two covers and sheets of paper. Our DIY diary is ready!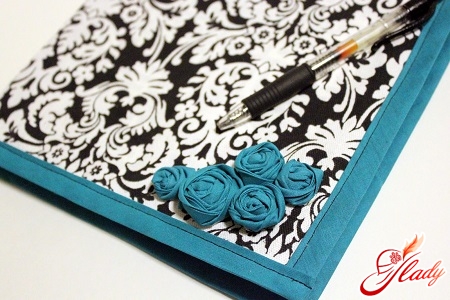
Rainbow Diary
For such a cheerful and colorful diary we needyou will need many sheets of colored paper. You can use office colored paper, white paper colored with food coloring or watercolors, scrapbooking paper, or even colored thin cardboard or paper wallpaper. In addition to colored paper, you need to prepare:
- Thick, dense cardboard;
- Large flaps of bright colored felt;
- Paper for gluing the inside of the cover (fly-mouth);
- Hole puncher;
- Sewing machine;
- Threads in the tone of felt or contrasting;
- Thin tailor elastic;
- Clay "Moment".
We cut all the paper into rectangular sheets.A5 format, make holes in it with a hole punch at the same distance from the edges and stack all the sheets. Actually, the inside of the personal diary is ready. It remains to make the cover. Cut out two rectangular blanks from cardboard, the size of which should be approximately one centimeter larger (on each side) than the length of the sides of the inner sheets of the diary. Cut out rectangular blanks from felt, the same size as the cardboard ones plus one centimeter on each side. Put the felt blank on the table, place the cardboard rectangle on it, leaving allowances for the bottom blank on each side. Grease these free edges with glue and wrap them, pressing them to the cardboard. Cut off the felt corners sticking up only after we make sure that the corners of the cover are well glued. Glue the second blank for the cover in the same way. Now, using a sewing machine, we sew a decorative stitch along the perimeter of both blanks for the diary cover. Then, using a hole punch, we make holes that should exactly match the holes on the inner pages. From the endpaper paper, we cut out rectangles with sides a couple of millimeters smaller than the sides of the cover. Using a hole punch, we make holes in the rectangles (matching the holes on the cover) and glue the paper endpapers to the back of both blanks covered with felt. We sew the holes on the cover by hand or decorate them with metal eyelets for scrapbooking. By the way, decorative corners are also sold in scrapbooking stores. They can be attached to the outer corners of the cover. We decorate the front side of the cover at our discretion, gluing on any applique made of paper, postcards or felt. You can also use beads, buttons, ribbons, braid or any other decorative elements. We assemble the diary by placing a stack of inner pages between the cover pages. We fasten it by first threading an elastic band through the upper holes and tying it with a strong knot, and then we also thread the second elastic band through the lower holes. Thus, we have a rainbow diary on soft rubber rings. How to decorate a diary If everything is clear with the external decoration of a diary made with your own hands, then the question of decorating its inner pages remains open. Naturally, we try to come up with something to decorate the pages themselves, so how can they be diversified?
In short, a personal diary made with your own handswill become not only a wonderful conversationalist, but also a reason to demonstrate, develop and improve your creative abilities. You just need to apply your skillful hands and fantasize a little. Go for it! And you will definitely succeed! We recommend reading:


