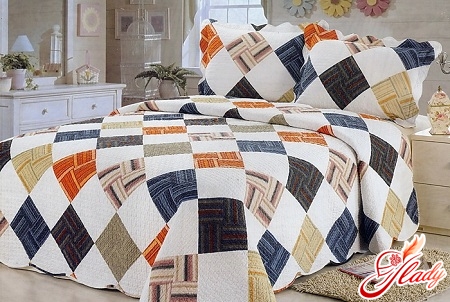
 You have the desire to create with your own handpatchwork masterpiece? Well, quite understandable desire. After all, created in the technique of patchwork covered, blankets, pillowcases, tablecloths and other home textiles can become an exclusive decoration of the interior. They will not only decorate your house, but will add to it a unique color, special comfort and warmth. In addition, such exclusive handshake is not only able to do with quilts, but even for beginners. However, even if you are not going to seriously engage in patchwork sewing, and just know how to scribble on a typewriter, then cover in the style of patchwork, too, master. So, let's begin.
Tools and materials
In order to sew by hand a patchworkyou will need a blanket, first of all, rags. For a blanket measuring one and a half meters by two meters thirty centimeters (standard size) you need sixty square flaps with a side of twenty-three centimeters. In addition, you need a piece of cloth (1.5 × 2.3 m), which will be the wrong side of the veil, and a sintepon (gasket) measuring thirty by two hundred. Prepare also threads of two colors: the color of the wrong side and the color of the leading (dominant) flap. The tools needed to sew a blanket: sewing needles or pins, a sewing machine, a scissors or a roller knife.
Selection of flaps
Sewing your own blankets is not difficult. It is more difficult to pick up scraps for him in a matching color scheme. Quilt in patchwork style can be made in two-color or multi-color.
- Two-color version
For such a blanket, pick thirtypatches of monophonic pastel color and thirty dark shreds. If you want to use printed fabrics, then the pattern should be more light flaps, and the figure itself is desirable to choose a fine. What color combinations can I use? Here are some interesting options: lemon and light brown (caramel color), milky pink and burgundy, ivory and the color of dark chocolate. As for the texture of the fabric, it can be any, but the density and thickness of the flaps should be the same.
- Multi-color option
For multi-colored bedspread we select shredsdifferent color. However, experienced scrapers recommend choosing for a multi-colored patchwork cloth not more than seven different colors. And only one kind of flap can be the leader. That is, the number of such flaps should be greater than the others. Thus, if you are making a cover of sixty pieces of cloth, then the leading flaps should be no less than twenty-five. Count the number of other flaps depending on the pattern, and select the color gamut by experience. 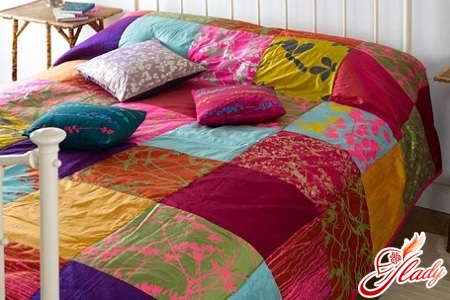
Manufacturing process
Sew your own patchwork bedspread soit's easy that even a beginner will cope with it. True, you need to be patient: the process is still laborious. To begin with, it is necessary to prepare the tissues for work: subject them to decimation. That is, you need to soak (or wash) the canvas, and then iron them thoroughly. If you work with cotton fabrics, they are also desirable to starch, and keep silk in gelatin solution. This will give the fabrics some rigidity, and it will be much more convenient to work with them. And do not forget to check the matching of the needle on the sewing machine of the selected fabric and make test stitches by adjusting the thread tension. Now proceed to the process itself. Take two different in color shred, fold them with faces and stitch, stepping back from the edge of one and a half centimeters. Then, to these two, attach another scrap, and so, alternately changing the colors, stitch a strip of six squares. Then sew another nine such strips and press the seams, smoothing the allowances in opposite directions from the line. The next stage will be grinding the strips. Fold the two strips with the wrong sides outward, grind them with pins (so that they do not go off) and stitch it on one side, stepping back from the edge of one and a half centimeters. When folding the strips, make sure the squares are staggered. And so connect all the strips to the whole canvas, and then again open all the new seams. Next comes the turn of the lining. The patchwork we sewed (with our own hands!) Is laid face down, and we put a sintepon on it. The size of the sintepon will be larger than that of the sewn fabric (part of the fabric has gone to the allowances for seams). Therefore, arrange the sintepon so that from all he would stand for the cloth equally, and grind both parts with pins. Now, on all lines (squares and stripes on a patchwork cloth), attach the sintepon to the canvas, trying to fall exactly into the seams. As a result, we get a nice square stitch. Sewed details are superimposed (wrong side to the wrong side!) On the canvas prepared for the wrong side of the veil. As in the case of the synthepone, all protruding edges of the cloth should be the same. Then we puncture the parts with pins and make a marking. Now the protruding edges of the back sheet are folded down one and a half centimeters and note them. And then two opposite edges of the lower fabric once again turn inside out one and a half centimeters, sweep and weighed. The same is done with the two remaining edges of the canvas. Corners sewn by hand. So, you can sew a nice patchwork cover with your own hands. This is one of the simplest patterns, but you can also come up with or find other schemes by choosing a more elaborate ornament. And you can also use old jeans for cover and, having cut out flaps from them, make a coverlet in patchwork technique. 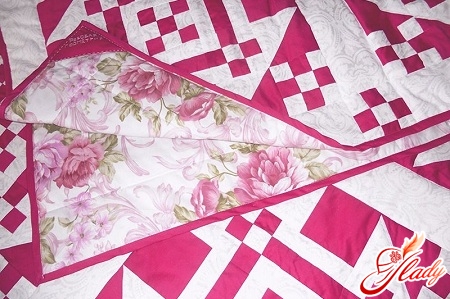
Bedspread from jeans flap
With your hands, any old jeans, denimSkirts, jackets and sarafans can be turned into an original and durable coverlet. In order to sew such a creative product, you will need only jeans and fabric for the wrong side. And interestingly, the coverlet will be patchwork on both sides! So, we are revising the cabinets and getting out of their bowels any old jeans. For the wrong side, practical fabrics are suitable, the main thing is that their density is approximately the same. The size of the elements for your coverlet should be determined on your own, based on the size of the remaining fabric that you intend to use in your work. From jeans and lining, cut square flaps and sort them in pairs: a jeans flap and a flap of auxiliary fabric. Fold all pairs with the wrong sides and get to work. Take two pairs of flaps and stack them on top of each other with lining inside, with a denim fabric outwards. Having trimmed the edges, back off from the edge of a half or two centimeters and stitch this pile of squares on one side. Now unfold it, disconnecting two pairs of flaps. You got the detail of the future canvas. The allowance for the seam should be on the front side of the future veil, and a smooth joint seam - from the inside. So sew all the prepared pairs, after which the resulting details are stitched into the whole canvas of the desired size. In the end, slip the blanket around the edges, also retreating one and a half to two centimeters. This stitching can be made double (seam in the seam). If you think that the most painstaking part of the work is completed, then we hasten to disappoint you - the most dreary still lies ahead. Now you will need a very sharp scissors, capable of cutting four layers of fabric, namely such allowances we have left from the front of the veil. We make cuts from the edge of the allowance to the seam along the entire surface of the blade and at its edges. Cut the allowances neatly, not reaching the seam a few millimeters and making a cut through a half to two centimeters. After that, we pull the cut cloth with our hands, letting it fluff a little. And the final stage will be combing our bedspread. To do this, you need a hard metal brush (for example, an animal brush). This "scab" should be torn each shovchik, combing the transverse threads and fluffing the longitudinal. The work, of course, takes a long time, but the result is worth it! The veil will look amazing, and in addition to this will last a very long time. All the squares of the patchwork are obtained by the fringed handmade fringe, which eventually fades slightly and firmly "preserves" the seams. If you do not like the fringe option on the edges, then try tying them with a hook. But still the fringed edges of such bedspreads will look much more spectacular. A patchwork sewn with his own hands will be an excellent decoration of the interior in the style of patchwork. Yes, and the practical benefit from it, too, will be (as, however, from any other veil). And you with a feeling of deep satisfaction with the result of your work can continually admire this creation. Or, entering into the rage, proceed to mastering more and more new techniques of patchwork sewing. Believe me, patchwork is a gambling affair: once starting, it's difficult to stop. But this is a useful hobby, so do not be afraid to get infected and take the first step safely. Good luck! We advise you to read:


