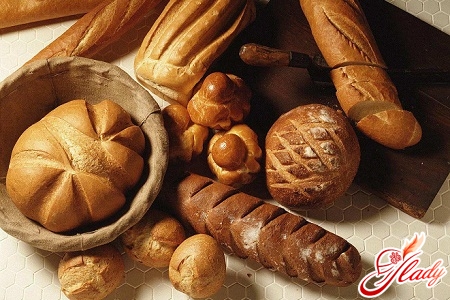
 The smell of fresh baked goods in the house is the key to a cozy atmosphereatmosphere and family happiness. Bread has long been a symbol of life, prosperity, hospitality. Dear guests were greeted with bread and salt. Bread in the villages was baked according to old recipes passed down from older women in the family to the younger ones. Today we buy bread in stores because it is simpler and more familiar. And few people can afford to spend half a day baking bread at home. However, sometimes it is still worth setting aside a day off and pleasing yourself and your family with real homemade bread. Moreover, it is not at all that difficult. What is simple homemade bread in the oven? It is just flour, water, salt and yeast. And nothing more, honestly! Store-bought breads contain a bunch of different additives, both natural and not so much. But if you bake a baguette at home from wheat flour, with a fluffy crumb and a crispy crust, it will be no worse. The main thing that is required at the first stage is to be patient. Many bread recipes involve the use of a dough starter. That is, a small portion of liquid dough is pre-mixed, left to rise, and then a full portion of dough is mixed on its basis. Then this dough is mixed with the main ingredients. Sometimes the dough is left to "ferment" overnight or longer, then the bread turns out with a characteristic sourness. Yeast dough can be capricious, it does not like cold products, a cold room and drafts. Some even claim that when bread is rising in the house, you cannot swear or talk loudly. If you do not succeed on the first try, the dough does not rise or falls in the oven, do not be upset, this is the fate of many. However, this does not mean that you will not succeed next time. Or the third time. In general, you have to try! So, baking bread at home - recipes:
The recipe is the first, simple
Ingredients for the dough:
- 1 cup of flour (wheat or special bread)
- 1 glass of water
- 1 tbsp. dry yeast
Dough ingredients:
- 4 cups of flour plus another half of the glass (this is about 750 g)
- 300 ml of water
- 1 tbsp. salt
- 2 tablespoons honey or 1 tbsp. Sahara
Pour warm water over the yeast. Важно! Теплой – это значит теплой. Если вода будет горячей, дрожжи не заработают. Если слишком холодной – тоже. Чай какой температуры вы дадите пить маленькому ребенку? Вот примерно такой должна быть и вода для дрожжей. Итак, залили дрожжи, перемешали. Дали постоять минут пять, пока на поверхности не появится пенка – это значит, они ожили и стали работать. Теперь вливаем их в миску с мукой, постепенно, не все сразу. И вымешиваем жидкое тесто. Накрываем пленкой, отправляем в теплое место. В зимний период это может быть около батареи. Можно также использовать для этих целей духовку, на низ которой вы поставили большую миску с горячей водой. Дрожжевое тесто боится сквозняков, поэтому не открывайте окна в кухне, пока занимаетесь выпечкой. Подходить опара будет около часа. За это время она должна увеличиться минимум в два раза. Учтите это при выборе посуды. Через час достаем опару из ее укромного места. Готовим еще большую миску. Выливаем в нее опару. Добавляем воду (300 мл) и мед или сахар. Постепенно всыпаем муку, по одной чашке, и вымешиваем тесто. Добавляем соль. Можно месить ложкой, пока тесто еще жидкое. Можно использовать миксер с насадками для теста. Когда оно становится густым, переходим к вымешиванию руками. Тесто будет сначала липнуть к рукам, но не нужно сыпать больше муки, чем в рецептуре. В ходе вымешивания оно станет более эластичным и перестанет прилипать. Просто нужно не лениться и посвятить этому процессу не две минуты, а десять. Да-да, именно десять. Вот увидите, каким приятным на ощупь оно станет. Готовое тесто выкладываем в миску, предварительно смазанную маслом (так тесто не прилипнет к стенкам). Накрываем льняным кухонным полотенцем, которое нужно смочить в горячей воде и хорошенько отжать. После этого тесто отправляется на второй «подход» в то же теплое место. Это займет около часа или меньше. Контролируйте процесс – как только тесто увеличилось вдвое, можно его доставать. Вынимаем его из миски, кладем на посыпанный мукой стол. Слегка обминаем руками – из него выйдут газы, образованные дрожжевыми грибками. Разделяем тесто на три-четыре равные части и из каждой делаем багет. Противень застилаем бумагой для выпекания, посыпаем мукой и выкладываем на нее багеты. Накрываем полотенцем и оставляем еще минут на 40 для расстойки. Включаем духовку, нагреваем до 240 градусов. Делаем на багетах диагональные надрезы. Ставим в духовку на низ миску с водой (на этот раз холодной). Следом отправляем противень с багетами. Хорошо бы под рукой иметь пульверизатор, которым обрызгать стенки духовки. Эта хитрость позволяет получить хрустящую корочку на багетах. Засекаем время. Ровно через семь минут температуру в духовке нужно снизить до 210. После этого багеты выпекать еще 25 минут (следить, чтобы не подгорели, такое возможно). Готовые багеты достать из духовки и оставить остывать на противне или решетке. Теперь самое сложное – не дать домашним до них добраться раньше времени. Совсем горячие, они будут слипаться при нарезке. А вот когда они немного остынут – можно ломать, резать и кушать с огромным удовольствием. Как видите, этот рецепт домашнего хлеба вовсе не сложный. Главное – это иметь в запасе три-четыре часа. Из них стоять у стола и плиты вам придется от силы 30 минут, остальное время тесто будет подходить. Но следить за процессом необходимо, так что вы должны будете находиться поблизости. При первой попытке рекомендуем уменьшить количество ингредиентов в два раза – так будет проще и тесто замесить, и багеты разместить в духовке. И если первая попытка окажется неудачной, будет не так обидно за испорченные продукты. 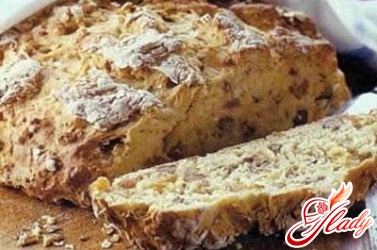
The second recipe, bread with herbs
This homemade bread is baked from two types of flour -rye and wheat. It turns out denser and "heavier" than white baguettes. Including because it contains fat and egg. In addition, greens and herbs will give it an unusual taste. Ingredients:
- 250 grams of rye and wheat flour
- 1 packet of dry yeast, calculated for 500 g of flour (read on the package).
- 230 ml of warm water
- 2 tablespoons melted fat or vegetable oil
- One teaspoon of dried basil and cumin
- Two tablespoons of dried dill or a bunch of fresh
Preparation: Pour water over the yeast.Mix. Mix both types of flour. Make a liquid dough from water and some of the flour (take about a glass of flour). Leave it to rise for 15 minutes. During this time, add herbs and caraway seeds to the remaining portion of flour and mix everything. Add fat and egg to the prepared dough and mix well. Gradually add flour and knead the dough. Transfer the prepared dough to a bowl, cover with a damp warm towel and leave in a warm place for an hour. During this time, it should rise, approximately doubling in size. Place the dough on a table sprinkled with flour and knead. Form a loaf (or two smaller ones). Place on a baking sheet covered with paper and greased with fat or sprinkled with flour. Cover with a towel and leave for about 20 minutes to rise. During this time, turn on the oven and heat to 200 degrees. We put our bread in a hot oven for 30-40 minutes. If you made two small loaves, then it will take less time to bake, 25-30 minutes. There is one trick to check the readiness of the bread. You need to knock on the "bottom" of the loaf - if the sound is dull, then the bread is ready. We take it out of the oven, that is, the oven, put it on the rack and let it cool. If the bread has risen and baked correctly, then the cooled crumb will be elastic and will not stick together when cut.
And a little more about bread
If you decide to try baking homemadebread, you need to consider the following nuances. First, it is the quality of the flour. In order to get a white airy crumb, you need to find premium flour with the maximum gluten content. Such flour is often sold under the bakery brand. You can also bake bread from second-grade flour, whole grain flour and the like. It will be more dietary than white wheat. You can also mix flour of several types and grades - coarse wheat, premium wheat, rye, oatmeal and buckwheat. Each flour has its own characteristics and requires different amounts of yeast and water. Dough made from rye flour turns out sticky and viscous - and this is normal. A few spoons of buckwheat flour will give the bread a sweetish taste and aroma. Oatmeal can also be added when baking bread. They can be mixed in dry form (in small quantities) or in the form of cooked oatmeal, in a 1:3 ratio with flour. Bran, dried fruits, nuts and seeds will fit perfectly into any bread. They should be added at the last stage of kneading. Nutritionists do not welcome the consumption of bread in large quantities, especially wheat bread made from premium flour. By diluting it with flour of other grades, you can achieve lower calorie content and make your diet more varied.
Indian bread without yeast
For those who take their figure seriously, the presence ofyeast bread can be a serious drawback. For them, we offer a recipe for traditional Indian chapati flatbreads. They are easy to prepare and have exceptionally healthy properties. Ingredients:
- 2 cups wholemeal flour or wholemeal flour
- 1 glass of water
- ½ tsp salt
- melted butter
Preparation:Pour flour and salt onto the table in a mound, make a depression in the center. Gradually pour in water and knead the dough with your hands until it is stiff. It is not necessary to use all the water. You may need a little more. In general, the finished dough does not stick to your hands and is pliable for sculpting. Leave it to rest for half an hour under a towel or bowl. After half an hour, divide the dough into 6 equal parts. Roll each into a ball. Roll the ball in flour, and then roll it into a flat cake using a rolling pin, but not too thin. Grease the flat cake on one side with butter, leaving the edges dry. Now fold it in half, with the butter inside, and then again. Pinch the edges. Now dip it in flour again and roll it into a thin, beautiful flat cake. Then put it on a hot frying pan. There is no need to grease it with butter. Fry the chapati for a few minutes until it starts to bubble. When dark spots appear on the bottom of the flatbread, brush the top with oil and flip it over. Fry for another one or two minutes, until golden brown. You can eat this bread every day with a clear conscience, even if you are on a strict diet. Whole grain flour is a source of complex carbohydrates and nutrients. Whole grain flour contains dietary fiber, which stimulates the gastrointestinal tract, promotes the growth and reproduction of beneficial bacteria, and removes toxins from the body. In addition, this flour retains vitamins and microelements. As you can see, it is not that difficult to make homemade bread - the recipes are quite simple. Try it! We recommend reading:


