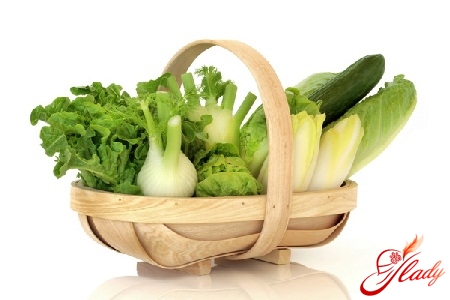
 The fashion for exoticism has not bypassed us either,gardeners. If ten years ago our beds were decorated only with familiar and traditional vegetables, today potatoes and carrots are not enough for us. We are drawn to exoticism - and that's it! And that's why bright broccoli inflorescences and tight heads of Savoy cabbage adorn many vegetable gardens. Deep in the ground, the roots of spicy ginger ripen, and juicy shoots of celery line up in rows on the beds like tin soldiers. And not just leafy celery and not the usual root celery, but petiole celery! Because growing petiole celery begins as a tempting experiment and a "trial run" in gardening poetry, and then becomes a completely familiar thing. And juicy, aromatic celery stalks turn from an exotic vegetable into an indispensable component of salads, soups and other dishes. If you haven't mastered this garden crop yet, now is the time to learn about the peculiarities of growing celery in theory and apply this knowledge in practice. Let's get started?
Seeds and seedlings
Celery (and stalked celery is no exception) is a vegetable"slow-germinating". That is, its seeds are capricious: they germinate slowly, sprout slowly, and can even go on strike and remain "buried alive". Therefore, it is best to plant them in containers in February-March. By the way, as practice shows (and theory does not contradict it), seed germination increases with age. And if the purchased seeds lie with you for three or four years, then the chance of getting good and strong shoots will increase many times over. So what is the best way to sow celery seeds? If you are familiar with the agricultural technology of growing root or leaf celery, then apply your knowledge and practical experience to petiole celery. If you do not have such knowledge yet, then comprehend this science in practice. Namely:

Transplant to open ground
Since the main difficulty for cultivationcelery - growing seedlings, then having overcome this stage, you can consider that all difficulties are behind you. Further - easier. As soon as the night frosts end, and even their potential threat has passed, our tender celery sprouts can be planted in the beds. Naturally, as responsible and conscientious gardeners, we will first prepare these beds. Petiole celery is a plant with pretensions. Like any foreign guest, it loves comfort. And beds with well-fertilized and well-drained soil will be comfortable for it. So we will fertilize the beds as required by the type of soil in our garden and prepare mulch for celery. Vegetable growing textbooks recommend planting celery seedlings in open ground that have grown to five to seven centimeters. However, in practice, rarely does anyone manage to grow celery seedlings of this size. Therefore, very, very small plants have to be planted in the soil. So small that they are easy to miss and wash away when watering or pull out when weeding. Therefore, experienced gardeners recommend putting plastic cups with the bottom cut out on the planted seedlings. Celery seedlings should be planted at a distance of twenty to twenty-five centimeters from each other, observing this “distance” both in width and in length of the bed. The soil between the seedlings should be immediately mulched with straw or sawdust. Considering that you have already protected the mini-bushes with the help of cups, you do not need to be afraid that they will “get lost” in the mulch. And after planting, do the first top dressing with liquid fertilizer.
Seasonal care
An interesting vegetable after all - celerypetiolate: its cultivation basically comes down to general rules of care, but also involves some "tricks". Standard agricultural technology for this crop is as follows.
After understanding the rules of standard careLet's get acquainted with some of its nuances. Because petiole celery requires a special approach and knowledge of little "tricks" in cultivation. For example, many gardeners practice tying the petioles. They do it as soon as the bushes grow to forty-five centimeters. Then the petioles (from the ground to the foliage) are wrapped in black paper. Please note that the upper part of the bush (about fifteen centimeters) must remain in the light. After tying the paper, the petioles can be put in tall plastic cups without a bottom. This will create additional protection from light and will protect the paper from getting wet when watering or raining. All this is done with one single purpose - to whiten the celery petioles. And in fact, using the wrapping trick, in a couple of weeks you will get completely white and completely clean, juicy and tasty petioles. In general, celery is unpretentious in cultivation. It responds to feeding and proper watering. If basic care requirements are met, it grows well, without any “whims or surprises.”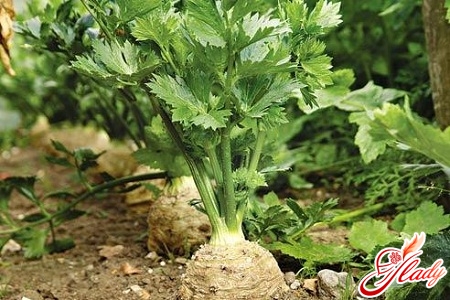
Harvesting
The harvest can be collected immediately afterthe petioles will reach a more or less decent size. By the way, it is not necessary to dig up young bushes for this. It is enough to carefully break off the lateral (outer petioles) - this will not harm it. And the greens, that is, the upper leaves on the bushes, can be used as traditional leaf celery. The mass harvest (if you set such a goal for yourself) should be harvested in the fall - in September-October, depending on the region. Adult ripe plants are dug up with a shovel or scoop. If the roots of your "celery" bushes have grown a lot, then it is better to use a pitchfork. So try to grow this spicy overseas guest in your garden. In addition, they say that it is unusually useful, irreplaceable in dietary nutrition and has a "negative calorie content". Plant petiole celery: growing this new crop for our gardens will not be too difficult and time-consuming, but will rather bring pleasure from a new agronomic experiment. We recommend reading:


