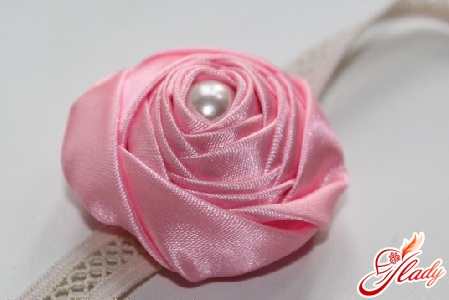
 Satin ribbons are one of the most famous andthe most affordable materials for decoration. They were used to embroider royal outfits, decorate folk costumes and weave them into horses' manes at village weddings. Having adopted traditions and applied new techniques, modern craftswomen also actively and willingly use ribbons to decorate clothes, make souvenirs and fashion accessories. For example, artificial flowers made of satin ribbons, which are popular today, can be easily made with your own hands. Let's try to make cute flowers from this accessible and inexpensive material.
Miniature Flower
A simple but very original flower can be made by simply folding a ribbon into an envelope. For such decoration we will need the following materials:
- a narrow satin ribbon thirteen millimeters wide (pink and green):
- wide satin ribbon (two and a half centimeters) in white;
- beads to decorate the middle of the flower;
- matches or a lighter;
- scissors;
- needle and thread;
- glue.
Take a white ribbon and bend it in the middleat a right angle so that the upper edge of the ribbon lies perpendicular to the lower one. We also lower the horizontal end of the ribbon down, passing it under the ribbon and placing it next to the second end. At the top of our structure there should be a corner. Now, holding the corner with your finger, we wrap the left end of the ribbon to the right and place it on top of the right end. We cut off the ends protruding beyond the edges of the ribbon and get an envelope. We stitch the envelope along the perimeter (along the edge), leave the thread with the needle in working condition, without removing the thread from the fabric, and singe the cuts so that they do not crumble. Next, we pull the thread, gathering the ribbon into a bud, and secure the seam with a knot. We straighten the "petals". From a pink ribbon we make the same bud, place it on the white petals and sew both parts in the center of the flower. We decorate the middle with beads. For the leaves, roll the green ribbon into a cone, cut off the excess fabric, and singe the cut. Glue or sew the edges of the ribbon. Having made three leaves, place them under the flower with the glued edges and attach. The miniature flower made of satin ribbon is ready.
Satin Carnations
A fairly simple flower to make, reminiscent of a carnation. To make it, we will prepare the following materials and tools:
- wide and narrow satin ribbons of any color;
- a needle and a thread;
- scissors.
For a voluminous and fluffy carnation, take a wide onea satin ribbon a little over a meter long. Iron it well, trim the ends and singe the edges. Thread a long thread into a needle and make basting stitches along one edge of the ribbon. Pull the thread slightly, gather the ribbon into not very frequent folds and secure the thread. Fold one edge of the ribbon inward and begin to assemble the flower, rolling the ribbon into a roll and securing each turn with threads along the bottom edge (where the stitches are). Make a small carnation from a narrow ribbon. To do this, also gather it on a thread, but tighten the thread more tightly and make the gathering thicker.
wild Rose
Elegant and quite natural lookinga wild rose flower can be made from satin ribbons. And, as you already understood, we are talking about a regular rose hip. The proposed technique for making this decoration is more complicated than the previous ones, but the result is worth it! So, for a wild rose from satin ribbons we will need:
- a meter of white, pink or red satin ribbon five centimeters wide (for the flower);
- on ten centimeters five-centimetric tape of green color (for leaves of a dogrose);
- yarn (iris) of yellow color;
- Threads in tone tapes;
- a needle (sharp and long);
- scissors;
- candle or lighter
- felt or accessories for the base;
- cardboard for the template.
To get started, we make a rose petal template. Высота лепестка должна быть чуть меньше ширины ленты, то есть почти пять сантиметров. Ширину лепестка отмеряем примерно в два с половиной сантиметра. Сделав шаблон, прикладываем его к ленте, обрисовываем и вырезаем атласные лепестки. Если вы хотите ускорить процесс вырезания лепестков, то сложите ленту в несколько слоев. Только не скрепляйте ее булавками, которые могут оставить на ткани некрасивые заусенцы. Обратите внимание, что основание лепестка (прямой срез) должно быть с кантом ленты, а его верхний край нужно обрезать так, чтобы канта на вершине лепестка не оставалось. Это удобно и для последующего оплавления лепестков над пламенем, и для сборки лепестков в цветок. Вырезав шесть одинаковых лепестков, делаем еще один шаблон, который повторит форму этих лепестков, но только будет миллиметров на пять (с каждой стороны) меньше. И делаем третий шаблон, также меньше второго на полсантиметра. По этим шаблонам вырезаем еще по шесть лепестков среднего и маленького размера. Получив три вида лепестков, приступаем к оплавлению их краев. Аккуратно подводя заготовки к пламени, даем лепесткам чуть загнуться и стать слегка волнистыми по краю. Чтобы лепесток получился выпуклым, подпалив край над огнем и зажав неподпаленную часть лепестка пальцами, аккуратно растягиваем ткань в противоположные стороны. Обратите внимание! Тянуть нужно еще теплую ленту: остывший атлас начнет рваться. Чтобы сделать лепестки еще больше похожими на настоящие, поочередно каждый лепесток держим над пламенем, дав ткани возможность деформироваться. Теперь начинаем собирать цветок. Сначала собираем нижний ярус из самых больших лепестков. Берем две заготовки и складываем их внахлест, чтобы край одного лепестка наполовину (по высоте) перекрывал другой лепесток. Сшиваем эти заготовки по нижнему краю несколькими стежками. На них кладем третий лепесток, чтобы он также наполовину закрыл соседнюю заготовку, и прикрепляем его швом «вперед иголку». Собираем все лепестки одного размера и замыкаем ярус в кольцо, соединив первый и последний лепесток. Таким же образом собираем еще два яруса из заготовок среднего и маленького размера. Складываем ярусы цветка друг на друга (от большого к маленькому) и сшиваем их, соединив нижние края заготовок. Для серединки цветка берем небольшой квадратный лоскуток, отрезанный от ленты, и вышиваем его французским узелком и делаем из пряжи петельки. Вышив круглую серединку цветка, натягиваем ее на пуговицу, а пуговицу пришиваем по центру верхнего яруса нашей дикой розы. Для листиков берем кусочек зеленой ленты длиной десять сантиметров и обрабатываем срезы над пламенем. Складываем ленту уголками к середине, формируя треугольник, и сшиваем наложенные части по нижнему краю мелким пунктирным швом. Затем стягиваем нитку и сшиваем крайние углы заготовки друг с другом. При желании открытые с изнанки листика края ленты тоже сшиваем. Сделав два-три листочка, пришиваем их к цветку. Готовый цветок шиповника крепим на фетр, на основу для броши или на заколку. Вот и вся премудрость. Освоив самых легкие способы изготовления цветов из атласных лент, вы можете приступать к более сложным техникам, например, мастерить своими руками японские украшения цумами канзаши. А когда набьете руку, у вас будут получаться просто щедевральные творения. Ведь не зря атласные ленты ценились даже при королевских дворах, а цветы из них украшали наряды самых высокопоставленных особ. Пробуйте. И все у вас получится!


