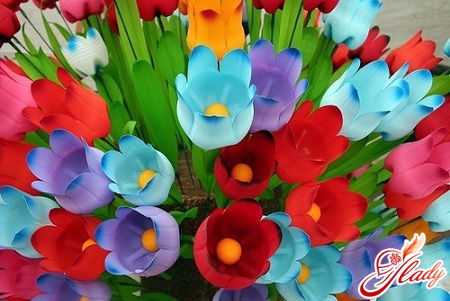
 "If you only knew from what rubbish flowers grow,"Without shame!" These lines by Akhmatova found incredibly clear confirmation in our chemical-synthetic reality with its plastic packaging and polymer containers that have filled our everyday life. Without further ado, craftswomen and needlewomen, generous with the most fantastic ideas, came up with the idea of making artificial flowers literally from garbage, namely from plastic bottles. What usually ends up in trash bins, in their skillful hands can turn into fabulously beautiful flowers: daisies, poppies, roses, peonies, calla lilies, crocuses. And, by the way, we are also able to create such beauty with our own hands. Let's find out how it's done and try to turn plastic bottles into flowers.
White Rose
Neat bottles made of white opaqueplastic, in which drinking yoghurts, kefir and milk are poured, will serve as the source material for a lush white rose, made with your own hands. In addition to such bottles, you will also need a candle, over the flame of which we will conjure with plastic, and glue (a hot gun or any other glue that firmly bonds polymeric materials). By the way, if your kitchen has a gas stove instead of an electric one, then the candle can be replaced with a gas burner. Yes, you will also need long tweezers, which must be used to hold the parts, processing them over the fire. So, let's get started. First, thoroughly wash the bottle and cut out parts from it in the shape of rose petals. You can use a template or just cut out "by eye" several small petals, several medium and several large ones. Now, holding the petal with tweezers, we begin to give it the desired shape, holding it over the flame. Important! Do not bring the part too close to the fire! Firstly, it will get sooty in this case, and secondly, it can simply flare up! So be careful – hold the petal over the fire so that it only heats up, and when heated, the plastic will begin to bend. By turning the petal in different directions, you can give it the desired shape, controlling the bending and twisting of the part. Having processed all the parts in this way, we begin to assemble the rose, fastening the petals with glue: we place the smallest parts in the middle, wrap them with the larger ones, and make the outer petals from the largest parts. That's it! The flower is ready!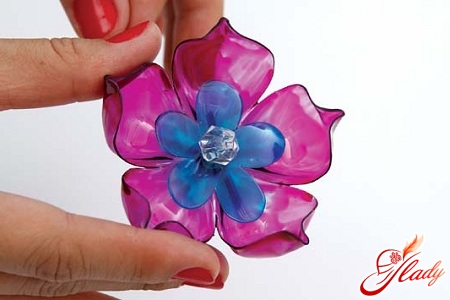
Bouquet of wildflowers
We will collect this bouquet from daisies andвасильков. И понадобятся нам для него: бутылка из синего пластика для васильков, белая непрозрачная полимерная бутылочка для ромашек, зеленая бутылка для стеблей и листьев, коричневый и желтый (оранжевый) пластик для серединок цветов. И еще приготовьте свечу, клей и жесткую проволоку в оплетке, которая послужит основой для стеблей. Итак, начинаем… Из средней части синей бутылки вырезаем кружочки диаметром семь-восемь сантиметров. Два кружка – один василек. Теперь надрезаем эти детали крестообразно, сделав восемь надрезов от края к центру и не доходя до центра примерно полтора сантиметра. Затем край каждого лепестка вырезаем неглубокими острыми зубчиками и придаем цветку выгнутую форму, держа деталь над пламенем свечи. После чего в центре каждого василька делаем прокол острым толстым шилом. Для стеблей вырезаем по спирали тонкую полоску (пять миллиметров) из зеленой бутылки. Затем обвиваем эту полоску вокруг проволоки, держа ее над огнем и закрывая витками проволоку по всей длине. Кончик провода освобождаем от оплетки, оставив металлический стержень длиной около четырех сантиметров. Еще одну зеленую полоску скручиваем в тугой рулончик и, слегка протолкнув серединку, придаем ему форму конуса и фиксируем клеем. Из зеленой бутылки вырезаем маленькие кружочки с зубчатыми краями (это будут чашелистики) и также сначала обрабатываем их над пламенем, а затем делаем прокол по центру. Теперь на проволоку надеваем сначала зеленый конус, затем чашелистик, а следом две детали, вырезанные из синей бутылки. Фиксируем с помощью термопистолета. Для тычинок вырезаем кружочки из коричневой бутылки и надрезаем их края длинной тонкой бахромой, затем обрабатываем деталь над свечой и делаем прокол в серединке. Надеваем тычинки на проволоку, металлический конец провода загибаем, фиксируя цветок. Серединку украшаем черным или серебристым бисером, посадив бусинки на клей. Для ромашки вырезаем из белой пластиковой бутылки круглые детали диаметром восемь сантиметров. Делаем на каждой детали надрезы, как и в первом случае, только гораздо больше, чтобы получить десять-шестнадцать лепестков. Каждый сектор обрезаем по краю, придавая лепесткам закругленную форму. Теперь обрабатываем детали горячим воздухом, чтобы лепестки приняли извилистую форму, и делаем по центру каждой детали прокол. Для серединки каждого цветка вырезаем два небольших кружка из желтого пластика и слегка надрезаем их по краю, делая края бахромчатыми. В одном кружочке вырезаем треугольный сегмент и сворачиваем кружок конусом, размягчив над горячим воздухом и зафиксировав клеем. Второй кружок просто обрабатываем над огнем и прокалываем по центру. Из зеленой бутылки делаем чашелистики. На провод (подготовленный, как и для васильков) надеваем сначала чашелистик, затем две детали из белого пластика, потом желтый кружочек и загибаем металлический провод, фиксируя цветок. Желтым конусом, как колпачком, закрываем металлическую петлю. Фиксируем клеем. Из зеленого пластика вырезаем листья с черешками по форме настоящих листьев васильков и ромашек. Каждый листочек обрабатываем над свечой, оставляя нетронутыми черешки. Затем прикрепляем листья к стеблям, оборачивая черешки вокруг провода и размягчая их над пламенем. Собираем букет и любуемся красотой, сотворенной своими руками. 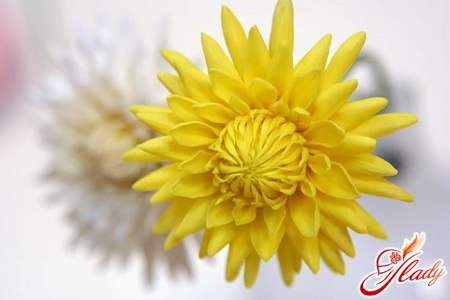
Flower on hairpin
DIY Hair Flower from Proseplastic bottles! Ready to make such a miracle? Then let's get started. For this we will need the middle part of transparent plastic bottles, white, green and pink acrylic paints, a candle, glue, a hair clip. Cut out the middle part from the bottle and cut three circles of different diameters from it: the size of the largest circle will determine the size of the flower for the hair clip. Now divide each circle into six sectors and make cuts from the edge to the center, not reaching the center by one and a half centimeters. Cut each petal, rounding the edges. Light the candle and begin to form the petals. First, pass the edges of the petals near the flame, melting them and making them wavy. Now turn the part over and heat the middle of each petal, forcing the plastic to bend, and the petal to become convex. Important! Parts made from plastic bottles heat up very quickly! If you hold the plastic over the fire for too long, it will curl into a tube or even turn into an incomprehensible squiggle. On the large circle, which will become the outer corolla of the flower, make only slightly concave petals. On the medium one, let them curl a little more, and you can hold the smallest petals over the fire longer. Assemble the flower by stacking the parts one on top of the other so that the large blank is at the bottom and the small one is on top. Fasten the parts with glue and cover with paints, trying to recreate the color of real flowers. The petals can be painted on both sides, or you can paint only one side - it's up to you. Leaves can also be made from plastic bottles. Cut out a blank of the desired size and shape, melt the edges over the flame, and draw the veins on the leaf with a hot coin or knitting needle, placing a fabric folded in several layers under the leaf. If you rub a hot coin (but not with your bare hand!) across the soft plastic, it will leave a relief mark on the part. Cover the hand-made leaves with green paint. By the way, for such a flower you can use blanks from colored plastic bottles: blue, light blue, green. Or you can paint the flower yourself, using stained glass paints. Then the flower will be colored, but transparent. Glue the finished flower and leaf to the hair clip. The hand-made hair clip with a flower from plastic bottles is ready! Try it on, admire and rejoice! With your own hands from plastic bottles you can make not only flowers for a hair clip, but also small flowers for jewelry. Such elegant flowers will look great in a bracelet or necklace, in earrings or even on a ring. Flowers made from plastic bottles can also become an interior decoration if you simply put them in a vase or decorate a ready-made or homemade key holder, hanger, or panel with them. It is only important to decide what kind of flowers you want to make, prepare the materials and tools. And no one doubts that with your own skillful hands you will be able to create beauty even from plastic bottles. Go for it! And you will succeed. We recommend reading:


