Flowers, flowers, flowers ... Well, what kind of woman does not likeflowers? Even if for some reason we do not like to accept bouquets as gifts, we still do not remain indifferent to the flowers. We like the images of flowers in pictures and photos, we subconsciously choose things with a pattern in the flower, we buy ornaments in the form of flowers. By the way, about ornaments. You, of course, know that you can make flowers from cloth with your own hands. And do not want to try it? The technician of making textile flowers is incredibly much. Naturally, all of them are impossible not only to master, but even to remember. Yes, and the flowers themselves from the fabric are so different that one of us certainly likes. But we will not complicate our task and get acquainted with all the techniques and methods of making flowers from tissue. We will swing a lot with the queen of flowers! We will try to make roses from the fabric with our own hands. So, let's begin…

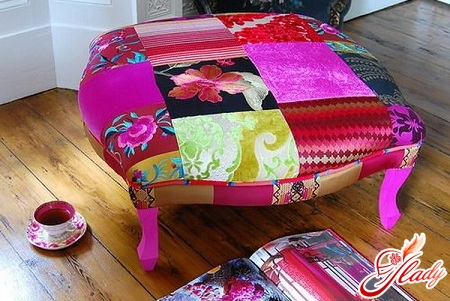
Calico Roses
Who said that cotton is a material toounpretentious for such exquisite flowers as roses? Nothing like this. Even the cotton roses still remain roses. And we will do them in the form of a disheveled rosette in a way that does not require sewing. Is it tempting? Then we make a cotton flower and prepare for this:
- printed cotton with fine pattern,
- flap of felt,
- iron,
- cardboard,
- scissors,
- hot glue,
- pins.
We lay out the fabric on the table and make a cut along theThe share of filament at a distance of five centimeters from the edge of the canvas. We make the second incision, having receded from the first by another two and a half centimeters. Now, with a sharp jerk, tear off the strip first along the first notch, and then another calico strip along the second notch. Here we will make roses from this second strip of chintz with two ruffled edges. The width of the strip, as you have already understood, is equal to two and a half centimeters, and its length is the width of the chintz cut (one hundred and twenty centimeters). The edge of the short edges of the calico strip is cut and cut the strip into two pieces of sixty centimeters long. From each such strip we will get one rose. Now make the first rose. We take one strip of fabric and fold it in half along the entire length and smooth the fold with a hot iron. Next, you need to make a cardboard strip thirty centimeters long and almost two inches wide (1.75) centimeters. We take a cardboard strip and apply a strip of calico to it, combining the upper short edges of both strips. While holding hands with both strips, we pin the calico to the cardboard with a sewing pin and start wrapping the cloth around the cardboard part. We lay the coils tightly, at an angle of forty-five degrees. After this, fix the second end of the calico strip with a pin and iron in a steaming mode the cardboard wrapped in a calico. We wait, when the fabric completely dries, and carefully pull out the cardboard strip, keeping the shape of the ironed folds. Now once again iron the stock for a rose, only now without cardboard. We take an ordinary pencil, apply it to the end of the strip, placing it across it, and wind the fabric blank onto a pencil, forming a flower. Twisting is not tight. Now take out the pencil, get the inner edge of the resulting outlet and turn it to the center. The outer edge is pinned with a pin in the bottom side of the rose. With a hot iron, we quickly iron our flower from above. Then you need to do the following. We take a felt flap, we drip on it a speck of glue, the size of which should be slightly less than the diameter of our calico rosette. We glue the flower, take out the pin, press the rose with the palm. When the glue cools down, once again press the flower in steaming mode. When the flower cools down, cut it out together with the felt along the contour of the glue patch. That's how we made a stylish decorative decoration in the form of a textile rosette. From these rosettes you can collect a whole bouquet and make a brooch, you can use them to decorate dresses, blouses, bags and hats. Such roses will be an excellent addition for clothes and home textiles in the style of patchwork, for kitchen accessories and soft toys sewn by hand. 
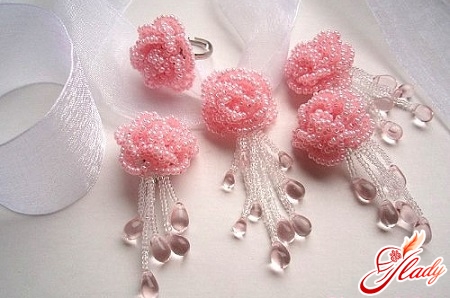
Roses for a wedding bouquet
Today, wedding bouquets have become an object not onlyfloristry, but also needlework. And the thing is that hand maid is so fashionable that even for wedding bouquets, many prefer to use not artificial flowers, but artificial, but handmade. And, by the way, you can easily make such flowers with your own hands. And if you make them out of the same fabric as the wedding dress, then the bride will look especially stylish. To make roses for a wedding bouquet we need:
- a piece of suitable for the quality and color of the fabric for roses;
- A fabric of the same color or some other for the bottom of the bouquet and leaves;
- a foam cone for the base of the bouquet;
- lace and braid for decorating a bouquet;
- non-woven fabric;
- pins;
- glue gun;
- sewing accessories.
First, we make roses with our own handsfor a bouquet, separately manufacturing each flower. To do this, we cut from the fabric three strips in length of seven centimeters and a width of fifty. We take one piece and fold it along the entire length of the face to the outside. On the double trimmed edge, we make wide stitches manually or on a sewing machine with a weak thread tension. We gather the workpiece by wrinkles, pulling the thread, and fix it. Now we begin to wrap the workpiece, forming a rose flower and simultaneously fixing the coils with a double stitch. In the same way, we make eight more roses. Now you need to make the leaves. First we make a paper pattern of leaves of the desired size and shape. Two or three leaves are large and about the same number of leaves a little smaller. We transfer the pattern to the fleece with allowance for the allowances and press it to the fabric that we have prepared for the leaves, and cut out. For each leaf, make two blanks of the same size. Now we put the blanks in pairs on the front sides and spread them along the contour, leaving a few centimeters unscrewed from the bottom edge of the leaf. We turn the sheet inside out, smooth the seams with the iron and sew the left hole with our hands. Now wrap the fabric with a foam cone and fix it first with pins, and then with sturdy little stitches. It remains to decorate the cone with roses. First, we estimate approximately how best to place roses in a bouquet, and then we plant them on the glue. Now, in the circle of the upper part of the bouquet, we attach the leaves so that at the top of the cone they spread out to the sides like open palms, and at the bottom they fit snugly to the base of the bouquet. The final touch is the decoration of a bouquet made by one's own hands. That's why we use braid and lace. We decorate the bouquet in accordance with their ideas about exactly how it should look. That's so simple, and most importantly, in different ways you can make a rose flower with your own hands. Each flower is good in its own way, and every idea deserves attention. And you can make roses from organza or from chiffon, from satin or kapron ribbons. But these ideas are already quite well-known, and what we have offered you is already from the new trends of hand maid. In nature, a rose is considered to be the most complex flower, but to make it with your own hands made of fabric is easier than many other flowers. So do not be afraid to fantasize and share your ideas with others. Good luck! We advise you to read: