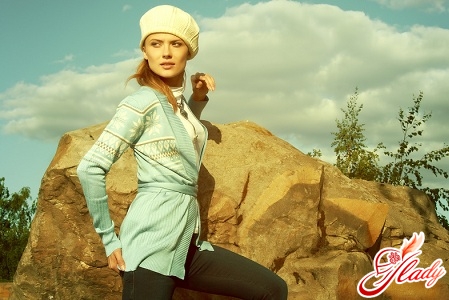
 A beret is a universal headdress.It is worn by children and adults, rich and poor, military and civilians. And berets are worn at any time of the year, and they never go out of fashion. Berets are sewn from fur and drape, from leather and felt, knitted and crocheted. And, by the way, a knitted beret can become a source of pride for fans of hand-made, and both a novice needlewoman and an experienced craftswoman can master this task - crocheting a beret. And why? Because a knitted beret is a fairly simple design. What does it represent, and how to implement the idea in practice? Let's find out.
Features beret
The beret remains the most popular among womenheaddress. And a knitted beret is especially so, because it is very easy to crochet or knit. Regardless of the style, any beret consists of several parts, and its knitting (unlike sewing) does not require a special pattern.
- The top of the beret is a round canvas.
- The middle is a straight or trapezoidal detail, the size of which determines the splendor of the headdress.
- The details of the lower part - in this part of the work the hinges are reduced.
- Bezel - narrow or wide knitted strip.
The beret parts can be made composite, it can beknit with a single piece of fabric with one seam or knit in a circle. The style of this headdress depends on only two things. Firstly, it is determined by the presence and size of the straight middle, and secondly, it depends on whether the beret “sits” on the headband, or has a straight edge without an additional strip. The appearance of a crocheted beret is determined not only by the style, but also by the quality (type) of the yarn, the density of your knitting, and the chosen pattern. Openwork summer berets are crocheted from thin cotton or silk threads. For the demi-season version, choose medium-thick yarn, openwork or dense knitting patterns. Warm berets are knitted from wool, down and mohair. Berets are often decorated with knitted flowers, brooches or other decorative elements. The main condition for the impeccable appearance of a crocheted product is that the thickness of the yarn matches the size of the hook. So, if you have the desire and time, you can make your own handmade masterpiece. And note that it does not require any special skill from you: only accuracy, imagination and patience.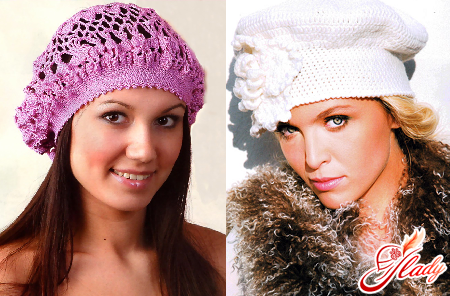
Classic Beret Tablet
The simplest of all models, which is worth itto start for inexperienced needlewomen. For it, you need a small skein of any yarn for hand knitting and a number three hook. Knit such a beret in a circle, starting from the top and making a traditional increase in loops. The size of the circle (its diameter) depends on the size of the beret, and its shape on the different number and location of the added loops. The increase in loops begins with the second circle, initially knitting a chain of air loops and closing it into a ring. For regular dense knitting with columns, use a wedge pattern, in which two loops are knitted from one increase in each row, and the remaining loops are knitted with columns. This way, you will get an increase in loops only along one edge of each wedge. If in the process of work (after knitting about five rows) you notice that the edge of the circle begins to go in waves (faldi), then reduce the number of wedges and loops in the first row. If the edge of the bottom begins to tighten and curl, then increase the number of segments and columns in the first row. Having knitted the bottom of the beret with a diameter of twenty-six to twenty-eight centimeters, begin knitting the middle with a piece of fabric without increases. This is where you can use some decorative pattern or combine the color of the yarn. Having knitted a piece of fabric about six centimeters high, begin decreasing the loops by knitting the outer loops of the wedges (along one edge) together. For example, if the width of each wedge is sixteen loops, then in the first row knit together the 15th and 16th loop, in the second circle - 15 and 14, in the third - 14 and 13. And so on, until you knit to the desired diameter of the beret. For the headband, knit a strip about two centimeters wide with loops without increases and decreases, alternating single crochets with a "crayfish step".
Warm winter beret
A warm headdress impliesusing dense, fairly thick and warm yarn. Although, for example, down yarn, despite its lightness and minimal thread thickness, is very warm even in openwork knitting products. And yet, it is best to knit a winter beret with some simple pattern. In the case of crocheting - single crochet or double crochet. For a more interesting appearance of such a beret, you can take melange yarn or yarn of a special texture - boucle or "grass". In any case, you will need about one hundred and fifty grams of not the thickest, but not thin yarn and a number six hook. Start knitting from the crown and continue it in a circle. To begin, dial a chain of three air loops and close it into a ring. Then knit in the following sequence.
- First row. Tie the chain with ten stitches with a crochet.
- Second row. Knit two columns with a crochet from each loop of the first row.
- Third row. Alternate one column with a crochet and two columns with a crochet from one loop. So from each second loop of the previous row you should have two loops of the third row.
- Fourth, fifth and sixth rows. Two columns with a crochet, two columns with a crochet from one hinge. In these rows you add one third of each loop.
- The seventh row. Spray one column with a crochet from each loop of the previous row (row without additions).
- The eighth row. Nine columns with a crochet, two columns with a crochet, closed together (decrease). Alternate to the end of the eighth row.
- Ninth row. Spray one column with a crochet from each loop of the previous row (row without additions).
- Tenth row. Seven columns with a crochet, two columns with a crochet, closed together. Alternate to the end of the tenth row.
- Eleventh row. Spray one column with a crochet from each loop of the previous row (row without additions).
- The twelfth row. Six columns with a crochet, two columns with a crochet, closed together. Rotate to the end of the twelfth row.
- Thirteenth row. Four columns without a crochet, two columns without a crochet, closed together. Alternate to the end of the thirteenth row.
- Fourteenth row. We knit five columns without a crochet, two columns without a crochet, closed together. We alternate to the end of the fourteenth row.
- Fifteenth row. The whole row is tied with columns without a crochet without loosening the loops.
Fasten and cut the thread.Wash the finished beret or just slightly dampen it and let it dry. Decorate the beret as you wish. And in addition to it, knit a scarf and mittens (or gloves) from the same yarn.
How to decorate a beret
If crocheting is your hobby and you are already inIf you are skilled enough at this, try knitting an openwork beret. Use any openwork pattern you like or even try knitting a beret made using the freeform technique. If crocheting is not your strong point yet, knit a beret using simple single crochet stitches, for example, from melange yarn. Such a headdress, as a rule, does not need additional decorations. If you have knitted a single-color beret, decorate it with additional decorations, also crocheted. By the way, knitting such details often becomes an interesting hobby. This can be, for example, a large flower or even a bouquet of flowers. These can be crocheted berries (a branch with cherries, for example). The beret can be decorated with flowers woven from beads or embroidered with beads. Ribbon embroidery will be a chic decoration for a crocheted beret. And given the texture and density of the crocheted fabric suitable for such embroidery, you can easily cope with this task. In the end, just buy or make a suitable brooch yourself. Crocheting is considered a very simple technique. In any case, this is the knitting that is recommended for beginner needlewomen. In addition, crocheting is a universal technique in which almost any clothing is made, from swimsuits to coats. And a small and stylish headdress, fashionable at all times and suitable for ladies of any age, is an excellent reason to master this simple, but very effective technique. Go for it! And you will succeed. We recommend reading:


