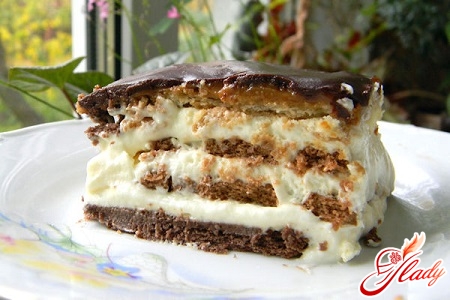
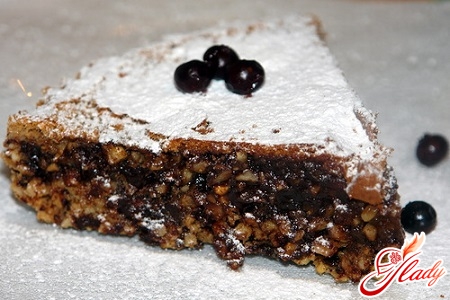
 Sachertorte (Sacher cake) is one of the mostpopular cakes in the world, a masterpiece of Austrian cuisine. The world owes its invention to the confectioner Franz Sacher, who lived in the 19th century. History says that this cake was first prepared in 1832 for guests of the Minister of Foreign Affairs Metternich. However, the dessert gained its popularity later, and, what is very significant, it was connected with a scandal.
History of the scandal
The thing is that Franz's son, Eduard, was alsopastry chef. And he used his father's recipe, baking and selling the cake at the reputable pastry shop "Demel", where he had trained. After leaving the pastry shop, he founded the Hotel Sacher, and, naturally, the cake began to be sold there as well. The cake was gaining popularity, and with it the desire to be the owner of the original recipe grew among both sellers - "Demel" and "Sacher". They argued until the trial in 1934. The pastry shops accused each other of illegal use of the trademark and other similar "sins". They argued until 1963, when they finally came to a peaceful agreement, coming up with two similar names. The Hotel Sacher began selling cakes under the brand name Original Sacher-Torte, while in Demel the dessert was produced under the name Eduard Sacher-Torte, the reason for this being some changes that Eduard made to his father's recipe while he was an apprentice in Demel. In the original Sacher recipe, the cake consists of two or three layers of chocolate sponge cake with a layer of apricot jam. The top and sides of the cake are covered with chocolate icing. In Demel's Sacher, the jam is placed only on top of the cake, before pouring the icing over it. The cakes are usually served with whipped cream. And this is understandable. No matter how you look at it, chocolate sponge cake will always be a little dry. And apricot jam is not able to moisten it enough. However, these details may interest us only from a historical and cultural point of view. To try a real Sacher cake, you need to go to Austria. Because the owners of this or that masterpiece obviously have no intention of revealing the recipe. However, any masterpiece is a source of imitation. It is clear that over the years there have been many attempts to create something similar and figure out the recipe.
Riddle of the recipe
Sacher Torte recipe is actuallya fairly simple combination of products and simple machinations with them. Of course, if we are talking about variations and imitations. What the original recipe actually contains, we can only guess. One of the most striking examples of imitation was the popular in the USSR cake "Prague". Its author, the head of the pastry shop of the Moscow restaurant of the same name, was at the beginning of his career an apprentice of pastry chefs from Czechoslovakia. Considering the proximity of this country to Austria, both geographical and historical, it is easy to guess where the inspiration came from for the author of the Soviet culinary classic. In the cake "Prague", unlike its Viennese colleague, there are three layers of chocolate biscuit. Creamy cream, consisting of butter, cocoa, condensed milk and chicken yolks, is used as a layer. Berry or fruit jam is used only for the top layer and sides of the cake. And finally, the cake is decorated with chocolate fondant or chocolate glaze. Russian housewives are also trying to figure out what lies behind the magic words "Sachertorte recipe". Similar recipes can be found on almost every culinary website or blog. We are not far behind. And we offer our version of the cake.
Recipe one, basic
For the biscuit:
- 150 g chocolate
- 30 g of powdered sugar
- 180 g of sugar
- 2 tbsp. l. cream
- 150 g of butter
- 6 eggs (divided into squirrels and yolks)
- 150 g of flour
- Apricot jam for impregnation
For the glaze:
- 40 g of butter
- 20 g of powdered sugar
- 50 g of cocoa
- 3 tbsp. l. hot milk
And also - a baking pan, non-stick, withразъемными боками, либо силиконовая, либо просто та, которая, вы уверены, не подведет. Размер формы – 23-25 см, может варьироваться. От него зависит высота бисквита и то, сколько времени понадобится на его выпечку. В слишком большой форме бисквит получится тонким, и его будет трудно разрезать. В слишком маленькой он может не пропечься, получившись излишне высоким. Поэтому, если форма все окажется мала, лучше не используйте все готовое тесто. Сделайте из него отдельный маленький бисквит и употребите по собственное усмотрению. Процесс приготовления: Для начала нужно включить духовку и дать ей нагреться до температуры 175-180 градусов. Подготовить форму, можно застелить дно бумагой для выпечки для надежности (чтобы бисквит проще было извлечь), смазать маслом. Тесто. Шоколад нужно растопить. Для этого его можно натереть на терке или просто мелко поломать, поместить в кастрюлю на маленький огонь. Процесс этот непрост, потому как шоколад имеет тенденцию подгорать. Следите внимательно. Лучше снять кастрюльку с огня раньше, чем дождаться запаха горелого шоколада. Отставили его в сторонку, занимаемся сахаром и маслом. Смешиваем их до однородного состояния, добавляем сливки и желтки. Туда же отправляем теплый шоколад. В отдельной посуде взбиваем белки с сахарной пудрой. В шоколадно-сливочную массу начинаем понемногу вводить муку. Не нужно сыпать зараз всю порцию, лучше сделать это в несколько этапов. Так вы сможете лучше перемешать, избежать комков и излишне крутого теста. Мука разных производителей по-разному впитывает жидкость. Поэтому, возможно, вам понадобится чуть больше ее или чуть меньше, чтобы достичь нужной консистенции теста. Оно должно быть достаточно густым, ведь впереди еще добавление белков. Белки вводим в тесто аккуратно, слегка перемешивая ложкой. Если приложить слишком много усилий, тесто не получится воздушным. Итак, тесто готово. Выкладываем его в подготовленную форму для выпекания и отправляем в духовку. Еще раз смотрим на температуру. Если она будет ниже необходимой, бисквит может «опасть» в процессе выпечки. И получится малопривлекательная лепешка. Если температура слишком горячая, тесто сразу схватится сверху, а не поднимется как нужно. Держим наше творение в духовке 35-50 минут. Опять-таки, время зависит от размера формы. Чем она больше, тем меньше нужно времени на выпечку. Минут через 15-20 загляните в духовку, чтобы убедиться, что тесто поднимается, не вышло ли оно случайно «за берега» (такое может быть, если положили много теста в маленькую форму). Минут через 35 можно попробовать бисквит на готовность. Зубочисткой или лучиной протыкаем его в самое «сердце». Если лучина сухая – бисквит готов. Будьте внимательны, особенно если печете впервые. Шоколадный бисквит из-за своего цвета будет подгорать незаметно для глаз. Поэтому не передержите его, если не хотите получить на выходе шоколадные угольки. Готовый бисквит достаем из духовки, даем немного остыть. Извлекаем из формы и остужаем на решетке. Почему на решетке? Это единственный способ сделать так, чтобы остывший бисквит был сухим снизу. Остуженный на тарелке или разделочной доске, он будет снизу влажным и отсыревшим. Законы физики, знаете ли. Далее идет процедура разрезания бисквита вдоль. Если повезло, и его бока после остывания остались нежными и мягкими, можно обойтись тонкой прочной ниткой. Подойдет и леска, и даже зубная нить. Если бока подсохли и образовали хрустящую корочку (такое возможно, не страшно), то следует вооружиться еще и острым тонким ножом. Итак, на глаз прикидываем, где проходит «экватор» нашего бисквита. И по этой линии окружаем торт ниткой. Первый раз будет сложно, дальше – легче. Слегка натягиваем нить, чтобы она впилась в бока бисквита. Сводим концы нитки крест-накрест и продолжаем резать мякиш. Нитка будет врезаться вглубь бисквита со всех сторон, пока не окажется посередине и не вытянется у вас в руках в одну линию. Теперь можно разделить бисквит на две идеально ровные половины! Если же нужно применить нож, то просто сделайте надрез по кругу, и потом пропустите там нить. А дальше – как описано выше. Готовые коржи нужно промазать джемом и «собрать» торт. Можно его джем подогреть, чтобы он лучше впитался. Обмажьте также бока торта и оставьте впитываться. Пока готовим глазурь. Нагреваем и растапливаем масло. Добавляем молоко, вмешиваем какао и сахарную пудру, предварительно объединенные в одно целое – так какао проще растворится, не превращаясь в комочки. Слегка увариваем глазурь в кастрюльке, в идеале – на водяной бане. Готовой глазурью поливаем остывший торт. Еще немного подождать, чтобы она застыла – и можно приступать к дегустации. На завтра торт будет еще вкуснее (если, конечно, что-то от него останется).
Variations
Depending on your preferences andpossibilities, the recipe can be enriched with additional ingredients. So, instead of all the flour, you can take part of the flour, and part of the ground almonds (almond flour). This will give the biscuit a special taste and texture. You can also add a little (20-40 ml) of apricot liqueur to the dough. If you are afraid that the biscuit will not rise, you can insure yourself by adding baking powder (see the proportions on the package, but, as a rule, it is about a teaspoon or a little more). One of the recipes found on the vastness of the world wide web suggests adding biscuit crumbs to the dough (then you need to take less flour). The crumbs will make the dough more airy. Another variation is to soak the cakes with liqueur before greasing with jam. This move will allow the cake to be softer and moister. In general, as you understand, making Sacher cake is a matter of not only skill, but also imagination. Having an idea of the basic laws of baking, you will be able to easily and naturally experiment with ingredients and flavors. Just remember that even the most mediocre cake will seem amazingly delicious if you share it with good people in a pleasant setting.
And also a compatriot ...
For those who are patriots and prefer domestic classics to any foreign miracle, we offer a short recipe for the Prague cake. For the biscuit:
- 4 eggs
- 200 grams of sugar
- 200 grams of sour cream
- 0.5 teaspoons of soda (quenched 1 teaspoon of vinegar) or 1 tsp. baking powder.
- 200 g condensed milk with sugar
- 3-4 tablespoons cocoa powder (for your taste)
- 2 tbsp. flour (you may need a little more)
For the cream:
- 200 g of condensed milk
- 300 g of butter.
- 2 tablespoons powdered sugar
- 1 tbsp. cocoa
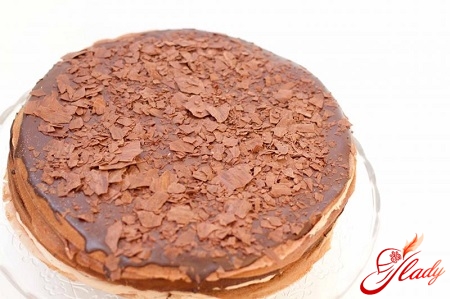
Beat eggs and sugar, pour in milk.Add cocoa and baking powder to the flour and gradually add to the milk and egg mixture. If you use soda, add it to the finished dough at the last stage. The dough should be thick. Put the dough in a mold, put it in the oven preheated to 180-200 degrees and bake until done (about an hour). Meanwhile, prepare the cream. Mix the butter with milk, add the mixture of powdered sugar and cocoa. Beat with a mixer until fluffy. Cool the finished sponge cake and cut into three even layers. Generously coat the layers with cream and assemble the cake. Use the remaining cream for the top and sides of the cake. Place the cake in the refrigerator to harden. At the same time, prepare the glaze (see the recipe for the Sacher cake). After about 30 minutes, take the cake out of the refrigerator and cover it with glaze. And decorate with chocolate shavings. Done! Like its Austrian prototype, the cake is unlikely to appeal to those who like moist, melting sponge cake. In both cases, the sponge cake will be quite dense and dry. How to fix this was described above. You can use chocolate or coffee liqueur or cognac as a soak. Or just cooled coffee. But this will be a different cake… We recommend reading:


