 Do you know that preparations for the New Yearof the year brings no less (if not more) joy than the holiday itself? And why? Because waiting for the New Year is waiting for a miracle. And with age, we do not stop hoping for a miracle. That is why we prepare so carefully for this magical holiday, look for new recipes for the festive table, choose new outfits, buy gifts for family and friends and, of course, decorate our home. We decorate the Christmas tree, hang garlands, and always cut out snowflakes. Well, even if we do not cut them out now, then in childhood everyone was fond of this pre-New Year activity. DIY New Year snowflakes - what was easier? Nothing, except cotton balls on threads under the ceiling. And beautiful, openwork hand-made snowflakes were glued to windows and mirrors, hung on walls and doors and used to decorate the Christmas tree. And even today, despite the abundance of bright and shiny New Year's decorations in stores, our hands are itching to make something New Year's. And thus touch a miracle. So we reach out for paper and scissors out of old memory, and again, like in childhood, we cut out snowflakes, cut out, cut out - until we get bored. And, by the way, making New Year's snowflakes is not limited to just cutting out paper. For example, did you know that you can make New Year's snowflakes with your own hands from pasta, from foil, from salt dough? Yes, you can simply crochet or sew them. Let's see what comes out of all this.
Snowflakes from dry macaroni
For these snowflakes, small pasta would work.(Shells, flowers, wheels, feathers). The most interesting thing is to come up with a shape for the snowflakes. First, collect beautiful snowflakes of different shapes and compositions on the table, and then glue them together. To ensure that the snowflakes dry well and do not stick to the work surface, place them on wax paper and turn them over from time to time. After that, paint the snowflakes with a brush or spray paint. They can be made white, blue, gold or silver. Be careful and do not apply too much paint at once - pasta swells from moisture! After painting, the snowflakes can be decorated with glitter, beads or beads. Hang the finished snowflakes on ribbons and decorate the Christmas tree and room with them.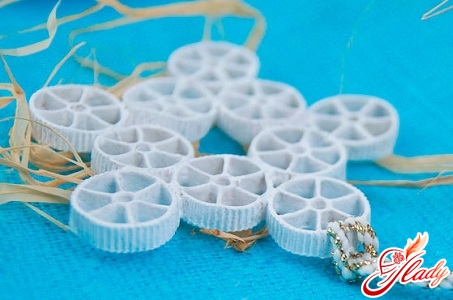
Snowflakes from foil
For snowflakes made of foil, food grade foil is suitable.rolled foil or chocolate foil. Cut square wrappers from it with sides from 5 to 10 cm (it all depends on the size of the future snowflake). The number of wrappers will also depend on the volume of the snowflake itself. Roll each wrapper into a ball (not very dense, but even). Actually, these balls will be the rays of the snowflake. Now in one of the balls (it will become the center) with an awl or a thick needle make the required number of through holes (three or four). And insert pieces of wire (10-12 cm) into them and then put the rest of the balls on the wires. Tuck the ends of the wire inside the last lumps of foil. Attach a ribbon. That's it - the snowflake is ready!
Knitted snowflakes
Those who can crochet can useyour skill to make elegant knitted snowflakes. Small openwork beauties will decorate not only the Christmas tree and the house. They can also be used to decorate knitted items (for example, a baby hat). Snowflakes are knitted from white, light blue, blue (as you like) knitting threads or iris, or floss, or harsh spool threads for sewing. Particularly creative craftswomen can come up with a pattern for their snowflakes themselves. And if your creative powers are low or you are short of time, you can find many interesting ready-made patterns. By the way, you can use openwork napkin motifs for knitting snowflakes with no less success. The finished snowflake is starched a little and ironed. However, for those who do not yet know how to crochet, making knitted New Year snowflakes is a great opportunity to master this simple and very useful technique.
Snowflakes from twigs
For such snowflakes you will need branches of any kindwood (the thickness of a pencil), a knife or sharp scissors, glue (glue gun) and something for decoration - buttons, beads, berries, ribbons, pine branches, etc. Cut the branches according to the number of rays of the future snowflake. Remember that there should be an even number of them - six or eight? Glue all the rays in a circle to the base (the middle of the snowflake) made of cardboard. In order to make the branches look like snow crystals, add short transverse or V-shaped crossbars to each ray. Or you can do both. Decorate the middle as you like: a bow, a green branch, bright buttons, in a word, whatever your heart desires. The snowflake is ready. Whether you want to hang it on the Christmas tree, or on the wall, admire it!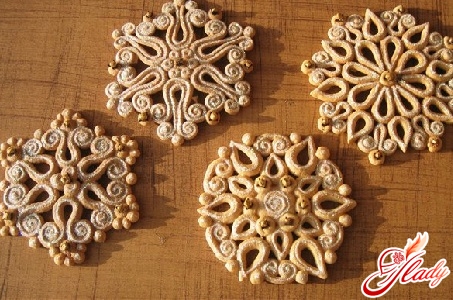
Snowflakes from felt
This is a great option for making creativesnowflakes for those who are friends with a needle and thread. But even if you do not know how to sew well, felt snowflakes are a great reason to start learning. For such snowflakes you will need red and white felt (disks with a diameter of 10 centimeters and a strip of 0.5 by 10 cm), a fabric pencil, a sewing machine, red and white threads, scissors. Through the center of the white disk, draw a horizontal strip with a pencil and divide the disk into six equal sectors. Two centimeters from the center of the circle, mark dots on the drawn stripes and connect them alternately with each other with straight lines. In the center of the snowflake you should get a pentagon. And then on each long strip (ray of the snowflake) draw two perpendicular short stripes. However, this is only one of the design options. You can depict any other snowflake of the correct geometric shape on felt. After that, put a red and white circle together, and between them, under one of the rays, put a thin strip of felt (this is a loop for hanging the snowflake). Thread the sewing machine so that the upper thread is red and the lower thread is white. Stitch the snowflake along the drawn lines - first the rays, and then the small stripes. Cut off all the excess threads. And then cut out all the unsewn parts of the circle with scissors, retreating from the seams by two millimeters on both sides. Erase the pencil and you can admire the unusual red and white felt snowflake. And not only admire, decorate your Christmas tree or room with such snowflakes - the effect will exceed all expectations.
Snowflakes from salted dough
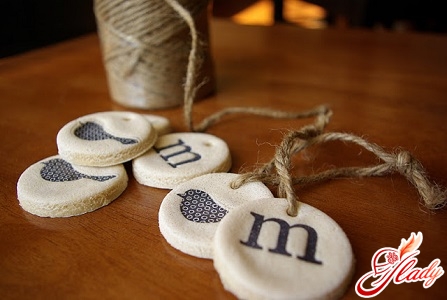
Beautiful snowflakes made from salt dough can bemake it in two ways. In either case, you will need a dough of one part salt, one part flour and two parts water. For plasticity, you can add a spoonful of vegetable oil to the dough. In the first case, we mold snowflakes from thin sausages. Roll out the sausage and twist it into a monogram. Wrap the ends of the sausage into a spiral on both sides (two or three turns), and then pull these spirals towards each other so that a loop is formed under them. This is the first element of the snowflake. The second element is a simple loop. Roll the rolled sausage of dough into a loop and cut off the excess ends. For one snowflake, you will need four monograms and twelve loops of dough. Place a small circle (also made of dough) in the center of the future snowflake, and arrange the monograms around it in spirals inside the snowflake. Place four loops (with the cone down) between the spirals of the monograms, and the remaining eight (with the cone up) between the loops of the monograms. In the second case, the snowflake is made from a single piece of salt dough rolled into a thin layer. Cut out a snowflake using a stencil - it can be openwork or solid, without gaps. Make a hole for the ribbon. Cover the dried snowflake with white paint and decorate with dashes, circles and curls. Use a red or blue felt-tip pen for coloring. If desired, cover the finished snowflake with varnish. As it turns out, a DIY New Year's snowflake is not only scissors and paper. All your handicraft skills can be fully demonstrated when making such a simple and wonderful symbol of winter and the New Year - a snowflake. So, getting ready for the New Year, we sew, knit, mold and glue these magical lace decorations, and how could it be otherwise – the New Year is on the doorstep! We recommend reading:


