 In this article we have collected severalmaster classes on children's crafts that you can try to make with your own hands at home or in kindergarten. Crafts are made from the simplest materials, and the process itself will bring your child a lot of positive emotions and help develop fine motor skills, imagination, imaginative thinking and attention. And most importantly, such regular classes will teach the child to correctly distribute his strength and bring any started business to completion.
Applications
Snowman made of paper and napkins Such crafts will be quite within the power of a child from three years old. So, to make a New Year's card with a picture of a snowman you will need:
- Napkins of white color;
- Colored paper and cardboard;
- PVA glue;
- And, of course, the desire to do something with their own hands.
Take a napkin and tear it into small pieces.pieces. Roll each piece into a ball. This work is quite simple, but painstaking, so the kid can quickly get bored. Try not to make the snowman too big, then you will finish the preparatory process faster. Now take blue cardboard and draw the silhouette of our snowman on it. After that, glue the entire inner surface of the drawing with napkin blanks. It is important that the balls are pressed very tightly against each other, otherwise the cardboard will show through between them. It is better to do this procedure in several stages: glue a row - wait for it to dry, then proceed to the next row. This way the balls will lie more evenly and not go beyond the outline. When all the blanks are glued to the outline, put it aside - let it dry well. In the meantime, cut out eyes, a carrot nose and a hat for the snowman from colored paper. You can also add a scarf or mittens, in general, everything that your imagination is capable of. All these parts are carefully glued with PVA to their proper places. Well, the cheerful snowman is ready. The only thing missing is snow around it, but this is easy to fix. Take small pieces of cotton wool and help your child glue them around the figure – you will get snowdrifts. You can also draw or glue snowflakes. By the way, you can make a teddy bear, a bunny, and Santa Claus in this way. All these crafts are great for creative activities both in kindergarten and at home. And most importantly, they can be done with the smallest children. Kitten from poplar fluff This original applique can be done with children aged 5-6 years. To make it, you will need a drawing of a kitten (template), which is applied to the base (colored cardboard) and carefully outlined with a simple pencil. Poplar fluff is very light, so you will have to work with tweezers. The silhouette of the kitten is smeared with a small amount of glue, fluff is evenly applied on top. And don't be upset if the fluff goes a little beyond the outline, on the contrary, the kitten will look more natural this way. After finishing working with the fluff, draw the cat's eyes and nose using a regular felt-tip pen. Or entrust this work to your child, let him add the necessary details with his own hands. Crafts from poplar fluff can be different - choose any template and create!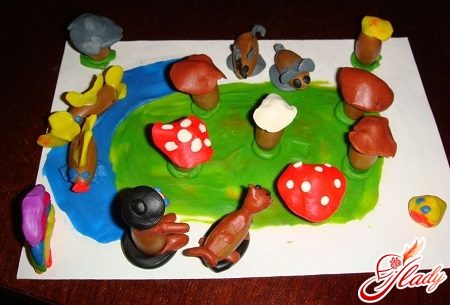
We mold from plasticine
It's not for nothing that children love modeling.It allows young creators to create the world as they see and understand it. Making crafts from plasticine with their own hands, the child develops the perception of form and texture, spatial thinking and imagination, learns to synchronize the work of both hands. In order not to upset the child with failures, let's try to make an ordinary bunny with a carrot. In the process of work, you can tell the child a fairy tale in which the main character is the "eared one", explain why he changes his "fur coat" in winter. So working on the craft will bring the child even more pleasure. So, we will mold the hare itself from white plasticine, make the eyes blue, the nose - pink. For the carrot, you will need orange and green.
- From white plasticine we model an elongated body and a round head. Then we connect the parts;
- Now we make four identical brusochka - it will be paws. We connect them with the trunk;
- Do not forget about the tail and ears;
- We attach eyes made from purple plasticine and a nose made from pink to the hare’s face.
And so that the bunny has something to treat us with, we docarrot! You need to give the orange plasticine an elongated triangular shape, and mold the leaves from the green one. To make the greenery embossed, use a toothpick. That's it, we have a beautiful, and most importantly - well-fed bunny!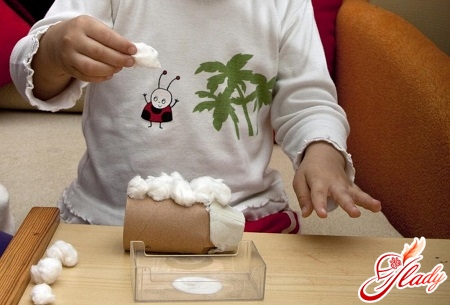
Pictures from croup
Your baby doesn't like porridge? No problem!Offer him to make a craft from cereals with his own hands - he will definitely change his mind about the food he doesn’t like. Let’s “draw” a picture. You will need PVA glue and a template in the form of a simple drawing, which will need to be “painted” using various cereals. If the child is over three years old, he can try to draw the template himself, if not, the preschool teacher or parents will do it. As an example, let’s take the simplest picture, which depicts a large mushroom. To create a cap, you will need buckwheat, and millet will do for the stem. Since the child is making the craft with his own hands, give him glue - let him carefully apply it to the mushroom cap with a brush. When a layer of glue is applied, take buckwheat and sprinkle it on top. Repeat the procedure with glue and millet on the mushroom stem. Carefully shake off excess cereal and let the picture dry. This version of the craft is considered the simplest - it is suitable for joint creativity with little ones. With older children, you can try to create more complex pictures. Such crafts will look great as decoration for the kitchen, children's room or a kindergarten group.
Greeting card
But what if the child is still very small, but already wants to give his mother a gift made with his own hands? A card in the form of a tulip-palm will come to the rescue. For this craft you will need:
- Cardboard for the flower (white, A5 format);
- Green cardboard for the stem and leaves;
- Paints (finger or gouache, depending on the age of the artist);
- Scissors and glue.
The baby can't do without your help here, somake the blanks right away: cut out a flower, stem and leaves from cardboard and glue them to any base. Pour paint into a small plate, now ask your child to dip his hand into it and make a print on a white flower. Leave the card to dry. That's it - an original gift for mom or kindergarten teacher is ready. And most importantly, the kid made it with his own hands! We hope that our advice will help you develop your child's creative abilities. Remember, by making crafts with your own hands, you not only help your child, but you yourself get the opportunity to learn something new! We recommend reading:


