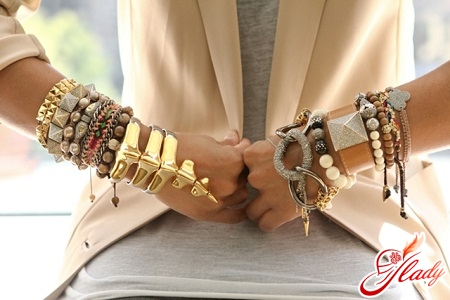
Today, hand-made is experiencing a kind ofthe Renaissance. No, of course, hand-made things have always been valued. However, our recent Soviet past still weighs on us, including the dismissive attitude towards hand-made jewelry, accessories and clothing. And yet, we are slowly but surely beginning to appreciate what is made by hand, which means it is exclusive, unique and therefore valuable. And today, not only teenage girls are interested in making homemade jewelry. By the way, in order to learn how to make, for example, bracelets with your own hands, you do not need to have any special talents. It is enough that your hands just grow from where they should. And we will offer you interesting ideas. We hope that with our help you will be able to make simple, but interesting and stylish bracelets with your own hands.
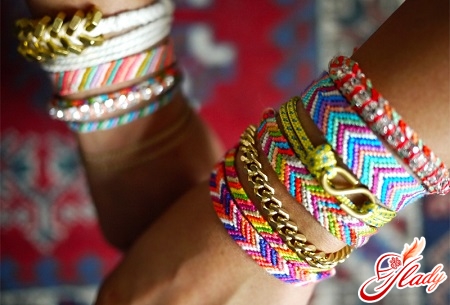
Bracelet made of ribbons and beads
Quite simple but beautiful braceletsare made from ribbons and cords. Even beginner needlewomen can make them. So try starting with such a simple bracelet. For work you will need:
- a narrow satin ribbon;
- large round beads, the diameter which should be approximately the same with the width of the tape;
- Needle and thread in a thin ribbon.
Which color combination would you prefer?It doesn't matter. It is important that this combination is harmonious. Such bracelets made of ribbons and beads, matched to the tone, or of materials in contrasting colors will look equally good. Take a ribbon of any length, but so that it is enough for a double wrist circumference and tying a bow. So, we step back from the edge of the ribbon at a distance sufficient for tying a bow and begin sewing on beads. Sew on beads every other time, leaving a space between them equal to the width of the beads themselves. Sew them with a regular straight stitch, passing the thread through the holes in the beads, making a bottom stitch along the back of the ribbon and laying the thread along the ribbon. So we fill the ribbon with beads at a distance equal to a double wrist circumference. Now we tighten the thread, gathering the ribbons into an accordion. This way the beads on the bracelet will be next to each other, and a nice satin fold will separate them. Then we make strong knots on both sides near the outer beads. That's it. Our DIY bracelet is ready! By the way, making such a bracelet will not be more difficult, and the result will be no less spectacular, if instead of a satin ribbon you use, for example, a crocheted or macrame openwork strip.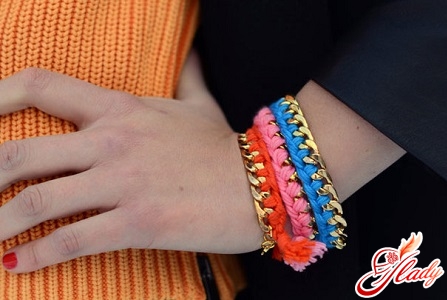
Chain Bracelet
Interesting and stylish bracelets with your own handscan be made from chains. If you have some chains that are out of fashion or have become unusable, try making a bracelet out of them. So, for such a decoration you will need:
- chain with large links;
- lace;
- tape in the tone of the lace.
Measure your hand at the wrist andchoose a chain that is at least twice as long. But the cord will need to be of such a size that the bracelet can be easily put on your hand. So, take this cord and start threading it through the chain every five or six links. In this case, the chain can be left lying freely on the cord, or you can gather it along the cord. Then the decoration will be more voluminous. When the bracelet (cord with a chain put on it) is the right length for your wrist, tie the cord tightly at both ends with knots. Tie satin ribbons to the knots, which can then be used to secure the decoration by tying them into a bow.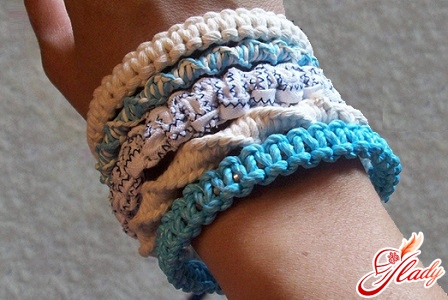
Coco style bracelet
Yes, yes, it will be "from Chanel"look like your bracelet, which combines noble pearls, brutal metal, and romantic satin. Its manufacture will not require any special skill from you, but the result will satisfy the most demanding taste. To make a bracelet with your own hands, prepare for work:
- artificial pearls (round mother-of-pearl beads);
- chains of different weaving and size (in width);
- a satin ribbon of black color about 1-1.5 cm wide;
- The elastic thread (for example, spandex for beading or usual thin elastic in a thread winding);
- two connecting rings (fittings for making jewelry);
- scissors.
And now the manufacturing process itself.String the beads onto a thread. The number of pearls you need depends on your wrist circumference and the size of the beads themselves. A bracelet usually requires 17 to 25 pieces. Now take one of the chains and thread the end of the thread with pearls through its outermost link. Next, measure out a section of the chain equal to the length of the strung pearls, cut the chain, and put its second outermost link on the other end of the thread with pearls. In the same way, string a few more chains onto the ends of the thread with pearls. Keep in mind that too many chains will ruin the bracelet. Identical chains will look a bit dull and not quite "Chanel". Therefore, choose three or four chains of different weaves, different thicknesses, and perhaps even different colors. So, having connected the ends of the chains with a thread, we tie this thread with very strong knots at both ends. Now it's the turn of the jewelry rings, which we also tie to the ends of the bracelet. All that's left is to take a satin ribbon, thread it through the rings and tie it with a pretty bow. That's it! A simple, but very original bracelet in the style of Coco Chanel is ready. Yes, don't forget to melt the ends of the ribbon with a candle or a lighter. Or just lean them against a very hot iron. Then the ribbon will look neat.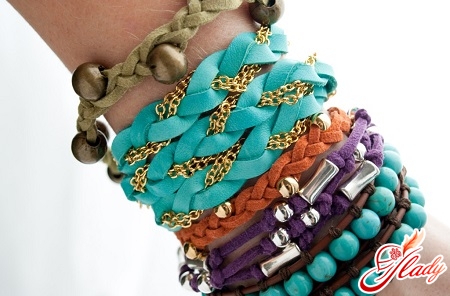
Wooden bracelet
Interesting, although very simple, resultsbracelets made of… Wooden ice cream sticks! They are also very easy to make. By the way, no one will guess that such interesting stylish bracelets are made by hand. You can decorate them with painting, using regular gouache or acrylic paints. You can decorate such bracelets with beads, seed beads and rhinestones, simply by gluing them on. Or you can not decorate them at all, but cover them with varnish. So, to make such an accessory, you will need flat wooden sticks, varnish, paints or other materials for decoration. One stick will make one bracelet. But you can make several blanks at once or prepare them in reserve in case of possible defects. To make the sticks flexible, they must first be soaked for a day. You can also boil them in boiling water for fifteen minutes. This option is good if you are going to make simple wooden bracelets. The fact is that hot wet treatment can darken the wood. So, we take the soaked sticks out of the water. Now they have become flexible, and we can give them the desired semicircular shape. To do this, take a cup or glass of a suitable size and put a stick in it, carefully bending and giving shape to the wall of the cup. That is, the stick should lie horizontally, spread out along the wall of the cup and taking the shape of an open circle. In this position, we leave the stick to dry. You can take it out of the cup only after the wood has completely dried. During this time, the stick will become hard again and retain its semicircular shape. And now you can start painting or decorating with any other materials. By the way, if you are painting a bracelet, then you need to varnish it last. If you are decorating the bracelet with beads, rhinestones or something else, then varnish it first, and when the varnish dries, start decorating. Keep in mind that after treating the wood with paints or varnish, the bracelet may straighten out slightly. Therefore, it is advisable to make the blank a little smaller than the size of the future bracelet. Here are some interesting ideas for making bracelets with your own hands. And this is far from all the possibilities of this hand-made. You can use many other techniques, but these are topics for a separate conversation. In the meantime, try to implement something from what we told you about. Go for it! And you will succeed.


