 Nature has created tens of thousands of species of orchids.We can meet a representative of orchids almost everywhere in natural habitat conditions. Of course, excluding the desert or the snow-white lands of polar ice. The most incredibly beautiful orchids live in tropical and subtropical forests. Conditions of constantly high temperature and abundant precipitation have the most favorable effect on the cultivation of orchids. Therefore, despite the greatest diversity of species of these divinely beautiful plants, not all of them can be grown at home, in ordinary home realities.
Orchid, which will suit even inexperienced growers
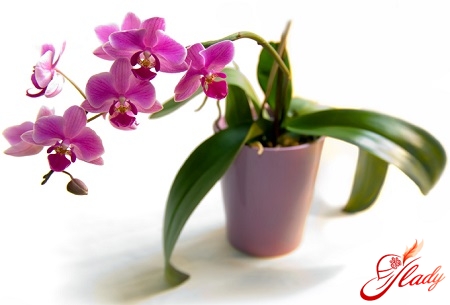
When choosing the desired type of orchid,take into account the following nuance: what is the temperature in the room where your pet will grow, bloom and delight you with its presence? Vandas, Cattleyas, Phalaenopsis, and Dendrobiums will feel comfortable in a warm room. Houses with moderate room temperatures are suitable for Lelia. Cool rooms are ideal for Coelonia, Paphiopedilum, and Dendrobiums. In this article, we will tell you about the most popular orchid, which is increasingly used to decorate their homes not only by experienced gardeners, but also by completely inexperienced lovers of this activity. We will tell you about a hybrid that is not in vain called "orchid for beginners". It earned this name for its sufficient simplicity in care and maintenance. We will talk about phalaenopsis. This flower was nicknamed "butterfly orchid". for some external similarity of their flowers with the wings of a real butterfly. With proper care, you will be able to admire these flowers at home for six months to eight months continuously. In order for your new tenant to be comfortable in your home, you should know and take care of three components that will ensure this. We are talking about a special substrate for orchids, special watering for it and air circulation of your beauty.
Healthy plant - learn to choose correctly
Of course, it is necessary to decide on the color of the petalsyour future ward you will be able to do it yourself, because here everything depends on personal taste preferences. But in order to understand the health of the plant, you need to know some signs that distinguish a sick plant from its healthy counterparts. So, in healthy plants:
- Fresh, bright, elastic petals
- The leaves are bright green or reddish-green, with no brown spots, dryness, yellowness, traces and signs of cobweb or mold
- Fleshy and hard roots are whitish-green in color. Note that if the substrate in which the orchid is located is dry, then the roots will be light, resembling silver threads. If it is wet, then the roots will be green.
If you see that the plant you have chosencorresponds to all these signs, then you can be sure that it is absolutely healthy and there is no danger in purchasing it to decorate your home. If you have chosen the winter season to buy a flower, then take care to wrap the plant in paper and then place it in a plastic bag. Do this carefully and thoroughly so as not to damage the leaves and flowers, while providing them with protection from the effects of cold temperatures. Do not leave the delicate beauty in the car in the cold for more than fifteen to twenty minutes. After you are at home with a new tenant, you need to take care of its acclimatization in a new space. To do this, place the plant in a place protected from direct sunlight and with good ventilation. Let it stand here for a few days and get used to it, understand that its travels from greenhouses, hothouses, stores have ended safely. Now it is at home. Let everyone in your household know that your family has a new addition in the form of a graceful flower that everyone will now admire.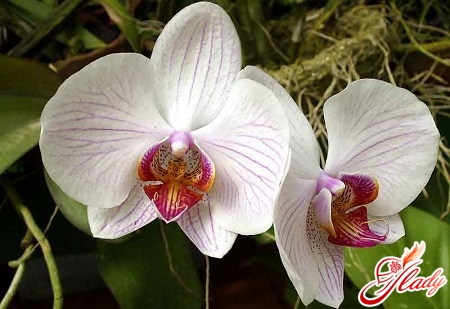
Sun, air and water
The flower will happily live and grow onany bright window, but orchids prefer diffused light. The most preferable are windows facing east or west. After all, there will be no scorching sun in the summer, but there will be sufficient lighting during the winter. Having placed the orchid on the south side, be sure to create shade for the plant. Or just remove the flower from the windowsill to a table near the window. If you forget to do this, then direct sunlight will scorch the delicate leaves. The plant will get burns that look like dents or brown spots, light or dark, depending on the degree of injury. Having placed your beauty on the north window, provide it with additional lighting in winter. Like all other plants, phalaenopsis reaches for the light. In order for the flower to remain straight, periodically turn the pot with the plant around its axis. Pay attention to the color of the leaves of your pet. If you notice that they have started to change their color or have already changed it, for example, becoming dark green, while they were light green or red-green, then the plant is experiencing a lack of light. There are three ways to water orchids, which we will tell you about now, so that your plant will never experience the torment of thirst, but also will not be at risk of flooding. We will immediately inform you that there are some subtleties when watering, which are not difficult to remember, since there are also only three of them. So, know:
The first method of watering is sprinkling.It is the closest to natural watering. The gist of it is this: when we see that the substrate is completely dry, we take the pot with our orchid, take it to the bathroom, and set the water flow there, making it weak and warm. We start watering the orchid from above until the substrate is completely wet. Immersion is the second method that you can use to care for your orchid. It is also done in the bathroom. You should fill a container (a basin or a bucket) with warm water and immerse the plant in it for about ten minutes or a quarter of an hour. This time is enough for the substrate to be completely saturated with water and wet to the required degree. It is also very convenient to water the plant at home using a watering can. In order for the substrate to be completely wet on all sides, pour water, slightly turning the pot around its axis. Whatever watering method you practice, be sure to let the water drain freely. Remove all excess moisture from the tray. Make sure that there is no water accumulated in the plant's leaf funnel, the so-called growth point. If there is, remove the moisture with a napkin. This orchid hybrid has only one growth point. This is literally the heart of the flower. Without it, it will not be able to develop, nor even live. When spraying the plant, remove it from direct sunlight for this time, so that the delicate orchid does not get burned. During active growth and flowering, orchids require more frequent watering than during dormant periods, when the plant has already finished flowering. In addition, focus on the room temperature - if the house is hot, the need for watering will increase. Warn your family not to overdo it with water procedures. The plant will hint to you about the lack of moisture by limp and even wrinkled leaves, about over-watering - by rotting roots, which will become soggy and dark. From excess water, the delicate orchid can become seriously ill and even die. Do not allow this, and then your unearthly beauty will delight you with its blooming appearance for at least seven years.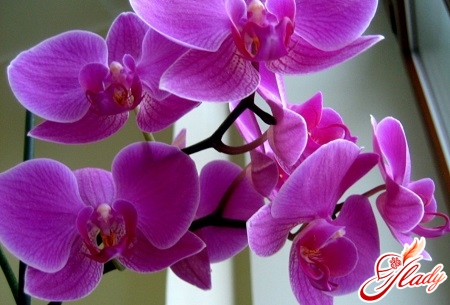
Plant, transplant, plant
Provided that you have become the owner of a healthyand a flowering plant, there is no need to replant it immediately after purchase. The reason for replanting is usually that the substrate becomes unusable. This happens once every two or three years. It is not difficult to determine this if you look at the substrate a little more closely. Compacted, brittle, blackened substrate with a sour smell - this is the reason to replant the plant. Phalaenopsis orchid belongs to monopodial plants. This means that due to the fact that the growth point of the plant is at the top, the orchid simply lengthens due to growth. Most of the new and healthy roots of the plant are between the leaves, come out and are aerial. The old stem with dried, exhausted roots remains in the pot. All this will happen in about five to seven years. And during growth, the orchid needs a new, clean, fresh substrate. Your favorite should be replanted in a transparent container. The easiest option suitable for this is food containers of the required size. To hide their unattractive design, later place the container with the flower in a wooden, bamboo or ceramic flowerpot. The most "delicious" substrate for the phalaenopsis orchid, as well as most other types of orchids, can safely be "called" a cocktail. It includes many ingredients: tree bark, various natural fibers (for example, peat), charcoal, moss, granulated clay, cork, coarse-grained sand with the addition of perlite or vermiculite. You can add a little foam. Of course, buying a ready-made mixture in the store will be much easier than preparing it yourself at home. But if for some reason it has disappeared from sale, we need to know how to make it ourselves. Initially, you should prepare all the components correctly. You should start with the bark - this is the basis of the bases for the whole mixture. It is best to use pine bark, and it should be removed from a dead tree. The bark should be cleaned and chopped so that there are pieces of about three sizes. Large pieces, about ten millimeters in size; medium ones - half as much, and dust about two millimeters in size. Before use, the bark must be disinfected by boiling it a couple of times, with an interval of two to three days. It can be used wet. The next important component is moss. Most often, sphagnum moss is used for planting, but moss called cuckoo flax is also quite suitable for these purposes. In appearance, it resembles spruce branches. For our purposes, it is better to use the green part, discarding the stems. Before adding them to the mixture, the moss should also be thoroughly washed with hot water. After that, it can be chopped into pieces from two to five centimeters. All other components (sand, coal, expanded clay) can be purchased separately. If you collect sand or expanded clay in the wild, you should also take care of disinfecting the raw materials. Sand can be baked in the oven, and expanded clay can be boiled. It is very important that the substrate and container for epiphytes cope with their main task, which is as follows:
- they should support the plant well and ensure its location in an upright position
- relieve the roots of the plant from the excess moisture around them, the accumulation and stagnation of water inside the tank
- it is easy to pass air to the roots of the plant, thus ensuring their ventilation and ventilation
Therefore, the substrate for epiphytes is usually not provided at all.contains garden soil, and the planting containers should have large enough holes in the bottom to allow water to flow out and air to circulate. So, when it's time to replant your orchid at home, do the following:
- You need to extract your orchid from an old potso as not to damage the roots. To avoid this, you can even sacrifice an old pot, cutting it in several places from top to bottom. Also, be careful not to damage the plant;
- Try as carefully as possible to remove allold substrate from the roots of the plant. Take sharp scissors and remove all old dried roots, as well as rotted. Place cut sections with crushed coal, sprinkling them a little;
- For a transplant, you will need a potty sizemore than the previous one. At the bottom of the new house of your orchid, put a few pebbles of large size, this gives the pot more stability. Then lay a layer of drainage, which can be used as claydite, shards from clay pots, granite rubble or brick crumb;
- Now put the orchid in the pot and startsprinkle a new substrate, from time to time shaking the pot, so that the mixture could better lie down. It should be free to fill the place around the roots of the orchid, without condensation, but without unnecessary emptiness. Do not cover the root of the plant with a substrate, it must remain open. Its location is optimal, if it is slightly below the level of the pot's edges;
- After all the above procedures, the plantshould be watered, observing all the subtleties of watering. Then put your orchid in a shady place for a few days for adaptation and addiction. Do not forget to rest it after rest, to a place already familiar to it.
Now you can say that you know everythingnecessary to create the most favorable conditions for growing orchids in your home. Do not stop at the success achieved, start mastering other types of these divine plants, enchanting us with their beautiful appearance. Most of them have an undeniable similarity in the intricacies of care. But it will not be difficult for you to master some nuances that are incomparable with the pleasure of contemplating charming plants in your home.


