Design: Tatyana Andryashina Photo: Dmitry Korolko
Beads
Materials:
- Salty dough
- Large beads
- Lock for jewelry
- Acrylic varnish, acrylic gold paint
Instruments:
- Toothpicks, embossed buttons.
 Crafts from salted dough
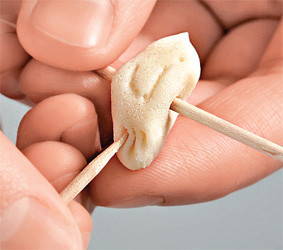
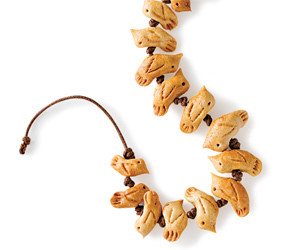
- Photo 1. Prepare salty dough: mix flour and salt in a 1: 1 ratio, add a little water and mix thoroughly. Salt is suitable only fine, otherwise the structure of the dough will be granular. Knead dough well and divide it into small balls of different diameter. Mold from one such ball a small bird figure. Swallow a toothpick moistened with water and twist it through a bird figurine in order to make it easier to work with small parts. With another toothpick, apply a relief pattern. It is necessary to make 3 pairs of figures of birds of various sizes.
- Photo 2.To make another part, take a ball of dough, thread it onto a toothpick and flatten it. Then make embossed button prints on both sides of the blank, having first sprinkled the stamp with flour. Additionally, make 10-14 small balls of dough, threading each onto a toothpick.
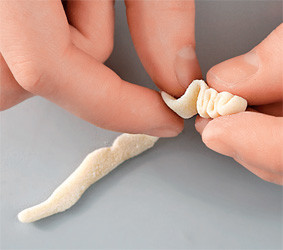
- Photo 3.To make the accordion part, you need to mold a sausage from a ball of salted dough, then give it a flattened shape and fold it as shown in the photo. Pierce the blank with a toothpick. Make 9 similar parts. Also, from the sausage of salted dough, twisting it in a spiral, mold 12 snail-shaped parts.

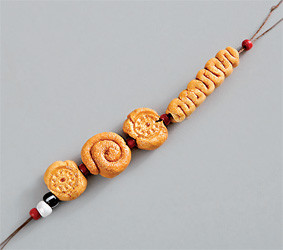
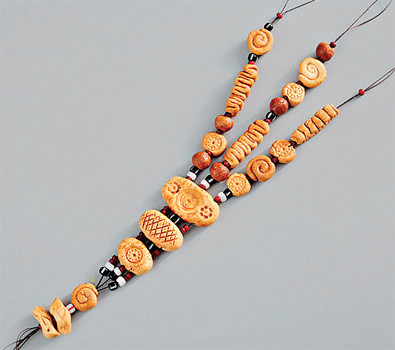
- Photo 1.To make a spacer bead, take a larger ball and shape it into a flat "AB" brick. Pass 3 toothpicks through the pieces one by one at a small distance from each other. Then use relief buttons to create a pattern on one side of the piece. Make the required number of pairs of beads.
- Photo 2. Insert all the prepared parts on the toothpicks into the foam and leave to dry for a day, periodically moving the parts so that they do not dry out to the toothpicks. Then place the parts in the oven, leave them with the door closed at a low temperature until completely dry. Remove toothpicks. Brush lubricate every detail of the future beads with a mixture of egg yolk, milk and salt. Next, place the parts back in the oven, heated to a high temperature, and bake them to the desired color. The color for each part can vary from light yellow to brown. After cooling, coat the parts with varnish or gold paint, using a semi-dry brush. String the beads on the double folded nylon thread, as shown in the photo.
- Photo 3. Make three such elements. Pass the threads of each row through the holes of the separator beads and gather the ends of the threads together, forming two main ones. On them strung the remaining beads. Attach the lock for jewelry.
ITEM The more you put the flour, the more plasticget a lot, especially this rule is important in the manufacture of small parts for beads. To make it easier to work with salt dough and it does not stick - periodically moisten hands with water.
Molded brooch
Materials:
- Salty dough
- Brooch pin
Instruments:
- Craft knife, toothpicks

- Photo 1.Make a thin oval "pancake" from a ball of puff pastry, which will serve as the basis for the future brooch. Put half of another ball, forming a basket. For better adhesion of the parts to each other, wet your hands with water. Make a handle for the basket from a thin sausage and carefully place it along the edge of the base.
- Photo 2.Use a craft knife to align the edges of the future brooch. Make notches with the knife, imitating the structure of the basket. From small balls, mold an apple, pear and plum, using a toothpick to give the fruits relief.
- Photo 3. Attach to the base of the brooch 6 small balls of dough, putting them in the shape of a flower. Work the flower petals with a toothpick. Make another such flower. Complete the composition with small dough. Then you should dry the brooch and bake as described above. Cover the brooch with varnish or gold acrylic paint. On the back of the stick a special pin.
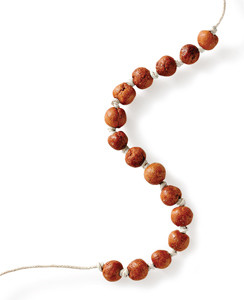
By the way. To make "lykovye" beads, collectbang into a bun, paint it with gold paint, thread the beads. Wrap the ends of the bundle with waxed cord, secure with glue. Attach to the ends of the blank metal "bells" for jewelry and a few beads. Complete the beads with a brooch made using the technology of "printed" beads. A simple bracelets of birds or "chocolate" balls gather with the children.


