Design: Violetta Beletskaya Photo: Dmitry Korolko
Keychain "Warrior"
 Make a present to your father with your own handsMaterials:
- Burgundy felt, 0.1 cm thick
- Green felt, 0.5 cm thick
- Multi-colored floss threads
- Carbon paper
- Eyelets 0.4 cm – 2 pcs.
- Ring with chain for keychain
Instruments:
- Embroidery hoop
- Universal punch


- Photo 1. Select a drawing with a soldier. With copy paper, transfer it to felt.
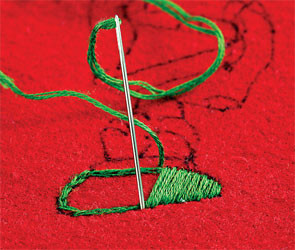
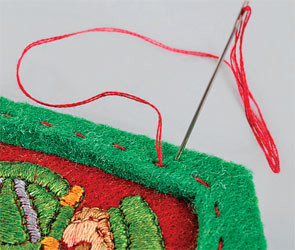
- Picture 2. Gently pull the burgundy felt onto the embroidery frame. Embroider on the felt a pattern in the technique "Simple double-sided smoothness". Remove the embroidery frame and carefully cut out the embroidered pattern, leaving the allowances of 1.5 cm.
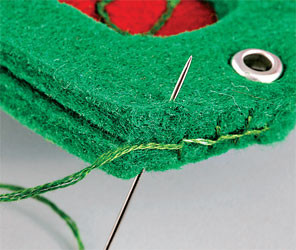
- A photo 3. Open from the felt of green two identical parts in the form of a small shoulder strap. Install the piercing nozzle on the piercer, make the same holes in both parts. Use the special nozzle to secure the eyelets. Also this hole can be handled by hand, sweeping the edges with threads in the tone of the shoulder strap.
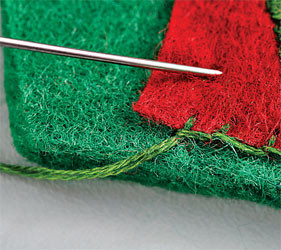
- Photo 4. Sew the felt with embroidery to a single piece of green felt by a secret seam.
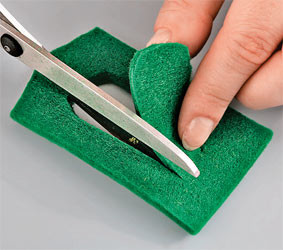
- Photo 5. Make a slot in the form of a window on the other workpiece from the green felt.
- Photo 6. Fold the parts together and sew them manually with a seam "over the edge".
- Photo 7. Decorate the top detail, sewing it manually with red thread.
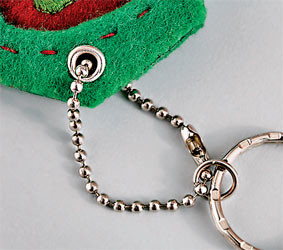
- Photo 8. Insert a chain with a key ring into the hole.
By the way the key ring can be made from two foldedtogether, blanks of dense felt cut in the form of a shoulder strap. One sheet of felt should be decorated with two strips of golden braid attached with a "cobweb" thermal tape. The edges of the braids bend and paste on the wrong side. Glue the parts of the shoulder strap. Decorate it with thermo-application in the form of a golden star. Make a hole and install the eyelet, thread the chain with the key ring.
Photo frame "Toy soldiers"
 Materials:
- Wide photo frame 10x15 cm
- Felt of blue and light blue colors, thickness 0.1 cm
- Thick three-layer napkins
- Glue for decoupage on fabric
- Light cotton fabric
- Thermal tape "spider web"
- Blue acrylic paint
Instruments:
- Glue gun


- Picture 1. Take three-layer napkins and cut out images with soldiers. Separate the top layer of the napkin with the image. Using a special adhesive for decoupage, glue the images of soldiers to the cotton fabric. After the glue dries, cut off excess fabric.
- Picture 2. Take the felt of light-blue color, stretch it on half of the frame, gently bending the corners. Attach the felt from the back of the frame with a glue gun. To stretch the felt around the edge of the frame opening, cut the fabric. The rest of the frame is similarly attached to the butt of felt blue-blue.
- Photo 3. In order for the frame to look more neat, paint it with blue acrylic paint on the reverse side.
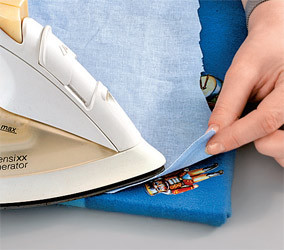
- A photo 4. Arrange prepared images of soldiers and drums on the front felt surface of the frame. Put a "spider web" cut out on the form of applications for them, iron the iron in the "cotton" mode through the cotton cloth.
Tip If you want to hang a frame on the wall, you need to attach a metal hinge on the back side for hanging.
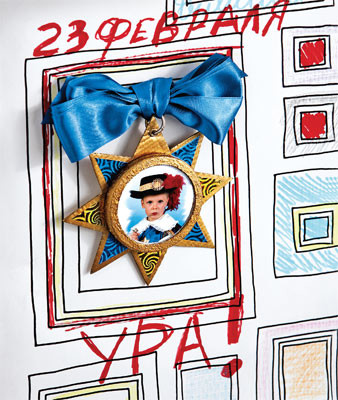
Photo Frame "Order"
 Materials:
- Cork hot pad
- Thin organic glass
- Satin ribbon blue 4 cm wide
- Thick cardboard
- Metal ring for fastening, 2 pcs.
- Gold acrylic paint
- Colored paper
- Eyelet 0.4 cm, 1 pc.
- PVA glue
Instruments:
- Glue gun
- Universal punch
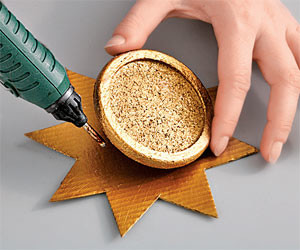

- Picture 1. Prime with PVA glue and paint the stand with gold acrylic paint. Cut out the eight-pointed star from the cardboard corresponding to the diameter support. Cover the star with two layers of gold paint. Connect the stand and the star with the help of a hot gun so that the recess in the stand is on the outside.
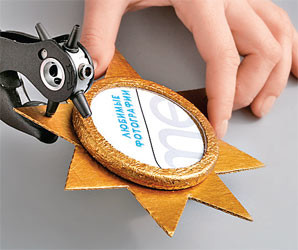
- Picture 2. Cut out a plexiglass from the plexiglass 0.1 cm in diameter larger than the diameter of the stand, so that the plexiglass is well kept in the frame for photography. Punch a hole on one beam of the star, insert the eyelet and secure it with a punch with a nozzle to install the eyelets. Insert a metal ring into the hole.
- Photo 3. Pass the satin ribbon into the ring and tie it in a bow. On the back, glue the second metal ring for fasteners.
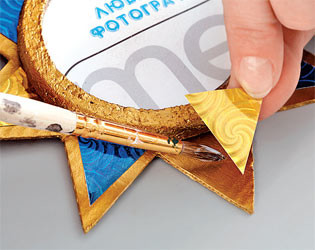
- Photo 4. Decorate the rays with triangular elements from colored paper, alternating with gold and blue colors.
Read more: