And you know that origami, kusudama and tsumamiKanzas - not all kinds of needlework, donated by Japanese masters? They have, for example, an absolutely extraordinary art of creating paintings from silk shreds. A kind of patchwork without a needle! And such a stunning kind of handicraft "kinosuga" is called. And how the European craftsmen managed to interpret this Japanese needlework - just marvel at it! But first things first…
Kinusayga as an art
Like the English patchwork, the kinusage isthe result of the ability to save, this is an art from the category of "gol to the fiction of cunning". And if the European patchwork was produced due to the high cost of Indian calico, then the high cost of silk for kimono contributed to the appearance of the kineusage. Passed by inheritance, the kimono was never thrown away, but other, smaller items called a comon were ripped and made from cloth. The remaining rags also went into the matter - of them "painted" paintings on wood. First, a sketch was made on paper, and then the drawing was translated to a wooden board-cloth. On the contour of the picture, cuts were cut, and then with silk rags, as paints they drew pictures. That is, the flaps were applied to the elements of the pattern, filling the edges of the fabric in the cut grooves. Thanks to the scrupulous selection of colors and shades of silk, as well as the volume of the resulting image, the pictures were stunningly beautiful, similar to the picturesque canvas, batik and photo at the same time. Such a wonderful art! 
Patchwork without a needle
In the European version, the art of kinoisiga wearsmore applied nature. We call it "patchwork without a needle", because it is used not only for "picturesque" paintings and colorful panels, but also for decorating various household items, as well as for souvenir handicrafts. This technique is still young enough, but already has its adherents and even managed to get a professional name "method of incrustation in patchwork sewing." The technology is based on applique. Here, as well as in the kinusage, the cloth flaps are superimposed on a flat or three-dimensional surface, their edges are refilled into pre-made grooves, and as a result, a pattern is obtained. In order to decorate the work in the technique of "patchwork without a needle" are decorated with braid, cords and ribbons. Why is patchwork used without a needle? First of all, this all kinds of panels and pictures that serve as a decoration for the interior. Such an application decorates caskets, boxes, album covers, notebooks and books. This technique was widely spread in the field of making souvenir Easter eggs, Christmas toys, valentines. And a patchwork without a needle is used for decorating lampshades and even furniture. How exactly do they do it?
Materials and Tools
To work in this technique you will need, beforein total, foam billets. Flat sheets can be cut from packaging containers, and bulk (with flat surface) purchased in specialized stores for needlework. The foam itself serves as a basis for working in this technique. It is on him that a drawing is made, contour slots are made on it, and multicolored flaps are applied on it. Naturally, for work you will need a variety of fabrics. Anything can go to a course. Suitable silk, velvet, chintz, velor, satin, wool (and so on). The sizes and colors of the flaps can also be anything - it all depends on your idea and on the drawing. In addition to fabrics, you will need tapes and ribbons of any width, texture and color, as well as cords and, possibly, beads, buttons or rhinestones. Some masters for decorating bulky items use pins with heads in the form of pearls and beads. The tools required to work in this technique:
- scissors for cutting fabrics,
- adhesive PVA, which the fabric will be glued to the surface of the foam,
- a drawing pencil,
- stationery knife for cutting out the outlines of a drawing,
- Stack (or any similar tool) to fill the edges of the fabric in the slot.

Technique of work
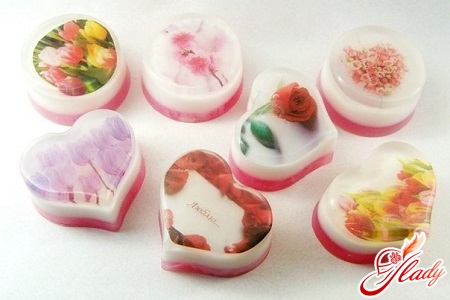
By preparing materials and tools, you canproceed directly to the manufacturing process. What kind of product you conceived, it does not matter. The technique of performing flat pictures and voluminous souvenirs is the same. For example, you are going to make a souvenir Easter egg. To do this, draw a sketch, defining the pattern and coloring. However, you do not have to draw, you can experiment right along the way. So, take the egg-shaped foam piece in the shape of an egg and apply a drawing border on it with a pencil: it is best to divide the egg into sectors by meridian lines that are diverging from the center of the sharp end of the egg and joining at the center of the blunt end. Then cut out of the fabric (preferably take a shiny silk or satin) flaps in the form of sectors, but slightly larger. By the way, you can use wide satin ribbons for these purposes, which are simply cut into pieces of the desired length. Then you put the first flap on the workpiece, fixing its end on the top of the egg with a pin. And after that carefully fill the edges of the flap in the slots on the foam, slightly pulling and straightening the fabric - one sector "painted". Similarly, close all other parts. Covering the whole shape with rags, decorate the slits with a beautiful braid, planting it on the glue, and decorate the egg with beads and rhinestones. That's all! By the way, the technique of decorating volume shapes can be somewhat different. To do this, do not make cuts in the workpiece, and overlap the flaps on it overlapping, turning the edges of the fabric and fixing it with pins. As for paintings and panels, they are performed using the first method, that is, cutting through the contours of the picture. But for such a product, you also need a frame. Making a rectangular frame, cut out a large piece of fabric, the dimensions of which on each side about five centimeters more than the picture itself. Then the fabric is put on the table face down, and the picture is laid on it. At the edge of the picture, the borders of the frame are made and, wrapping the free edges of the fabric on the picture, fill them in the slots. For the durability of images, you can "plant" the flaps on the glue or glue only the slits with glue. And for the relief of the picture, you can put a sintepon under the cloths, which also need to be fixed on the foam with glue. Here is a surprisingly simple technique and an original way of making souvenirs. A patchwork without a needle will completely satisfy your creativity needs, even if you do not know how and do not like sewing, but you are a fan of patchwork. Create, create and enjoy the process and the result! We advise you to read: