 Waiting for a miracle is what we love so much for the New Year. And in anticipation of this miracle, we try, at least for the time of the New Year's holidays, to turn our life into a fairy tale. And even after becoming adults and ceasing to believe in fairy tales, in the New Year we again become a few children who sincerely believe in this tale. Well, remember childhood? Remember how to make snowflakes from paper with your own hands? Let us recall how prosaic white sheets turn into our fairy-tale Christmas snowflakes at the behest of our hands? After all, the New Year is already around the corner, and therefore we again, as in childhood, expect a miracle!
Traditional open-work snowflakes
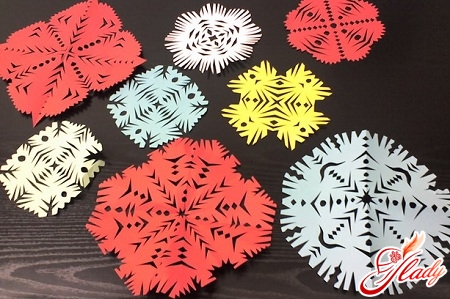
You remember how, being children, we diligentlycut out these weightless laces from the folded corner of the paper? And the process itself was already almost a miracle. How to make snowflakes, we knew, but what kind of snowflake it would turn out to be a secret. Just scissors chik-chik along the edges of a paper triangle. And then they unfolded and admired with admiration that this "chick-chic" happened. Over time, the process was improved, the hand was stuffed, and the snowflakes turned out all the more beautiful and more delicate. Will we try to create such a miracle? For such traditional snowflakes, special tools will not be required (yes what are you saying, you yourself know this!), Only paper and scissors. Well, also a pencil, as an object of improved technology. The most important thing is to fold the paper correctly. Therefore, we take the standard sheet A4 and begin to add.
And now we continue to make a snowflake and draw onpaper patterns. Lines put hardly appreciable that on a snowflake there were no fat and dark traces of a pencil. First, try to draw some very simple patterns: on the right, on the left, on the bottom, in the upper corner. And after training, draw more complex and ornate patterns. And then it will remain to make the final "passage" - to cut out a snowflake along the lines drawn. Open the snowflake and iron it smoothly so that it is not a mint. If you want to make three-dimensional snowflakes, cut six or eight identical snowflakes, and then glue their tips. First you need to make a series of three (four) snowflakes and close it in a ring, connecting the tips of the rays of the extreme snowflakes. Then, in the same way, three (four) snowflakes must be glued together. After that, glue the upper edges of one ring of snowflakes with the bottom edges of the second ring. By the way, this is not the only way that you can make bulk snowflakes from paper. 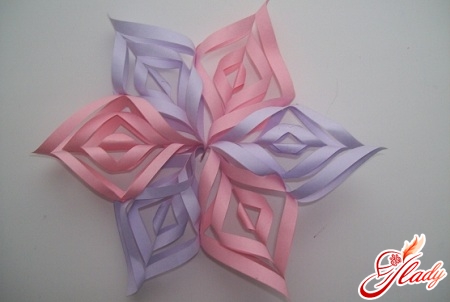
Volumetric snowflake
To make such a snowflake, you will needpaper, ruler, scissors, pencil, tape and stapler. First cut six identical paper squares. The more squares there are, the more the snowflake will turn out. Now we begin to make the snowflake itself. Take the box and add it diagonally, making a triangle out of a square. Draw lines of future slots along the ruler, parallel to the sides of the triangle. First we put along the right side three parallel lines, not bringing them to the edge. The closer to the middle of the triangle, the line is shorter. Then three of the same lines are parallel to the left side of the triangle. The distance between the lines is equal, about one and a half centimeters. As a result, you should get a "Christmas tree", twigs of which do not converge in the middle. We begin to make cuts along these lines, not bringing them to the edges of the sides of the triangle. We unfold the workpiece. In front of us is a square with cuts along the perimeter, the lines of which do not connect along one diagonal of the square. Now we form a snowflake. Lay the sheet so that the diagonal with uncut lines lies vertically. First we wrap it inside and glue it together or join the corners of the inner square with scotch tape. We turn the workpiece by the other side and also connect the corners of the second (from the center of the sheet) of the box-frame. Again, turn the workpiece and again connect the corners of the third square. We also connect the corners of the last extreme square box, turning the sheet one more time. We make three such blocks and connect them with a stapler, forming one half of the snowflake. Similarly, it is necessary to make a second half, consisting of three more blocks. Now connect the two halves and get a three-dimensional snowflake.
Snowflake - flower
A very simple way to make three-dimensional snowflakes in the form of a flower. For such snowflakes we need color paper, glue, stapler and scissors. We start to make a snowflake in stages.
Such snowflakes can be made from white orcolored paper, you can decorate them with sequins or even decorate them by hand. In general, snowflakes from paper can not only be cut. Amazingly beautiful, almost like real, snowflakes are made, made in the quilling technique. Thin little pieces of paper are twisted into separate blocks, from which the New Year's miracle is then collected. And snowflakes made of paper can be made in the technique of origami or kusudama. You can use for this purpose ordinary office or colored paper, corrugated or cigarette paper. Snowflakes can be made even from ordinary paper napkins. Smart bulk snowflakes are obtained with contour cutting, strict and stylish snowflakes can be done using the technique of paper-plastic. In a word, whatever technique you use to work with paper, start making New Year's snowflakes. This process will bring a lot of pleasant minutes and make you remember your childhood. And to become a little child at least for the time of a magical holiday - is not this a miracle? We advise you to read:


