Accessories themselves, made withoriginal approach, and most importantly with desire, are able to transform any interior. Such things always retain the warmth of human hands, so they bring only comfort and tranquility into the house. And what else does a person need to feel really at home? And if you have a feeling that it's time to update the interior, you do not need to immediately run to the mall and buy a new rug, a pretty lampshade for the lamp or a frame for a particularly successful photo. All these or other pretty accessories for the interior can be done by yourself. It is important only to make a little effort, patience and, of course, fantasy! The main thing that you need to remember is creating accessories yourself - no hurry and sloppy. After all, if a thing is done with one's own hand, this does not mean that it has to be done somehow. Even without a practical purpose, such a thing should give you pleasure from its contemplation. Therefore use all your skill, be extremely careful and apply high-quality materials. And then accessories for the house, made by yourself, will please you for a long time. What is so creative and able to transform the interior can be made without special considerations?
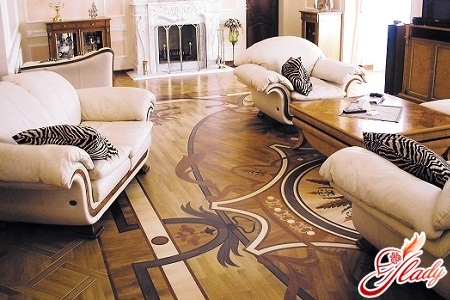
Decorative rug from glossy magazines
Accessories for the interior with their own hands can bedo not just from yarn, beads or lace. How do you, for example, have such an idea - to use magazines that you have read for a long time, and throw away the hand does not rise? Perhaps someone will think the idea is absurd, but someone will inspire creativity. Shall we try? To create an unusual rug, you only need free time and a little perseverance. And the most attractive is the minimum financial costs. You will also need scissors, glue, scotch, thread and wooden sticks (you can use sticks for sushi). In the beginning of work it is necessary to remove from the logs the staples that fasten the sheets. Unfold the sheets and fold their edges so that the square turns out. By the way, it is better to use several sheets for one square, pre-gluing them together - so the rug will be stronger. Lubricating the wooden sticks with glue, wind the edges of your square on them, from the side where the edges were bent. In order to understand well how a similar thing is made, make no more than eight squares - four put vertically, and four horizontally. Next time, if there is a will, make a larger rug. Now put the workpieces on the table in such a way that one big square is produced. The joint between the wand and the journal sheet should "look" at you. Now you need to pin all this together. To do this, you will need a thread and an adhesive tape. In those places where it is convenient, accurately we sew sheets with threads, and then we glue all joints with an adhesive tape. Now turn the product over - the rug is almost ready! For greater appeal and durability it can be covered with acrylic lacquer. Such unique rugs, made by own hands from old glossy magazines, will successfully look both on the floor and on the wall. Also they can decorate a small coffee table or a curbstone. If you place the product on the floor, do it in a place where you do not go very often, so the rug will last longer. 
Mosaic from eggshell
Homemade home accessories can be madefrom anything. Take, for example, a shell of eggs. You always thought it was just household waste. True? And there it was! From the eggshell, you can make an original decoration for the interior of the children's room - a mosaic depicting fairy-tale characters. For work you will need:
- shell from several eggs (the amount depends on the size of your future masterpiece),
- cardboard sheet of paper,
- PVA glue,
- two tetrad sheets,
- pencil,
- Glass bottle.
First, we prepare the shell. To do this, place it between the tetrad sheets and gently roll the bottle until we get the pieces of the right size. Here it is necessary to rely on the requirements for drawing. Next, we process the cardboard. First you need to give it the right shape, cut with scissors. If you draw well, you can create a sketch of the future drawing yourself, if not, use a stencil. It can be purchased in a special store for needlework, download a picture on the web or even use children's coloring pages. Now you can proceed to the main task, directly to decorating the picture. To do this, gently apply a layer of glue to the small area of the pattern. Then take a pinch of shell and sprinkle the area with it. In order for the boundaries of the mosaic to be more distinct, you can use the blade, aligning the edges of the picture with it. The shell should evenly lie over the entire area of the product. Having finished this painstaking work, cover the drawing with paints - a bright picture for the children's room is ready! If you do not want to use eggshells, you can create a similar mosaic with your own hands from an ordinary multi-colored bead. Then you will not have to paint the picture.
The second birth of a wooden saltcellar
Wooden saltcellar, decorated in the technique of decoupage,will become a truly exclusive accessory for your kitchen. And presented in a wide range of napkins for decoupage (which can be purchased in stores for creativity) and even ordinary multi-layer napkins with a bright pattern will ensure your imagination an unforgettable flight. And even if you still have an old salt cellar, bought back in Soviet times by your grandmother, this salt cell can be transformed, giving her a second life. To do this you will need:
- the salt cellar itself,
- fine-grained sandpaper,
- primer,
- napkin for decoupage,
- acrylic paints,
- varnish,
- PVA glue,
- brushes.
The work that you have to do,begins with polishing the surface of the salt shaker, which must be completely cleaned of the old paint and varnish. Then it is necessary to coat the treated surface with a primer, wait for the complete drying and work with sandpaper again. Next, apply the napkin to the product and grease with glue. We are waiting when it dries, and once again we pass a little sandpaper. If the drawing is damaged during application, it can be restored independently with the help of paints and a thin brush. And the last step is to coat the product with varnish. Cute and functional decoration for the kitchen is ready! In general, the original accessories for the house, made by themselves in the technique of decoupage, will transform the interior and give you a completely new and even exclusive look. This way you can decorate decorative plates, mugs, a towel rack, and even the towels and kitchen napkins themselves. The most important thing is that it is very simple, does not take a lot of time and does not require serious financial expenses. 
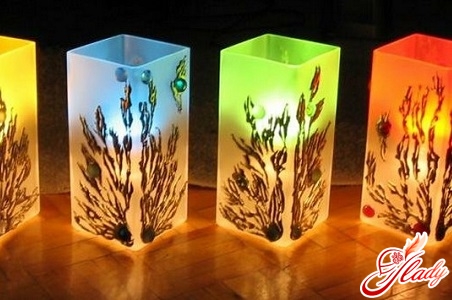
Candlestick made of beads - beautiful and stylish
To make the interior of the living room orIt is important to pay attention to the details. Here, for example, so necessary in ancient times, candlesticks today have lost their functionality, but have remained important in the design of the house. Of course, you can buy ready-made beautiful candlesticks. But if you make them yourself, then decorating these accessories for the house can be anything. Any man-made candlesticks will revive the interior and give the room a special charm. To make a candlestick from beads, special skill is not needed. Here only the assiduity is important. The metal frame for the product can be purchased ready, and you can do it yourself. Begin work from the bottom up. To do this, cut off a piece of wire, about eighty centimeters in length, and attach it to the vertical beam of the workpiece. The necessary quantity of beads is stringed on a wire and connected on the opposite edge of the frame. And so - until we fill all the voids. The same is done with crossbeams. As a result, you will get a continuous pattern of beads. In this paper, you just need to show imagination and your artistic taste. Choose beads of different shades, shapes and sizes. Competently combine them: the more shades and crossbars on the frame, the more original the candlestick will turn out. And the bead can be supplemented with larger beads, and small details in the form of plastic or metal flowers, butterflies, hearts. In short, whatever creative or simply cute accessories for the house you have made yourself (candlestick, decorative saltcellar, mosaic, or rug from glossy magazines), they will bring you much more joy than items bought in the store. After all, you put in the products not only time, but soul, and mental strength, as known units of measurement do not have. So the value of such accessories for home is simply immense! We advise you to read: